How to Make DIY Beeswax Wraps
Learn how to make your own reusable beeswax wraps with simple ingredients, using cotton, beeswax, pine resin, and jojoba oil.
2023 Update: Click here to see how I made simple linen beeswax wraps.
Why make beeswax wraps?
I am always trying to find ways to cut down on plastic in my home. According to some recent estimates, if we don’t change anything, by 2050 there will be more plastic in the ocean than fish by weight. Ouch!!
Not only that, there are numerous health concerns when it comes to plastic and food. I have eliminated pretty much any and all plastic items from my kitchen. What about saran wrap, though?
Enter beeswax wraps. They are beautiful, reusable, and non-toxic. But when you buy them, they tend to be pretty expensive. My attitude? Oh, I can make those myself 😊
After a little research, I figured out how I would make them.
This post contains affiliate links, which means I make a small commission at no extra cost to you. You can read my full disclosure.
How to make beeswax wraps
All you need is some cotton, beeswax, pine resin, jojoba oil, and a brush.
If you like you can try to find organic cotton. The size really depends on how many wraps you want to make and how big you want them to be. I thought about what bowls I use most often for leftovers and what else I would like to cover and wrap.
The beeswax makes the wraps heftier, somewhat water-repellent, and moldable. It also has antibacterial properties. You can buy it in a block (such as this one and grate the beeswax on your own) or buy beeswax pellets (such as these). I had a big block in my craft supplies so that’s what I used and I just grated it.
Then, you need pine resin. Pine resin makes the wraps sticky. This is what I got. You’ll only need a little bit so this will last me a long time.
To make the beeswax wraps flexible and moldable, I add jojoba oil which you can easily find at Trader Joe’s or here.
Heat oven to 185˚F. Mix the ingredients in a bowl. Start with
- ½ cup beeswax (4 oz.)
- ¼ cup pine resin
- ¼ cup jojoba oil
Lay the cotton pieces on a baking sheet covered with parchment paper and sprinkle with your mixture.
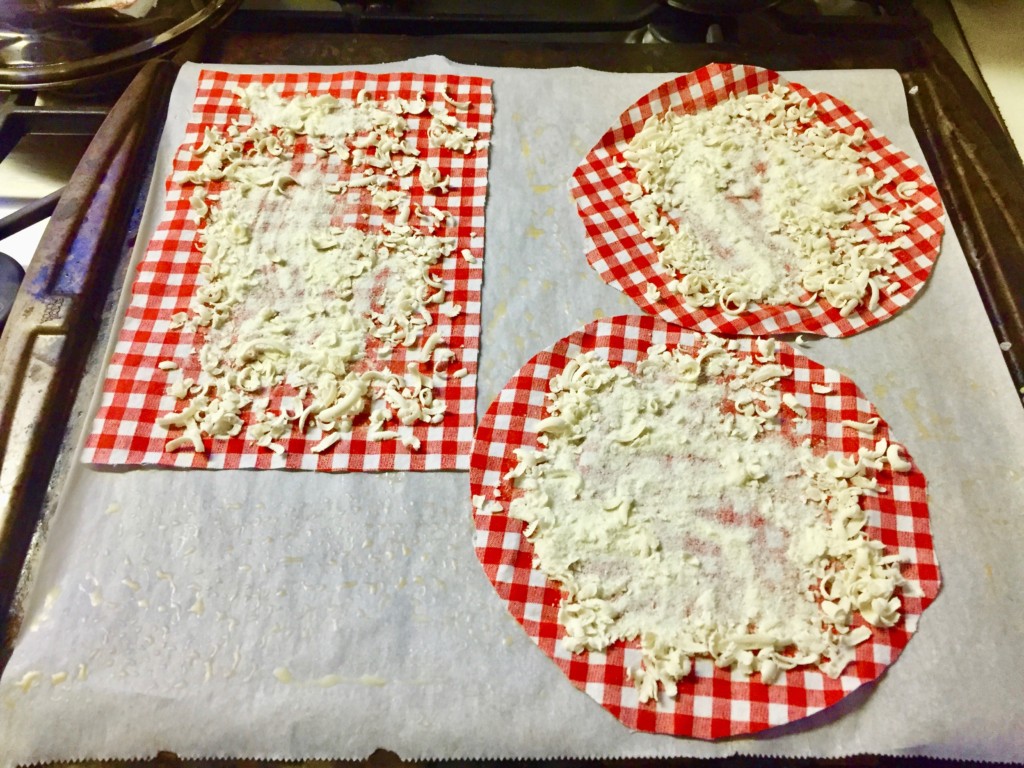
Place the baking sheet in the hot oven until your beeswax mixture is melted. At this point, I like to take the baker’s tray out of the oven and use a brush to spread the beeswax mixture more evenly. If you work quickly, you might be done or put everything back in the oven for a bit.
Once done, I lift the beeswax wraps off the tray (hold carefully) and move them around in the air to let them cool off. And that’s it!
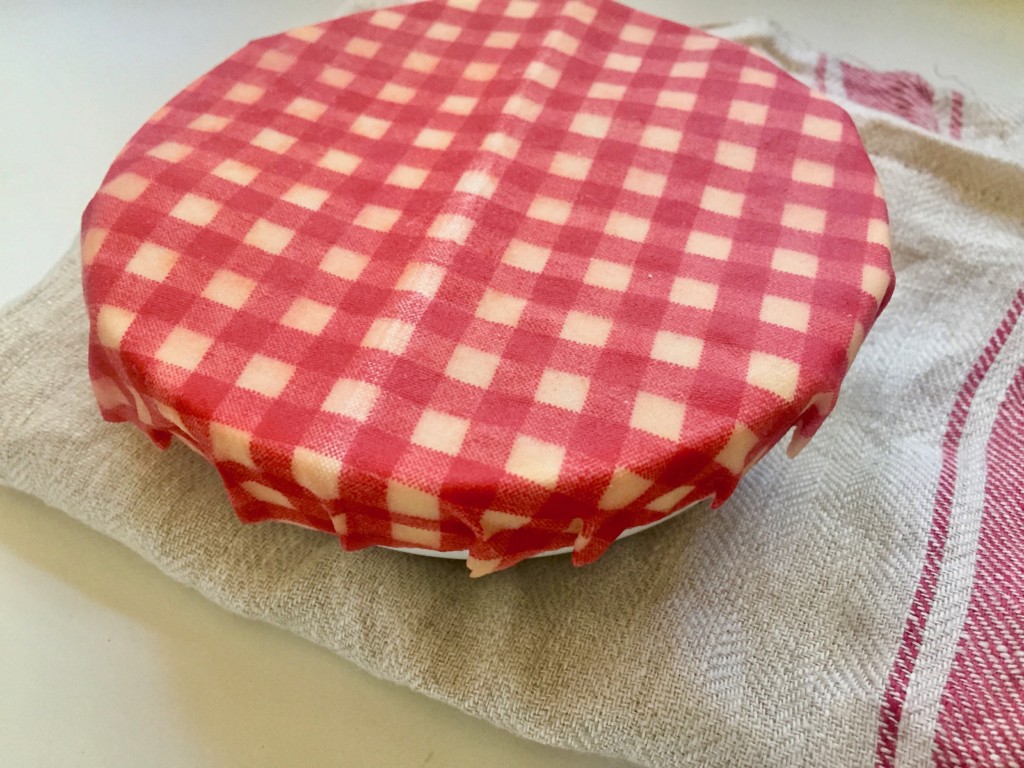
Here you can see how well the beeswax wrap sticks to the bowl.
Just a few of the sizes:

How to use the beeswax wraps
You can use these for wrapping sandwiches, half onions (they don’t absorb the onion smell at all), and cheese, you can use them to cover bowls with leftovers just the way you would use cling wrap.
I was just recently looking for an alternative to plastic cling wrap! If I use these for sandwiches and get mustard on them, how do I wash them? Thanks for sharing!
Hi Brandi, I wash mine with lukewarm water (and sometimes 1 drop of dish soap if needed). Hope this helps ~ Anja
I love these! I live in Florida-do they melt when left out in hot weather? Also, are they easy to clean, and how? Thank you!
Beeswax wraps will certainly get softer in warmer weather but they won’t melt. I clean mine with lukewarm water and maybe the tiniest amount of dish soap if necessary. Hope this helps ~ Anja
how long do they last and how to store them
I have some that I made over 2 ½ years ago and I am still using them. If they are very worn you can always put them between two pieces of parchment paper and re-do them with a hot iron. I simply store them folded up in a drawer. Hope this helps 💛 ~ Anja
I cannot wait to make some of these!
This is so Great!!!! Thank you for posting this!
Love that you love them!
I am so excited about these! I am going to try them soon!!! Thank you!
Yes! Have fun – you’ll find endless uses for them 🙂