Basic Crochet & Knitting Stitches
Both knitting and crochet are so fun! I am going to teach you basic stitches so that you can create simple craft projects.
If you have been following me for a while, you might know that I love both knitting and crochet projects.
You might have also noticed that I have posted a few craft tutorials that use very basic crochet or knitting stitches such as my farmhouse potholders.
The reason for this post is that often I get comments such as “oh, can you teach us how to knit/crochet?”.
And since going forward, I would like to share more craft tutorials that involve some knitting or crochet, I thought I would teach those basic stitches to those of you who do not yet know how to do them.
For this post, I am using a very heavy yarn and the appropriate crochet hook and knitting needles. Using big needles and heavy yarn has two advantages:
First of all, you will see progress happening quicker.
But secondly, any potential unevenness will be less visible than if you used finer yarn.
This post contains affiliate links, which means I make a small commission at no extra cost to you. You can read my full disclosure.
Side note about my hands:
While I have always loved what my hands can do, for most of my life I have been somewhat self-conscious about their appearance.
You see, I don’t think my hands are very elegant. Rather, they are very wide. As I am teaching you these basic knit and crochet stitches, my hands will be square in the middle of the pictures.
I just wanted to get that out of the way …
Crochet
We’ll begin with crochet because it is easier and knitting builds on the crochet concept.
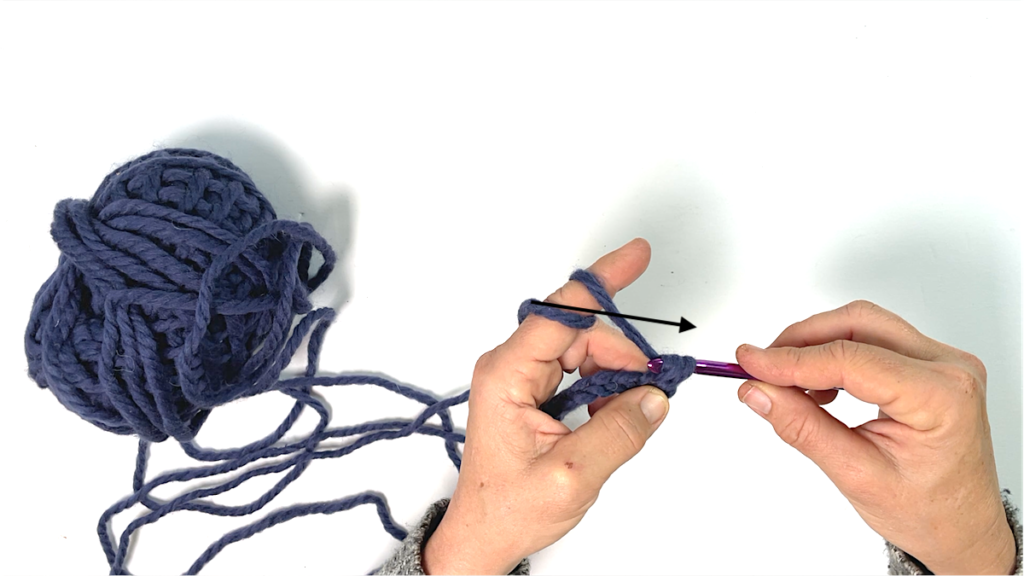
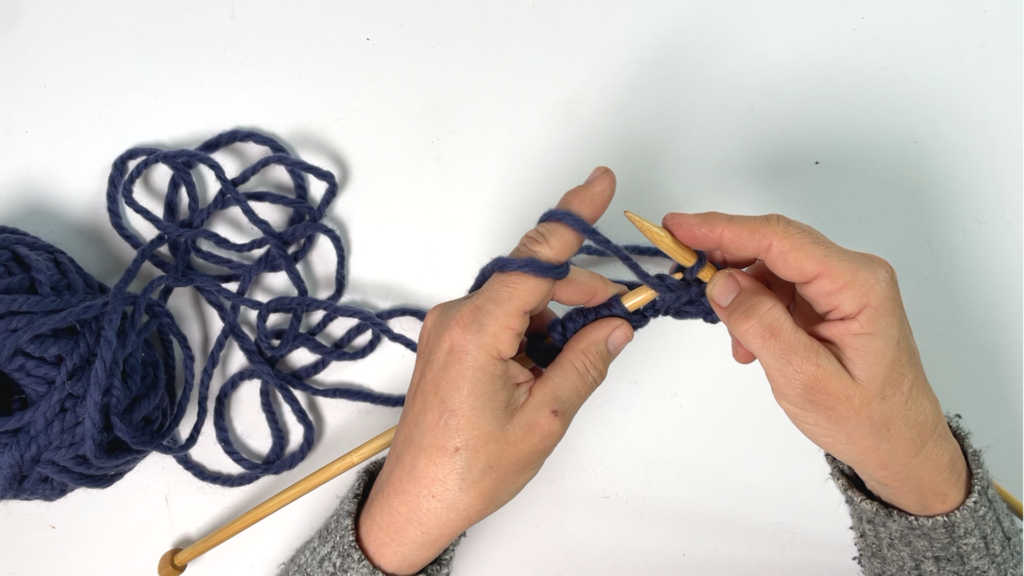
Creating a slip knot
To begin any crochet project, we need to create a slip knot. You simply create a loose knot but pull a loop through the middle.
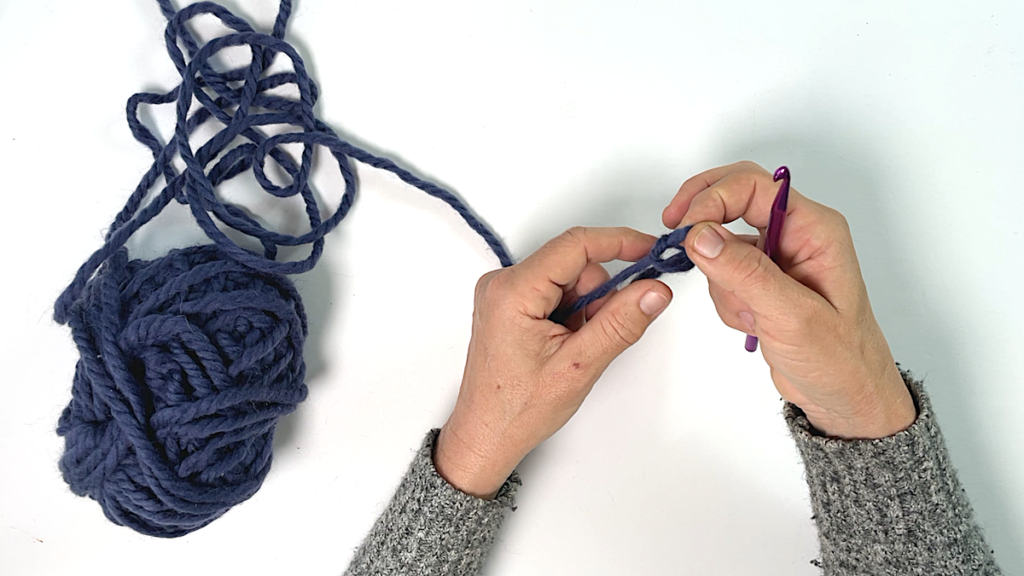
That is essentially your first stitch.
I like to have the yarn move from between my pinky and ring finger to my index finger where I wrap it around twice. I feel that it gives me the best control over the tension of the yarn.
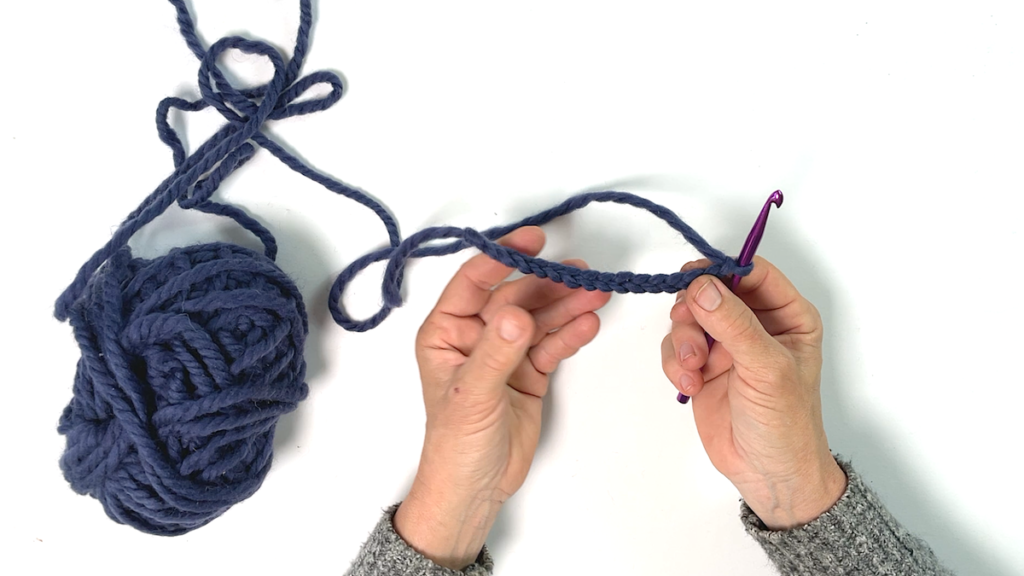
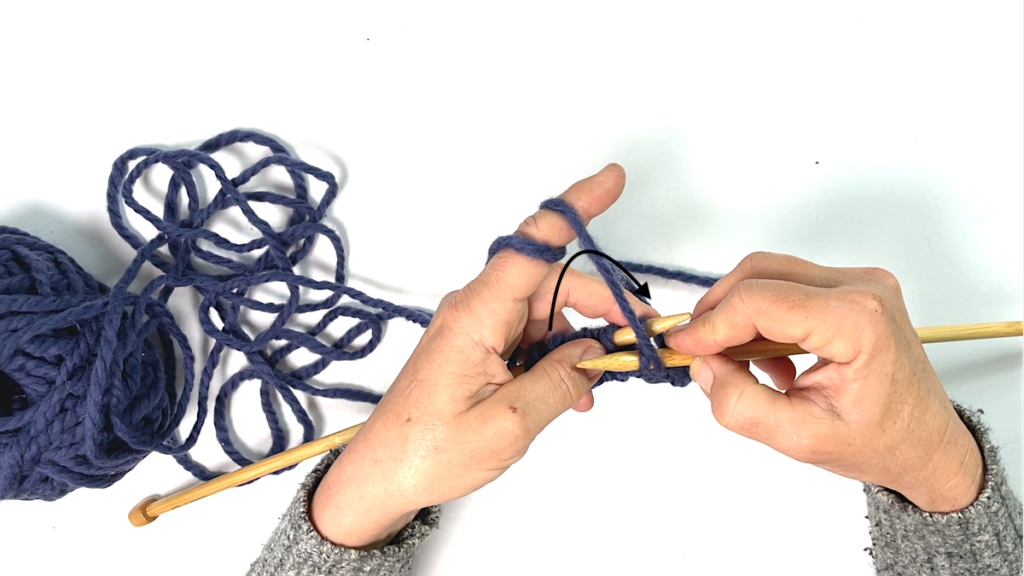
Casting on / chain stitch
Insert your crochet hook into the stitch, wrap it around the yarn and pull it back through the stitch.
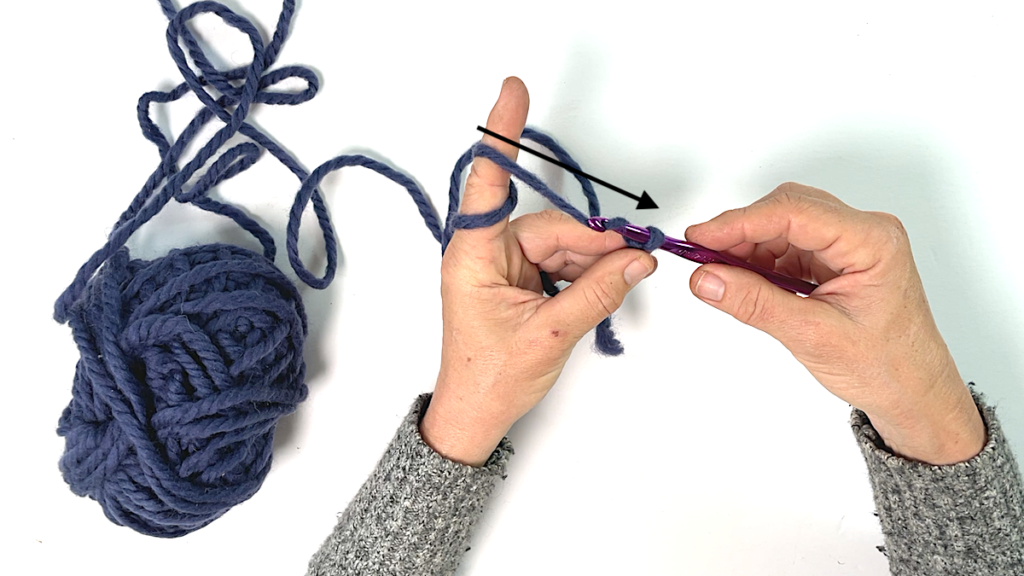
That is your second stitch. This is called chain stitch or casting on. You now continue with that until you have the desired width of your project.
The second row / going back
Creating the height of your crochet project, you need to ‘go back’ or crochet the second row.
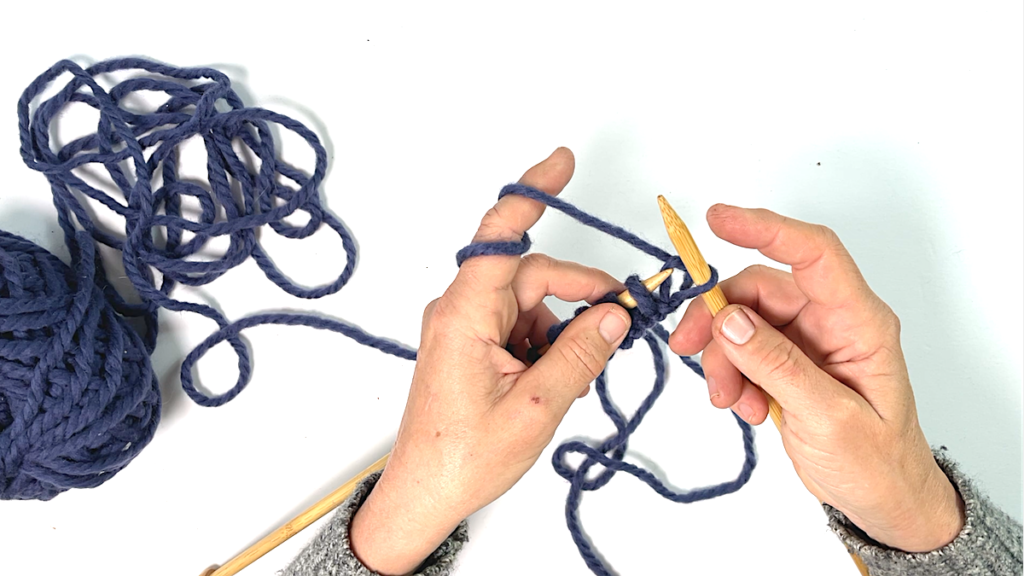
Insert the crochet hook into the second stitch from the right, wrap around the yarn and pull it through. Now, you have 2 loops on your crochet hook.
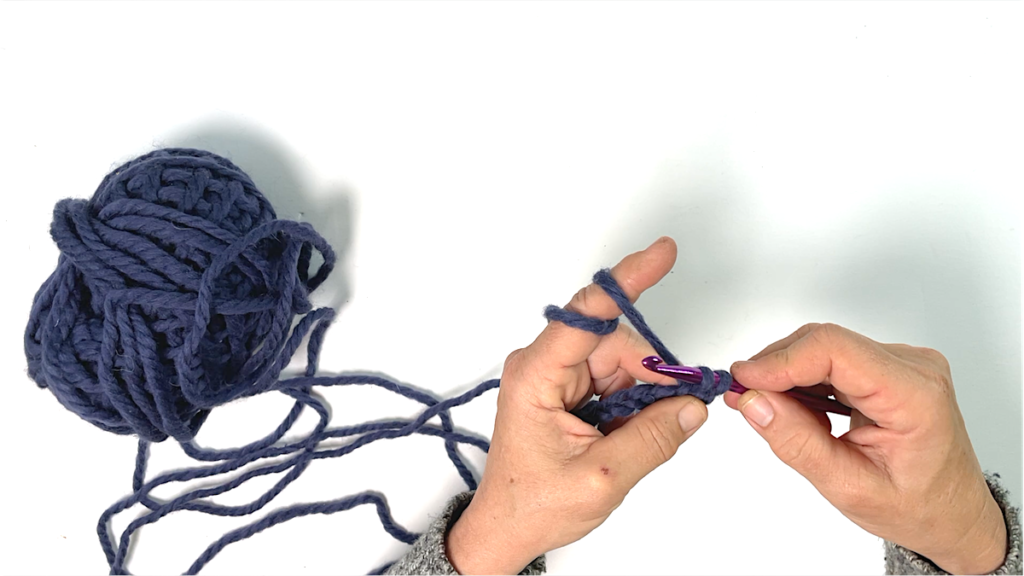
Wrap around the yarn once more, grab the yarn and pull it through those two loops. This is called a single crochet stitch. Continue with that until you reach the end of the row.
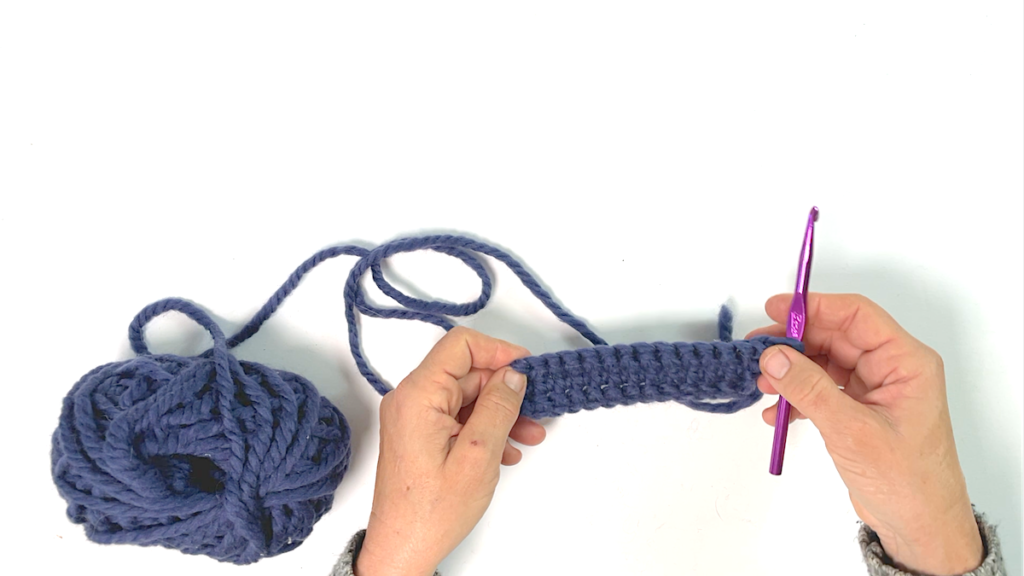
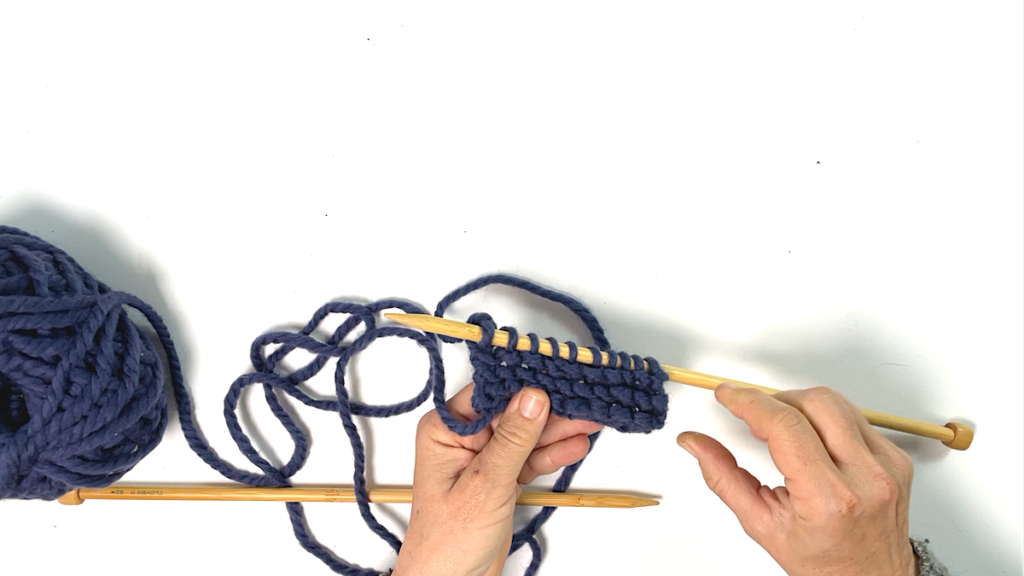
Crochet the 3rd and more rows
When you come to the end of a row, turn your project around, add one more chain stitch and continue with your single crochet stitch. Add as many rows as you like. It will look like this:
Knitting
Casting on stitches
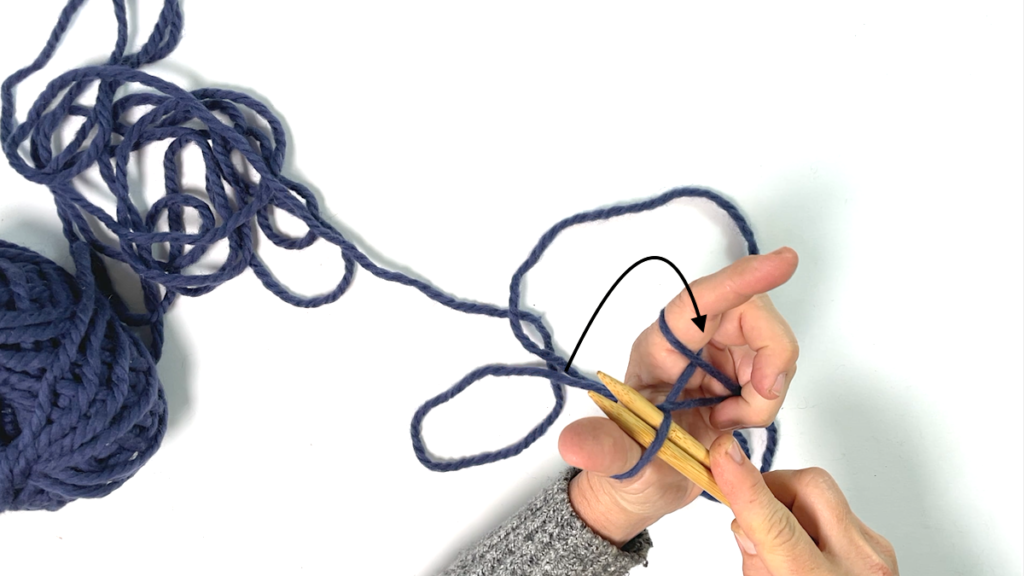
There are many ways to cast on stitches for knitting but I like and use this one the most. You will need 2 knitting needles. Pull some yarn off the ball and ‘fold it in half’. Take your thumb and index finger and insert them into this loop:
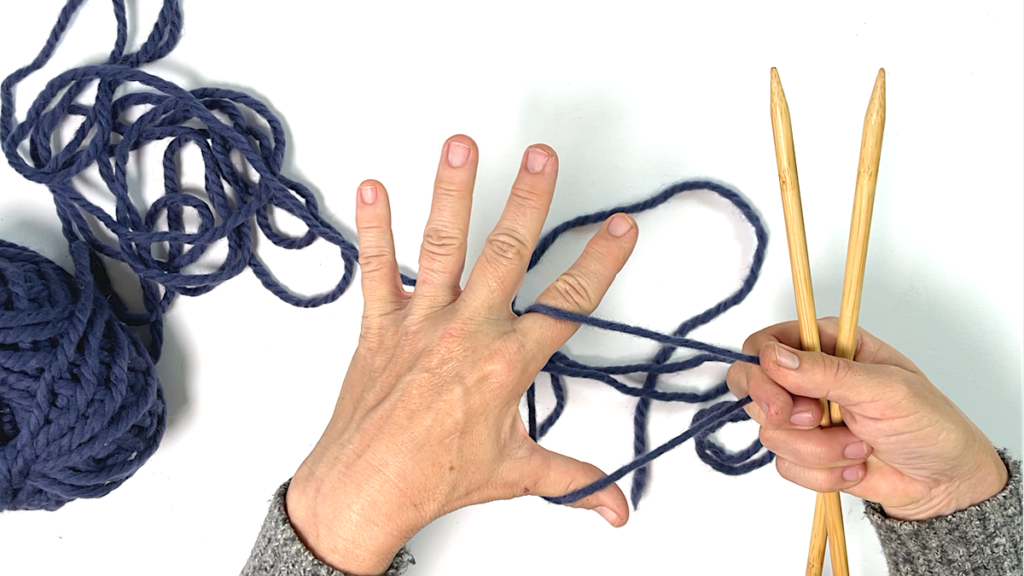
Now, flip up your hand so that your fingers are pointing up:
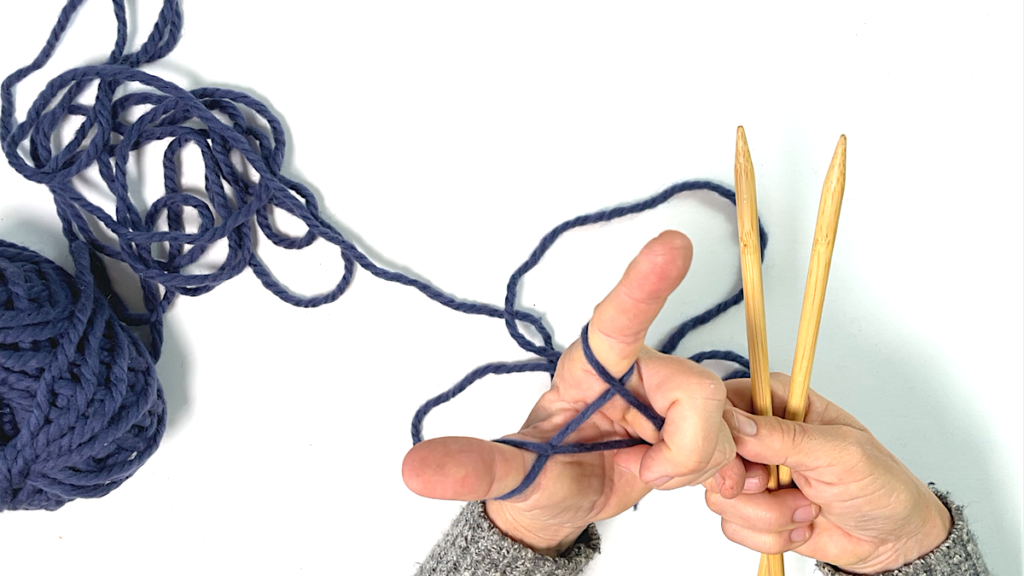
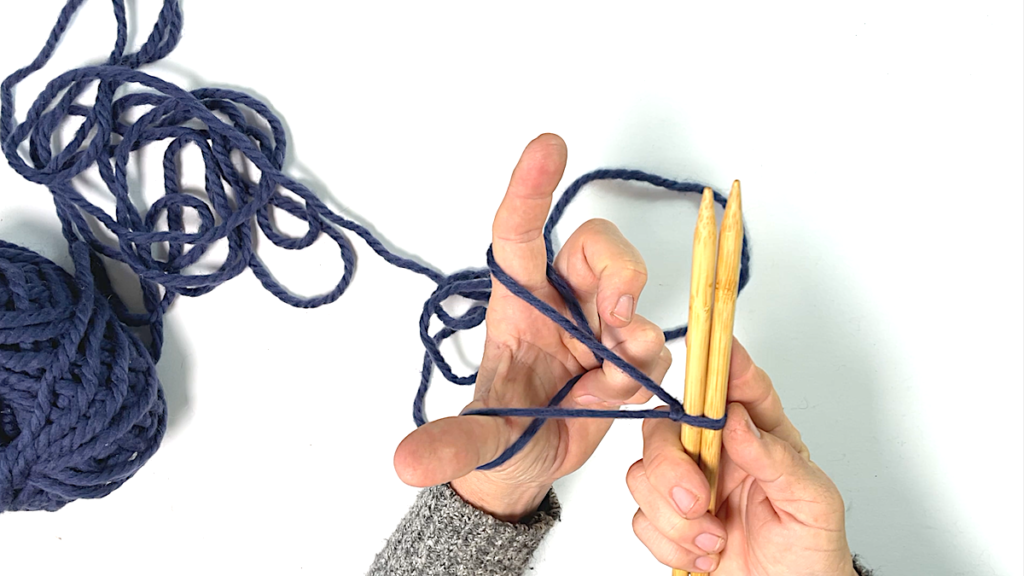
Take your two knitting needles and moves them into the loop around your thumb from underneath, grab the yarn around your index finger, and pull it through the yarn around your thumb:
This is your first stitch.
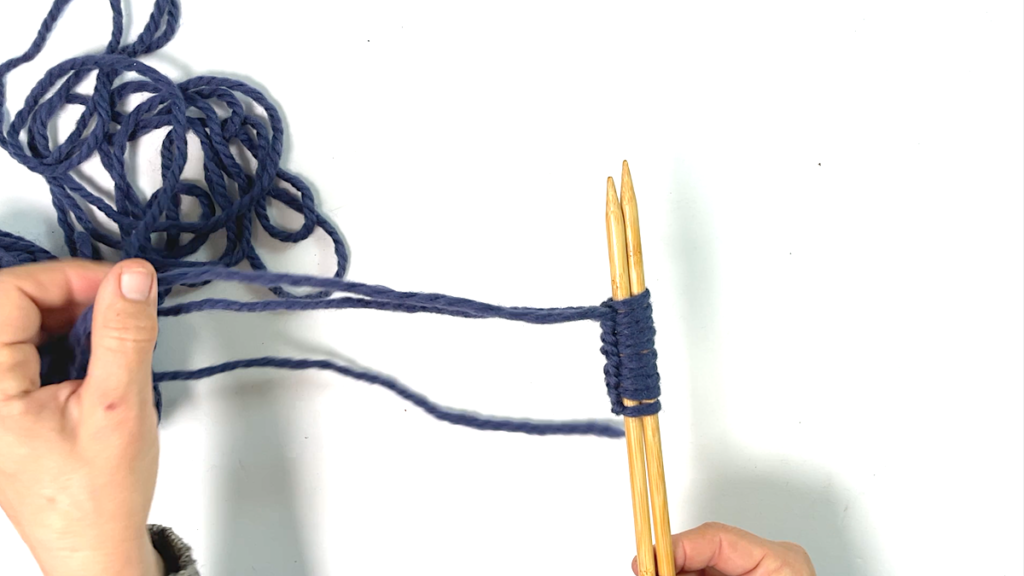
Continue with as many stitches as you want your project to be wide:
The knit stitch
Holding the needle with the stitches in your left hand, use your right hand to insert the right knitting needle into the first stitch from the left into the stitch, grab the yarn in the back and pull it through.
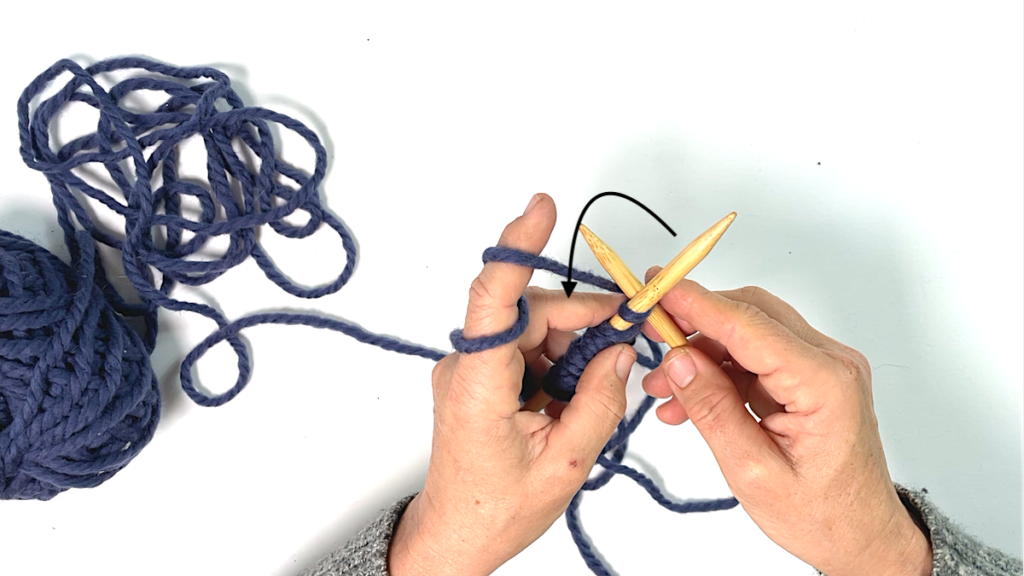
Then pull the stitch off the left needle. This is your first knit stitch:
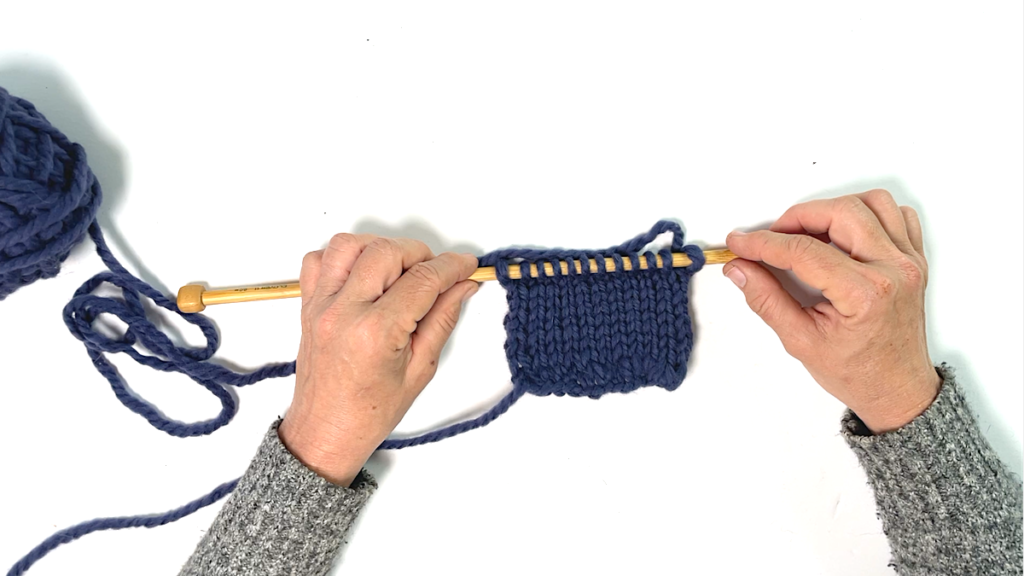
Continue with this until you reach the end of the row:

You can turn your work around and knit another row until you have the desired number of rows. Your work will look like this:
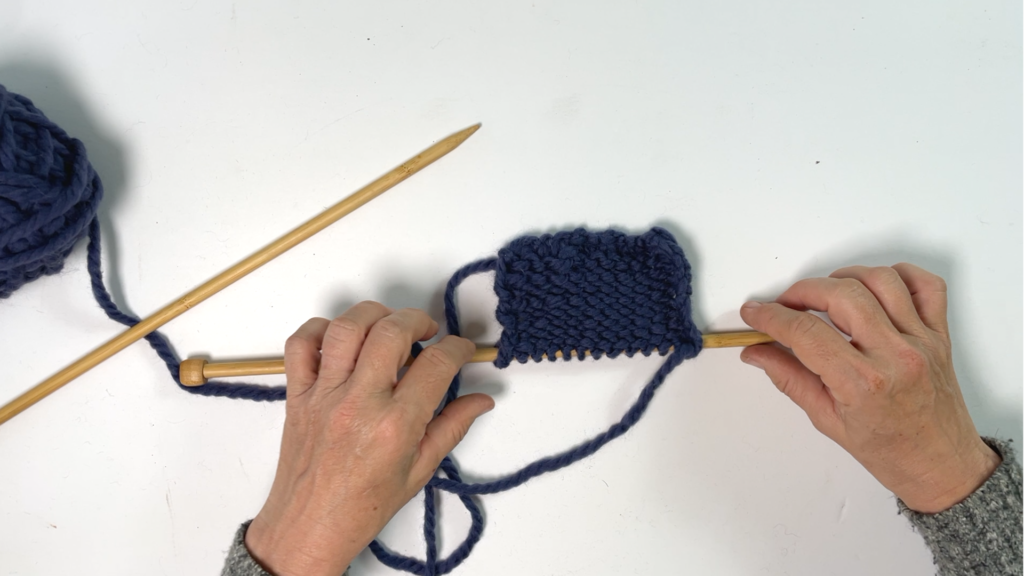
Adding the purl stitch
The purl stitch is a bit of a reversed knit stitch. For this one, you insert your knitting needle from the back to the front, grab the yarn and pull it back through:
Pull the stitch off the needle:
Front of your knitting work
The front side of your work has that ‘knitted’ look. You could look at some knit garment in your closet and see if you can notice it.
The backside of your work
The backside of your knitting has a more ‘pearled’ look.
About knitting patterns:
Even with these two basic knitting stitches, you could create all sorts of interesting patterns. However, that would go beyond the scope of this post.
A note for beginners
If you are completely new to crochet or knitting, please be kind to yourself and compassionate. While these basic stitches that I have shown you are not that complicated, they may be completely new to you. It may take a while before you get the hang of it before you will have the muscle memory, and the practice to get the tension right.
Practice makes perfect. Follow along as you practice. If you are not happy, just unravel your work (you might be surprised at how fast that goes!). Start over again. With a bit of patience, you will master it!
Some Easy Knitting Projects
Shop this post:
Chunky yarn: https://amzn.to/37W5cir
Crochet hook: https://amzn.to/3bonhWY
Bamboo knitting needles: https://amzn.to/3pIdpMT
Please let me know all your comments and questions below!
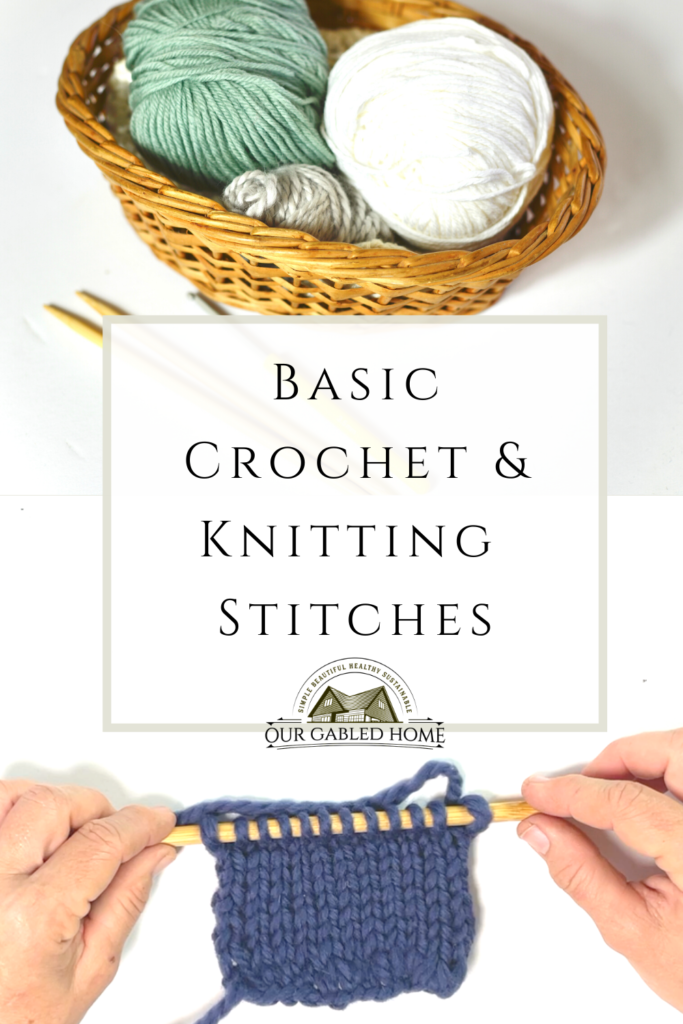
Pin For Later:
Anja, I am so excited to watch this with my girls. I have only ever learned the basic knit stitch. Nothing beyond that and I’ve never learned to crochet. But I keep thinking I want to expand my skills here… seeing as I never feel comfortable enough to create anything (other than a wonky scarf 🤣). So thank you for sharing!
And can I just say… your hands are beautiful. I totally understand your self-consciousness though. My sister once told me I have ‘old lady hands’ because they are small and not very smooth (meaning… short and wrinkly 😜) and I have always felt self-conscious of them ever since. But like you, I’m grateful for all the good they are able to do. ❤️ Keep on sharing all the great things you’re up to. I love it!
Thank you so much for your sweet comment and encouragement! Hope you’ll be on your way to knit and crochet beautiful things very soon 💛
This is such a great tutorial Anja! I knit, but have never tried to crochet. This makes it look super easy! Ill be coming back to this.
Yes, I think crocheting is easier than knitting. Hope you’ll take it up 💛
I’m so excited to start crocheting again. This post is very helpful! Great job
Awesome! Happy crocheting and thank you so much ~ Anja
This is a very good tutorial and your pictures are vivid and clear. I’d love to see your finished projects!
Thanks… enjoying the video… looking forward to learning…. your humbleness touches me… you have motivated me to pursue something close to my heart… please post the next step after this to keep me going. Thanks again… bless you.
Thank you so much! Reading a comment like yours definitely makes my day