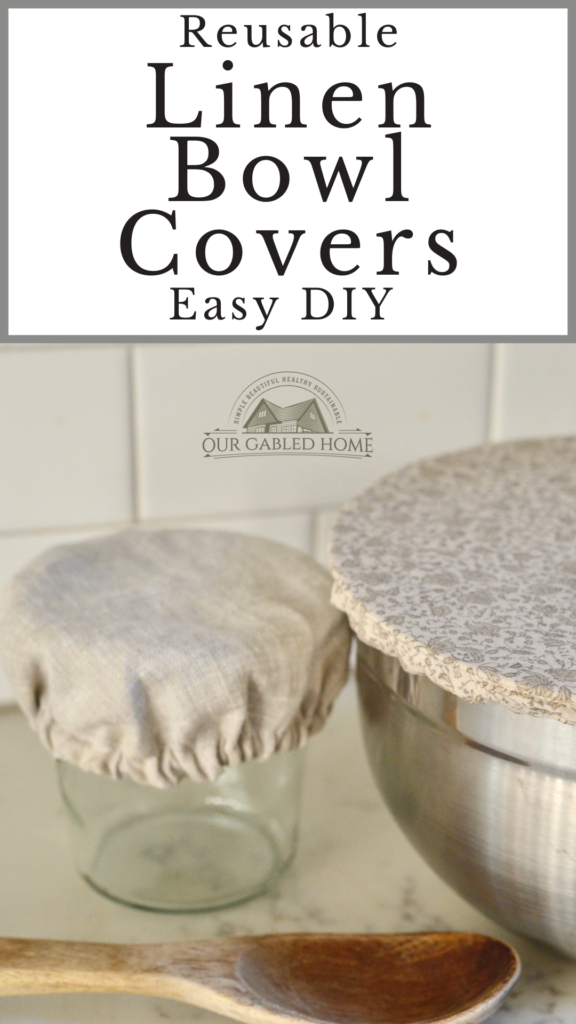
How to Sew Reusable Bowl Covers
Reusable bowl covers are very easy to sew and you can make them exactly fit all those bowls and jars you use the most.
With all my baking and fermenting, I am constantly in need of bowl covers in the appropriate sizes for my bowl or jars. What better way to make a few cute reusable linen bowl covers!
In this post, I am showing you how you can easily sew them with a customizable fit and the 2 main methods.
This post contains affiliate links, which means I make a small commission at no extra cost to you. You can read my full disclosure.
Why make reusable bowl covers?
I love using these fabric bowl covers for a variety of reasons:
- cut down on single-use plastics in your zero-waste kitchen
- I can make them in a variety of sizes to fit my needs (large bowls or small jars)
- they are a great way to cover doughs or other ferments
- you can wet them to keep your doughs from drying out
- they make great gifts

Why linen bowl covers?
If you have been following me for a while, you might know that I have a love affair with linen. While you can make these fabric bowl covers from pretty much any fabric you like, I really prefer linen:
- linen is naturally anti-bacterial
- it is very sturdy and long-lasting
- linen fabric gets better with age
- I just love the feel of linen
- linen is the perfect rustic farmhouse fabric
Items you need for your handmade linen bowl covers
Here is what you need to make reusable linen bowl covers:
- your fabric
- coordinating thread (or contrasting, depending on preference)
- regular scissors
- pinking shears/zigzag scissors (prevents fraying of the fabric)
- measuring tape
- elastic band
- pins
- safety pins
- tailor’s chalk or fabric pencils
- hot iron
- sewing machine (not strictly necessary but makes your job a whole lot easier)

Prepping the fabric
Whatever fabric you will use for your reusable cloth covers, make sure it is machine washable. It is very important to wash your fabric before sewing. You don’t want to measure it to fit your bowls only to find that it shrank after you washed it. If your fabric came out very wrinkly, you might also like to hot-iron it to make it lay nice and flat.
You can also be frugal and repurpose some fabric that you already have. Those heirloom cloth napkins you are really not using? Turn them into soft fabric covers. You can use any tablecloth, old bed linen, or other leftover fabric for these bowl covers. Some people prefer using organic cotton.
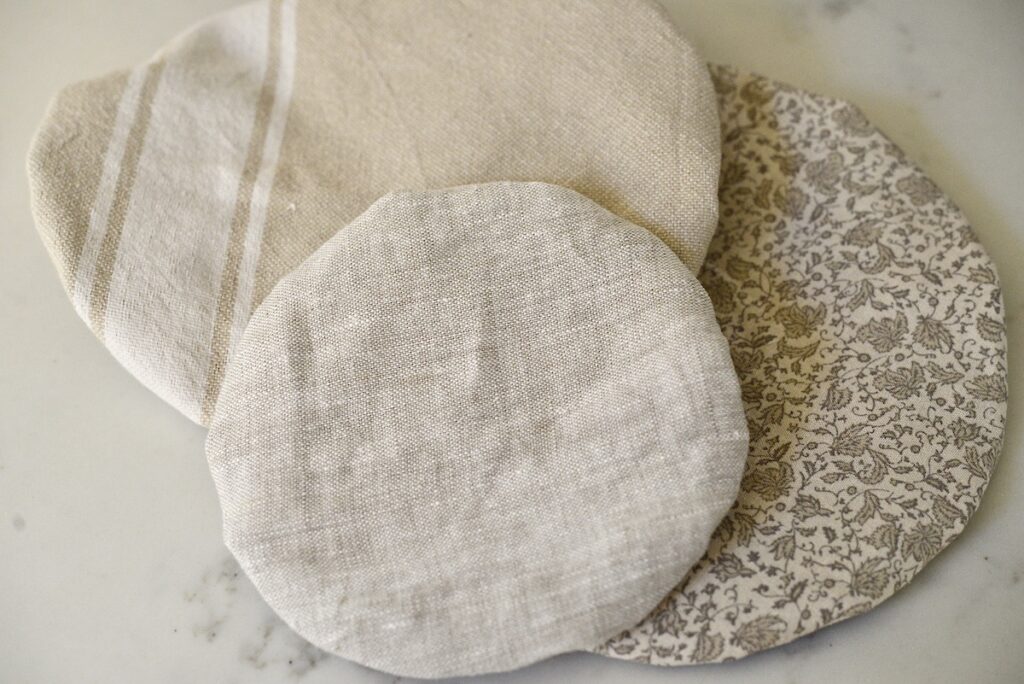
How to measure your bowl or jar
- Place your jar or bowl upside down onto your fabric with enough space all the way around (for method 2, double your fabric)
- Trace the outline of the bowl with your tailor’s chalk or fabric pencil.
- Using your tape measure, mark 2″ on the outside all the way around
- Connect those dots, creating another bigger circle
- Using your pinking shears cut along the outer circle
- Move on to one of the next methods
Bowl cover – method 1 (pure linen bowl covers)
I recommend this method for thicker fabrics or sturdy linen.
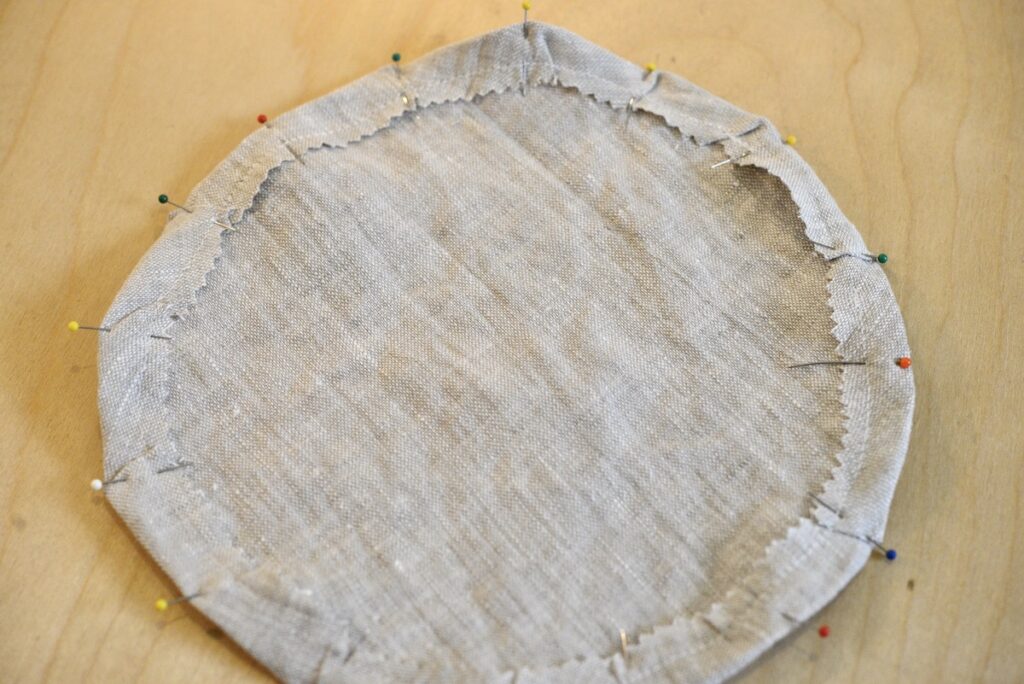
- Begin folding the outer edges in about ⅓ of the way to the smaller circle and pin them in place. I like to move from 12 o’clock to 6 o’clock to 9 o’clock to 3 o’clock and so on.
- Fold the outer edge in between your already pinned places
- Using a straight stitch, sew the “channel” for your elastic about ¾” from the edge.
- Make sure to leave a 2-3″ opening on one side.
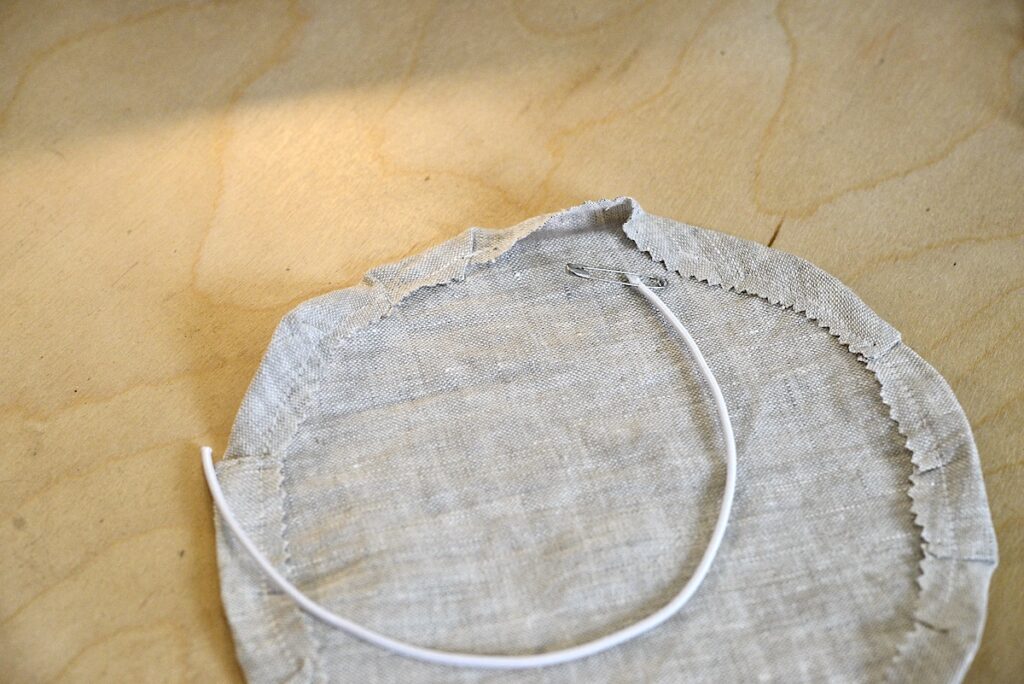
- Measure your elastic around the bowl. There should be quite some tension in it. Then cut it with an additional 1″.
- Put a safety pin through one end of your elastic and move the safety pin into your channel.
- Move the safety pin with the elastic all the way through, making sure not to pull the other end into the channel.
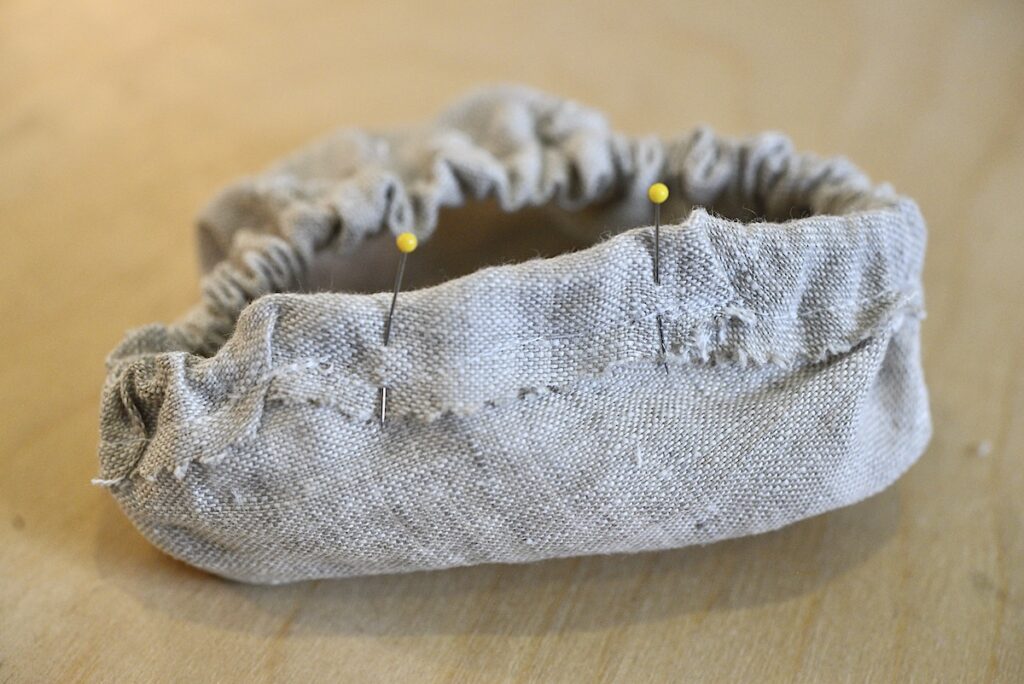
- Sew the 2 ends together and move the elastic evenly into the channel.
- Using a straight stitch, close the opening.

Bowl cover – method 2 (reversible, double-layer covers)
This method is best with thinner fabrics or if you would like to use two different fabrics.
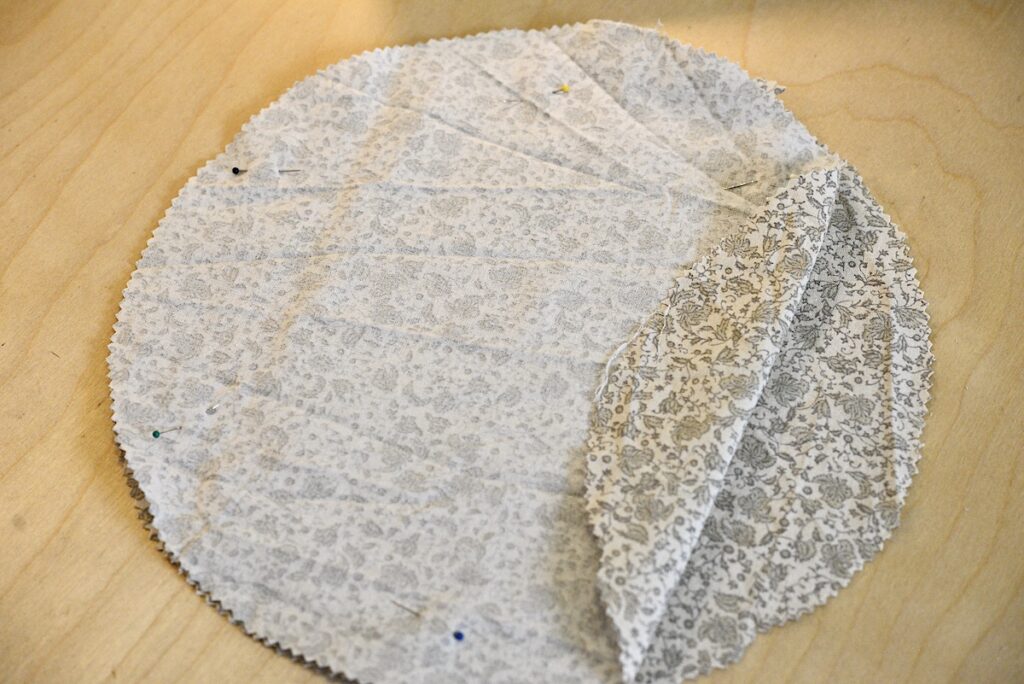
- Place the two circles on top of each other with the right sides facing each other.
- You might like to pin them in place to prevent any shifting.
- Using a straight stitch, sew these two pieces together about ¼” from the edge. DO LEAVE a 2″-3″ opening!
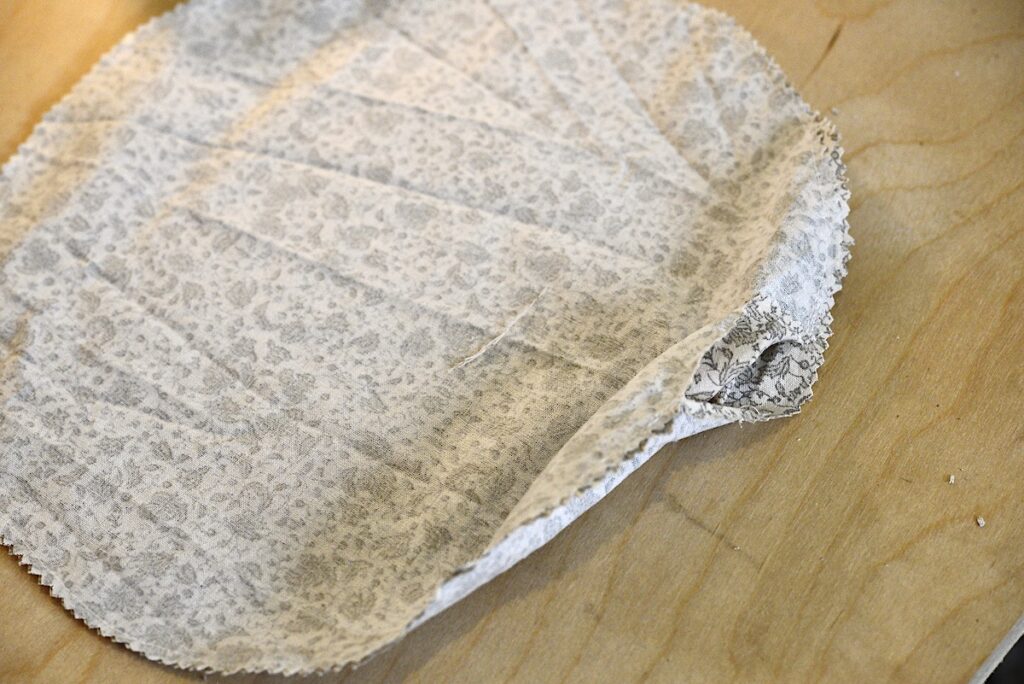
- Turn your piece right side out and press the edges out. You can use your hands for that or a long wooden spoon.
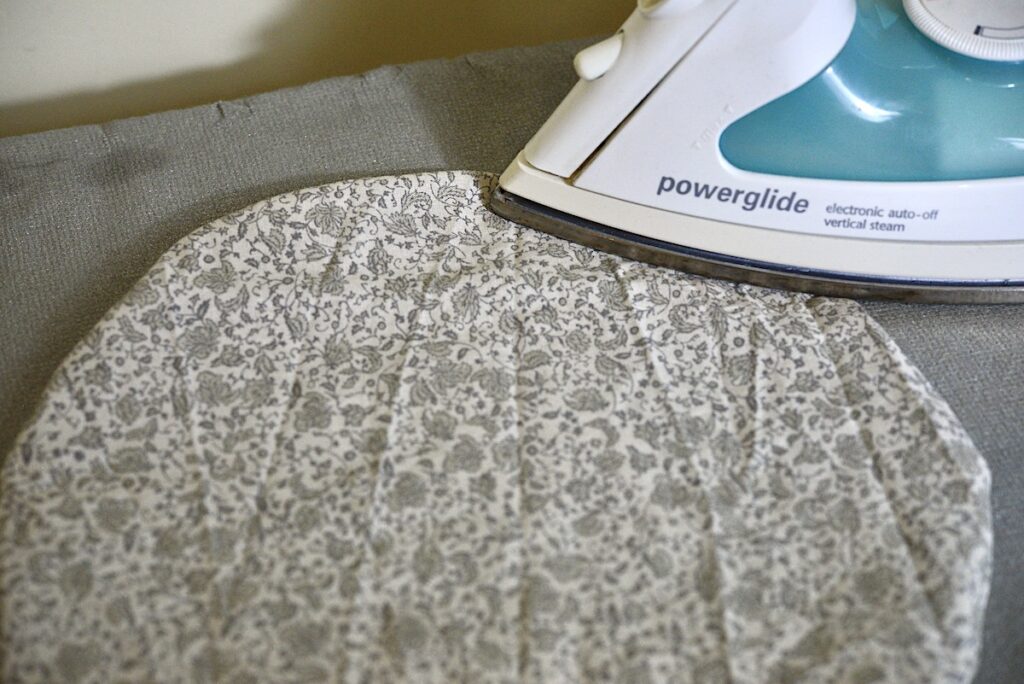
- I recommend using a hot iron to press the two pieces and their edges.
- Using a straight stitch, sew the two pieces together right sides out about ¾” -1″ from the edge to create the channel for your elastic. You can go all the way around.
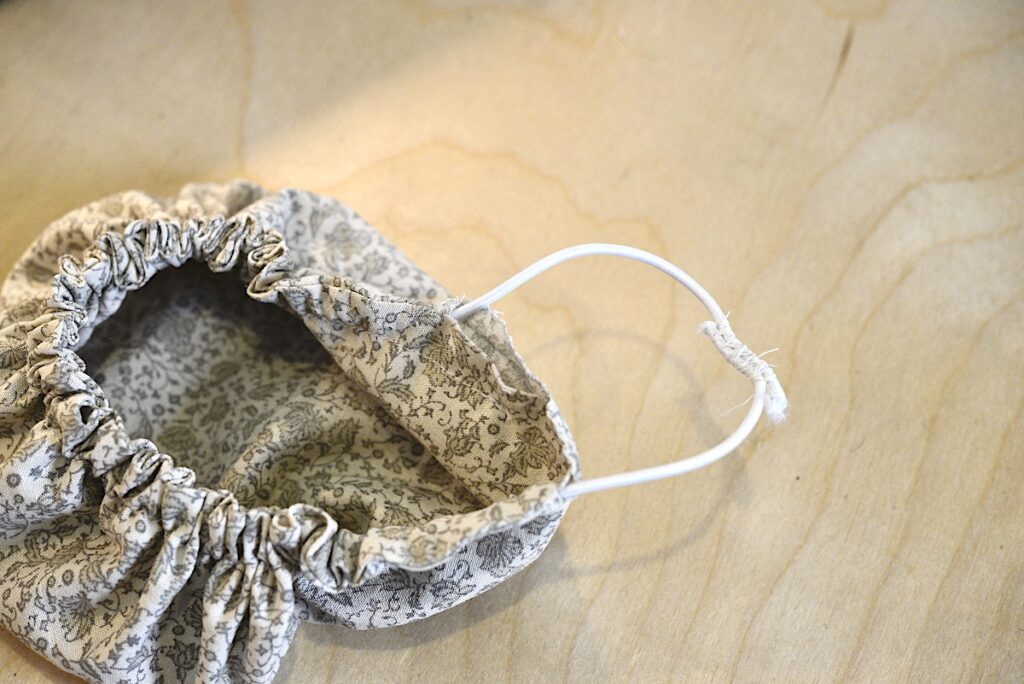
- Measure your elastic around the bowl. There should be quite some tension in it. Then cut it with an additional 1″.
- Put a safety pin through one end of your elastic and move the safety pin into your channel.
- Move the safety pin with the elastic all the way through, making sure not to pull the other end into the channel.
- Sew the 2 ends together and move the elastic evenly into the channel.
- Using a straight stitch close the opening on the side. You can also do this by hand.

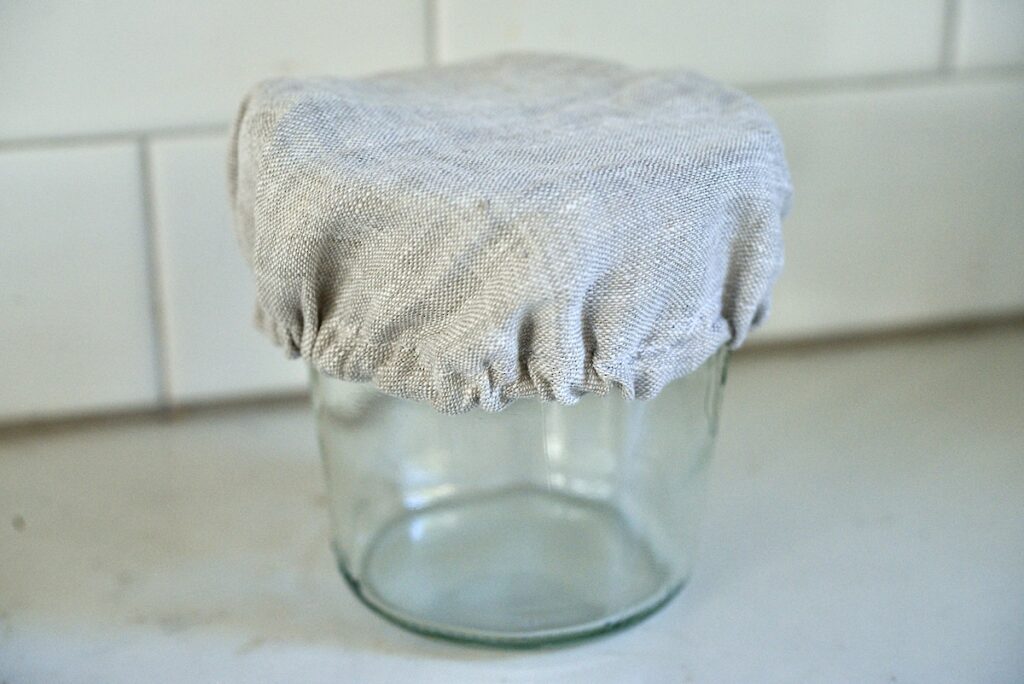
How to use your bowl covers
Once you see how easy it is to make them, you might like to make some more in a range of sizes.
They are made from fabric so they won’t give your bowls or jars an airtight seal. However, you can always place a beeswax wrap underneath.
For short-term storage, you can even use them for keeping food in your refrigerator. You can moisten them and keep your salad greens fresh. Especially if you use a very tight weave for your inner and outer layer, these bowl covers are the perfect replacement for disposable materials.
They should last a long time and if they ever get dirty, you can simply throw them in the wash.
And with the holidays just around the corner, they make a beautiful hostess gift, too!
Watch my Video Tutorial:
More Easy DIYs You Might Enjoy
Mason Jar Cozy from Old Sweater
How to Make Linen Beeswax Wraps
Do you have questions or comments? Let me know below!
Pin For Later:
Can you use these to cover vegetables that I am cooking in the microwave , instead of plastic wrap?
Yes, you can if you don’t mind that your fabric cover might get splatters on it ~ Anja
I’m definitely going to be making these! Saving to my Pinterest! Thanks!
XOXO,
Jenn // http://www.shawave.com
Awesome ~ Anja
You made this look so easy. I’m a newbie to sewing and after watching this feel confident I can do this. I watched another video and thought,” this is too complicated,” and then I saw yours. Thanks for showing all the steps as well!
Yes, you can do it! Not complicate at all! Happy sewing ~ Anja
What fabric did you use?
I love using linen even though this was an older linen/cotton blend table cloth from Ikea (that they discontinued …) ~ Anja
Anja could I use 100% cotton fabric? Or a flour sack towel?
Yes, both would be great options!
These are great! I’ve started making bread a lot so these would be a cute alternative to damp tea towels. Also perfect for protecting salads when I’m having a get-together!
Yes! They are so versatile ~ Anja