Easy Cozy Chunky Knit Pillow | Beginner-Friendly Tutorial
In this beginner-friendly tutorial, I am showing you how easy it is to knit a cozy chunky throw pillow, perfect for your handmade home.
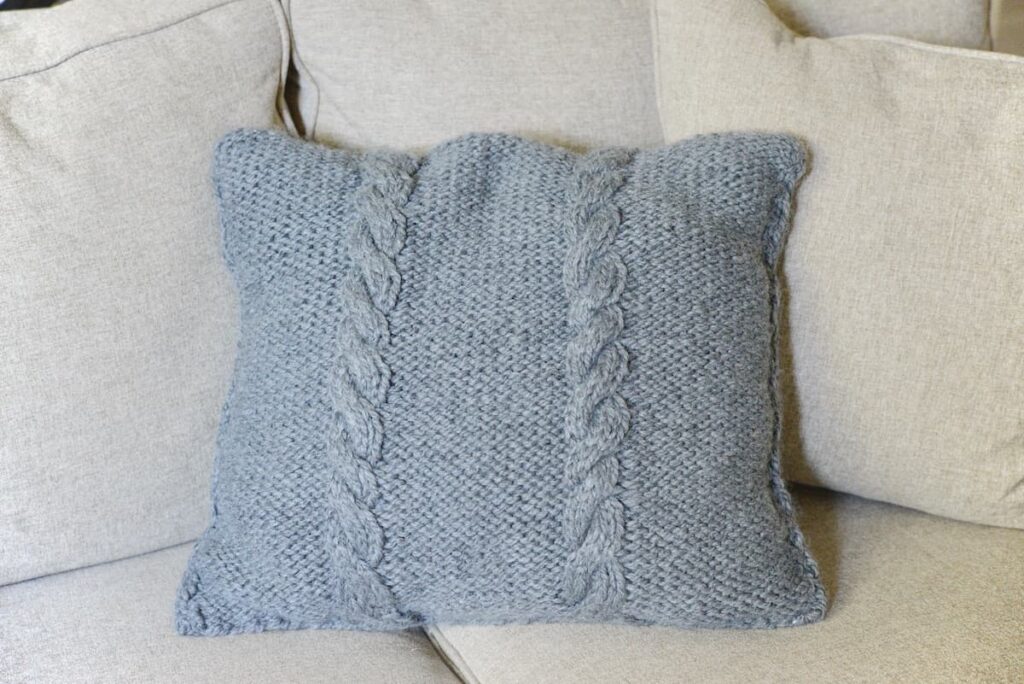
As we’re heading into the fall season, I am starting to crave more coziness. This chunky knit pillow is a perfect project for beginners while it adds that handmade charm to your home.
This pillow is not super chunky like many pillows you might have seen on social media lately. Rather, I am using a super bulky yarn as I feel that this is a bit more timeless.
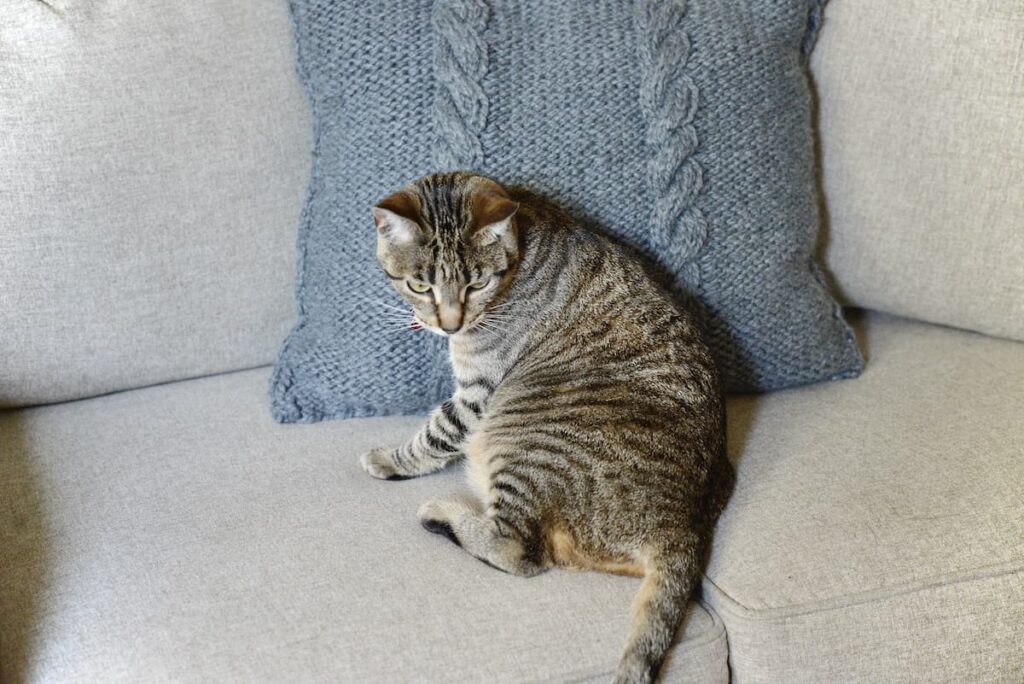
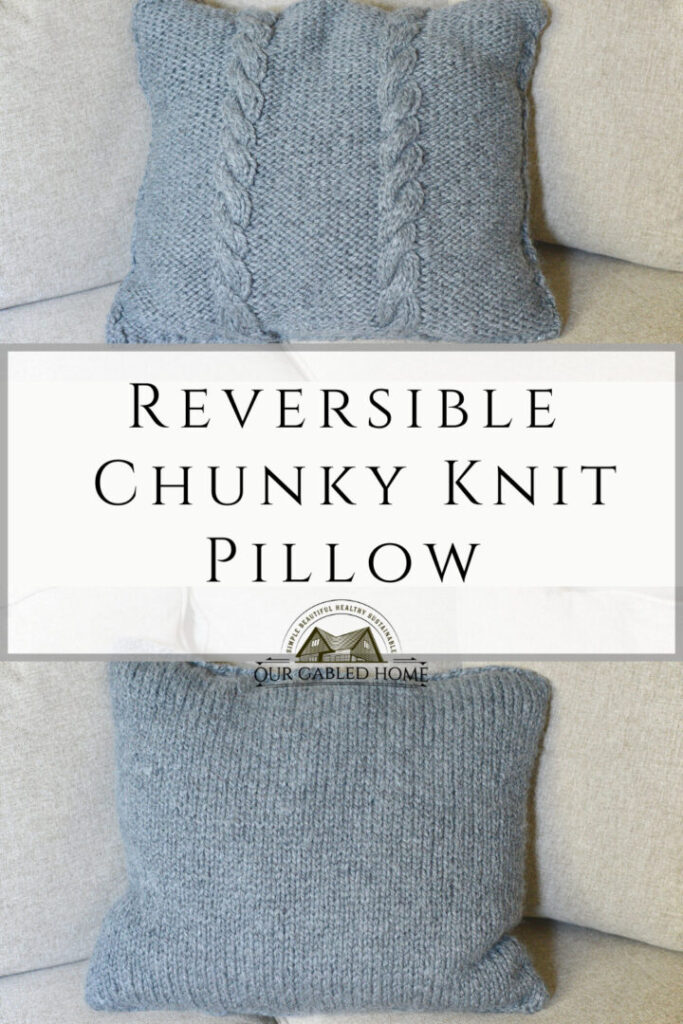
I made mine reversible with a stockinette stitch on one side and a simple cable knit on the other side. I will teach you how to make the cable knit. However, you can make this chunky knit pillow without any cables and it will be just as beautiful.
This post contains affiliate links, which means I make a small commission at no extra cost to you. You can read my full disclosure here.
Why knit a throw pillow?
Have I mentioned that I love knitting? So it’s easy for me to love a knit pillow.
But also, when you’re knitting home decor or throw pillow covers, it has that cozy sweater look that makes you want to curl up on the couch and lounge and linger.
While you can perfectly knit decorative pillows for your own home, they also makes a nice gift for someone else. This time of year is great if you’re thinking of handmade Christmas gifts. You can’t start too early …
Lastly, you can easily personalize this chunky knit pillow. You can choose the yarn, the color, and the pattern so that it matches the decor in your home. Sure you can buy some pillows in a home decor store but it just won’t be the same.
Don’t know how to knit?
I know that many of my readers here know how to knit. But what if that isn’t you?
Well, no worries! Check out my tutorial for basic knit and crochet stitches. Trust me it is very easy to learn those stitches. Making this chunky knit pillow is the perfect way to hone your skills because you can make it as small as you like.
Also, with this chunky yarn, even a beginner knitter will make very quick progress.
Materials for your chunky knit pillow
You can find all these items at your local craft store or online:
- Yarn: I chose the Big Twist Natural Blend yarn that you can get at JoAnn’s. I love that it’s a wool blend. You can get a ” rel=”sponsored nofollow”>100% wool yarn online or a similar wool-blend yarn at amazon.com. For my pillow size of 19″ by 19″, I used 3 skeins. However, how many you will need will depend not only on your pillow size but also on whether you have a fairly loose knit and on your pattern.
- Knitting needles: I normally prefer circular needles but you can also use 2 long straight needles. To make sure you have the right needle, I recommend you check the yarn. I used a size 13 which is pretty big but then this is a chunky knit pillow!
- Optional: If you want to add the cable knit you can either use another knitting needle or specific cable knitting needles.
- Optional: Some people like to use a stitch marker to help them with their pattern.
- Optional: If you really enjoy knitting, you might like to invest in a knitting kit that includes all sorts of items to make your knitting go faster and easier.
NOTE:
Make sure you purchase enough skeins of yarn. If you end up with more than you need, you can either use it for another project or return it. If you don’t purchase enough and buy more later you might get a different dye lot which can sometimes be very obvious.
Step-By-Step Instructions:
1. Make a swatch
Before you can begin, you will need to knit a swatch. That will determine how many stitches you will need to cast on for your chunky knit pillow cover.
Simply cast on 20 stitches with your chosen knitting needle size and knit about 20 rows. You can then find out how many stitches you have in a 2″ square. From there extrapolate how many you need for your pillow. If in doubt, I recommend going just a tad bigger as it’s easier to stuff a pillow with more batting than have a cover that’s too small.
Also, keep in mind that if you choose to add the cable knit, that tends to pull a bit and make your knitting a bit tighter. So go ahead and add a few more stitches.
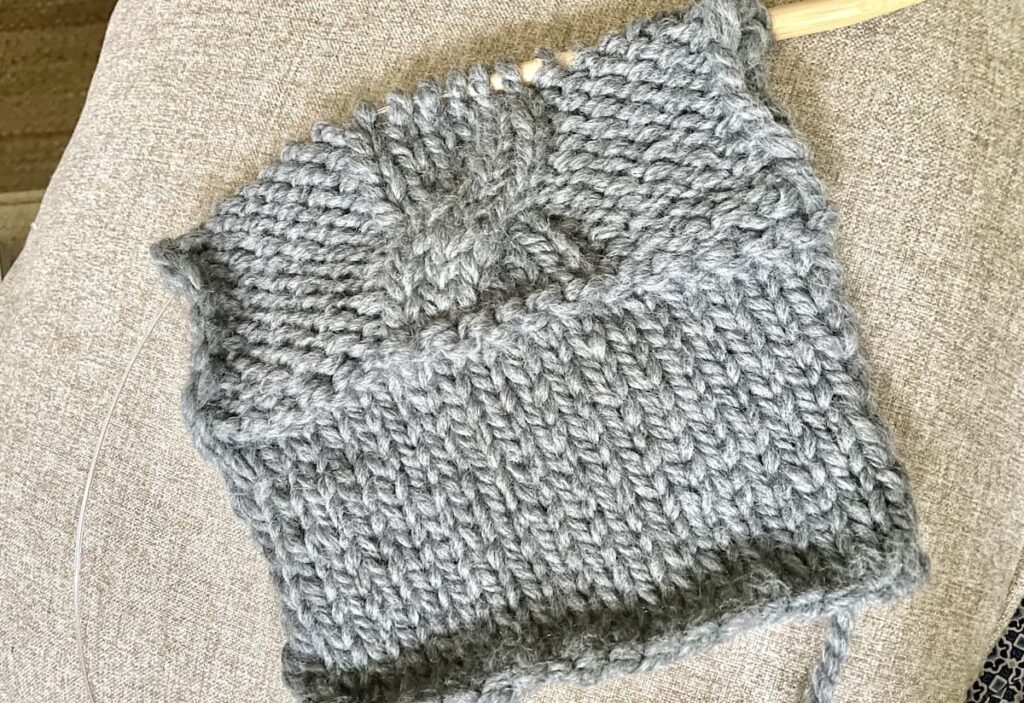
2. Knit the front of the pillow
For my chunky knit pillow cover, I cast on 54 stitches. Using the stockinette stitch, I knit one row and purl the other. It’s a very simple but beautiful pattern.
I knitted until I reached about 19″ in height.
You can now either continue if you want to keep it all on stockinette stitch. If you would like to add the cable knit on the other side, read the next paragraph.
Otherwise, you can skip to ‘Finish your chunky knit pillow’.
3. Knit the back of the pillow – making it reversible
• Figure out the placement of the cables
This does require some math. But do not worry about that. I have never been good at math, and if I can figure it out, you can, too!!
Using my example, I have 54 stitches and want to add two cables.
- I want my cables to be 6 stitches wide (you can make them wider or narrower). Therefore, I subtracted 12 (2 x 6 stitches) from 54 stitches and had 42 stitches left. This will be all the stitches around the cables.
- Since I wanted my cables to be right symmetrically in the middle of the pillow, I divided 42 by 3 which equals 14.
- That means, that I will knit 14 stitches, have 6 for my first cable, knit 14 stitches, have my second cable, and have another 14 stitches for a total of 54 stitches.
- As a way to mark the line between the two sides, I added one row of purl stitches.
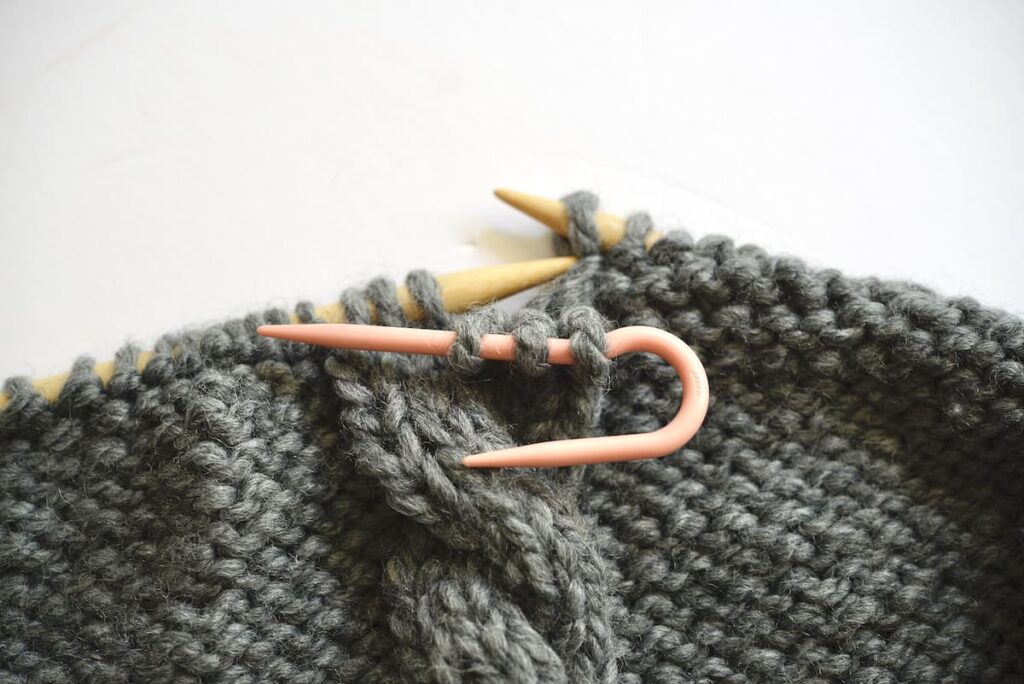
• How to knit cables
You will knit the actual cables in the knit stitch while you will purl the other stitches. That will make the cables stand out.
- I like to knit 2 rows (in my example: 14 purl, 6 knit, 14 purl, 6 knit, and 14 purl; reverse on the back rows).
- Then I purl the first 14 stitches.
- For the left twisting cables, using my extra needle I take the first 3 stitches off my needle and lay them in front of my knitting. Then I will knit the next 3 stitches. Now, I move the 3 stitches on the extra needle to the left and knit them. Don’t worry if things feel tight, that is normal with cables.
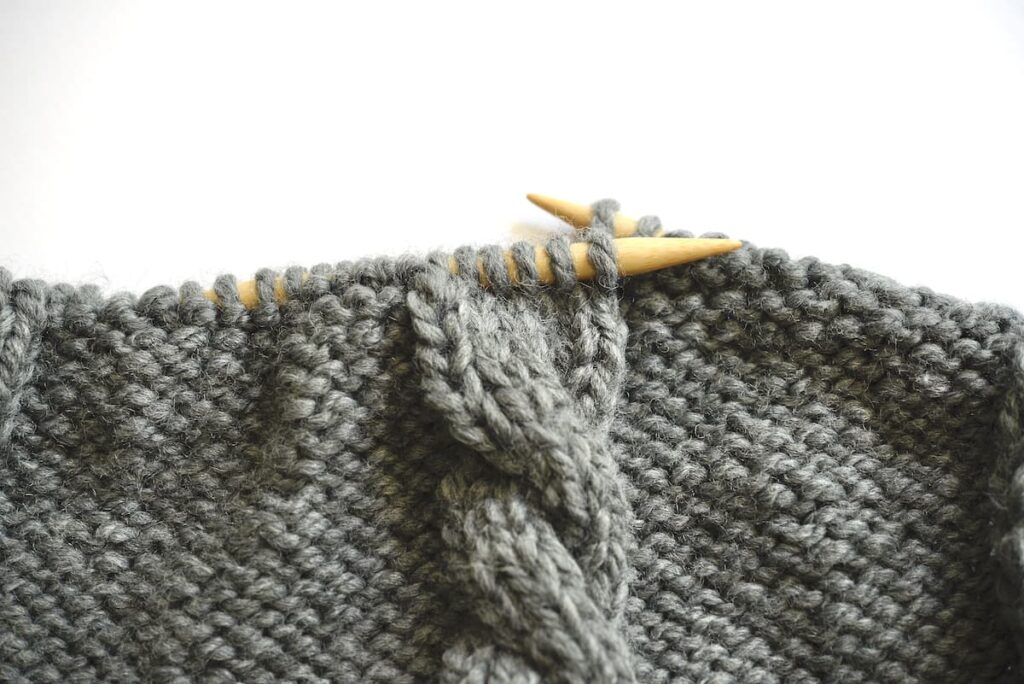
For the right twisting cables, I simply take the extra needle with the 3 stitches on it place it behind my knitting, and knit the next 3 stitches. Then I will move the extra needle to the left and knit those 3 stitches.
For the next 6 rows, just knit the stitches as they appear and repeat. It is that simple!
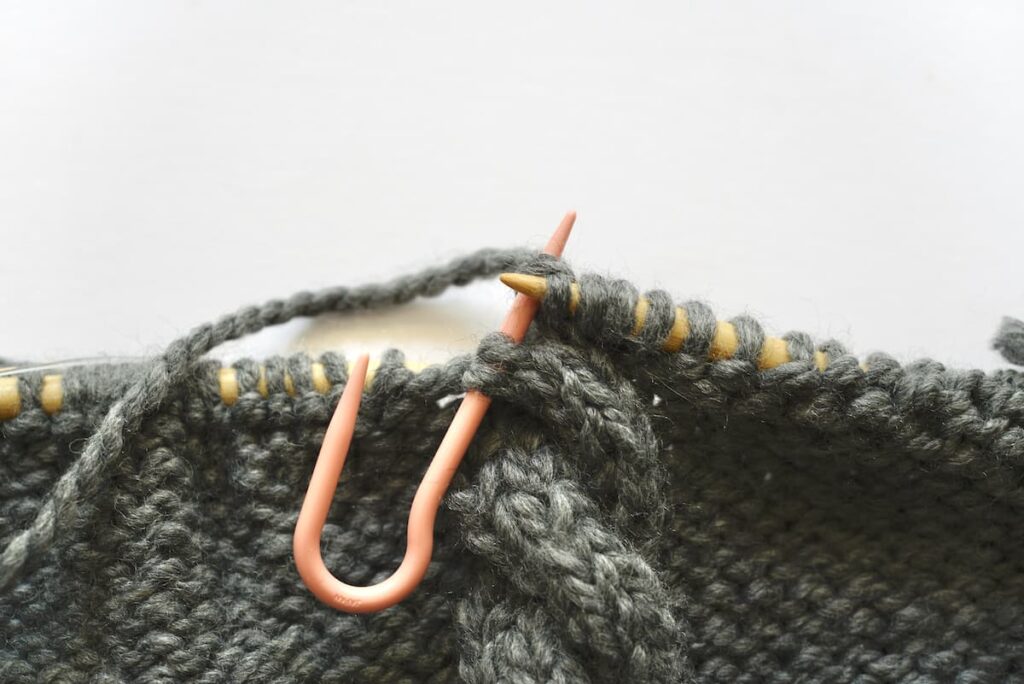
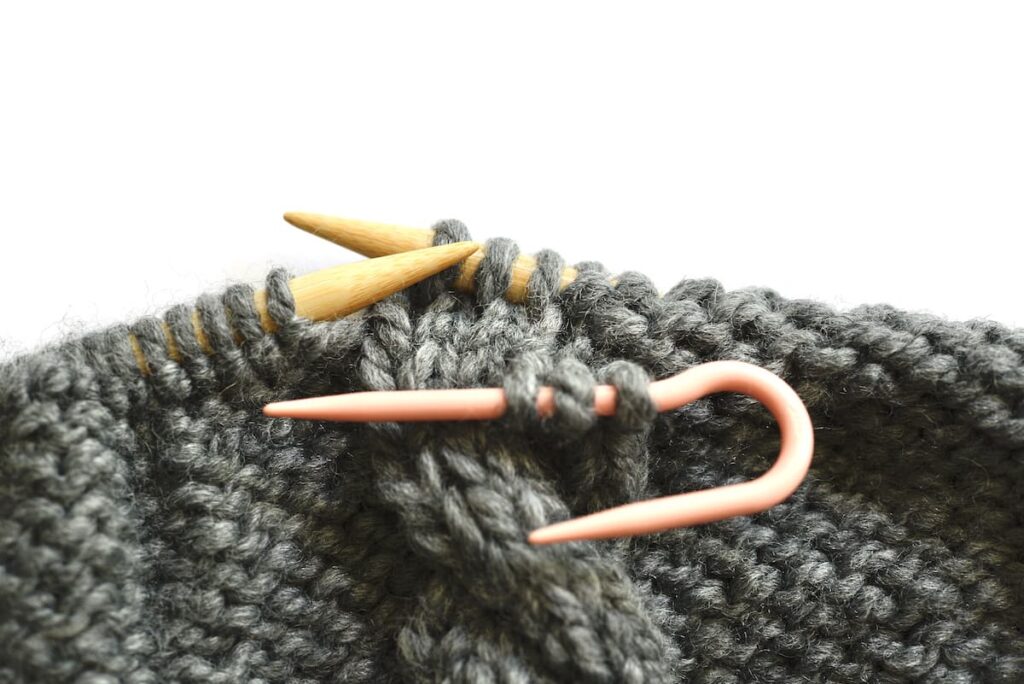
4. Finish your chunky knit pillow
Once you have reached the right number of rows for your pillow, you will cast off your work.
For that, slip off or knit the first stitch as it comes, knit the next one, and slide the first stitch over the second one. It’s important to keep things a bit loose otherwise you will end up with a very tight row that might even pull. Continue doing that: knitting the next stitch and slipping the previous one over it until you come to the last stitch.
TIP: When you pull the yarn through the last stitch, I recommend leaving a long tail that you can then use to close the sides.
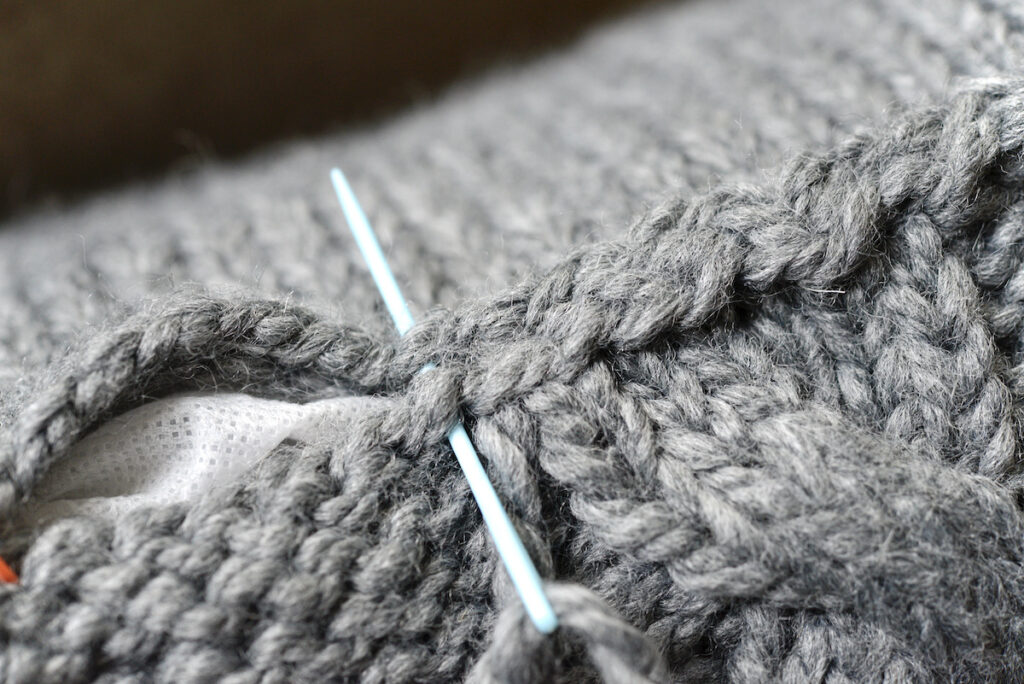
To close the open edges, I like to take the same yarn I have been knitting with and a darning needle. Then I will simply move the needle from right to left and left to right to close the sides. You could also use a crochet hook.
Before I close the top seam, I slip my pillow insert into the knit pillow. Then I will close the seam as before.
You can also Watch My Youtube Video Tutorial:
Shop this post
Wool-blend yarn: https://amzn.to/3AH7Vb6
Bamboo knitting needles: https://amzn.to/3m4KTHi
Single-point knitting needles: https://amzn.to/3xMOvjf
Cable knitting needles: https://amzn.to/3z62F0F
Knitting kit: https://amzn.to/3jWsuK9
Other DIY tutorials you might enjoy
Let me know if you have any questions or comments below!
What a beautiful pillow!
Thank you so much; I am glad you like it!!
Great tutorial! I am a beginning knitter and this would be a fantastic project to learn how to do cables!
Yay! And yes, this is such a great doable project for beginners ~ Anja
This is a great simple project! You can cozy up under a blanket and knit a pillow, which you then snuggle with as you knit even more projects. How perfect! Your instructions are easy to follow – thanks for sharing.
Aww … thank you so much! I am glad you like this pillow and found my tutorial easy to follow ~ Anja
Something about the coming of cooler weather that suddenly makes me want to crochet and this project makes me really want to learn to knit. Beautiful project. Thanks for sharing!
That is exactly how I am: with the cooler weather, I want to curl up on the couch and knit. Feel free to check out my tutorial on basic knitting stitches ~ Anja
I love those pillows. Not only is the color great, but they look super comfy. Your steps look easy and manageable to make these. I’m actually gonna try knitting these. Thanks for this lovely post.
Aww … thank you so much! I am so glad you enjoyed this tutorial ~ Anja
I used to knit when I was younger and wish I could get back into it! These are so cute!
I am sure you can still do it! I actually have a post and Youtube video teaching beginners basic knitting (and crochet) stitches ~ Anja
Oh my goodness, Anja! Your knitted throw pillow looks so cozy!! All you need is a good book and a coffee! Love it! 🥰
Yes, coffee, books, and knitted pillows are a great combo! Thank you so much ~ Anja
These pillow covers are beautiful! I’m one of those readers who DOESN’T know how to knit, but I desperately want to learn! Maybe one day when the little ones are a bit older!
Thank you, Sylvia! I actually have a post and YT video teaching you basic knitting (and crochet) stitches. It’s so easy and doable ~ Anja