How To Make Bone Broth Without Special Equipment
Here are my 5 best tips so that you can easily turn your leftover bones into a healthy, collagen-rich, gut-healing bone broth!
Everyone loves bone broth!
Have you been wondering how you can make your own? Would you like to learn how you can capture all the delicious goodness from the bones?
Let me show you how you can easily make your own bone broth! It might sound a little intimidating at first.
But you won’t even need any special equipment. And you can do it right on your stovetop with just any large stock pot.
What Readers Are Saying:
Wow!!! This looks so simple and amazing!!! Michelle
Why You Should Make Homemade Beef Bone Broth
In recent years, bone broth has emerged as a new superfood with many nutritional benefits. It is purported to contain huge amounts of collagen, a protein that is found in the skin and connective tissue. Because collagen production in humans declines as we age, consuming a traditional beef bone broth is a wonderful, natural way to support our bodies.
Beyond being highly nutritious and packed with vitamins, this homemade bone broth is a great way to heal leaky gut, fight inflammation, and help with joint pain. It’s an easy way to give your immune system a boost—nothing warms you up in the winter months like a hot cup of healing broth!
5 Expert Tips for the Best Bone Broth
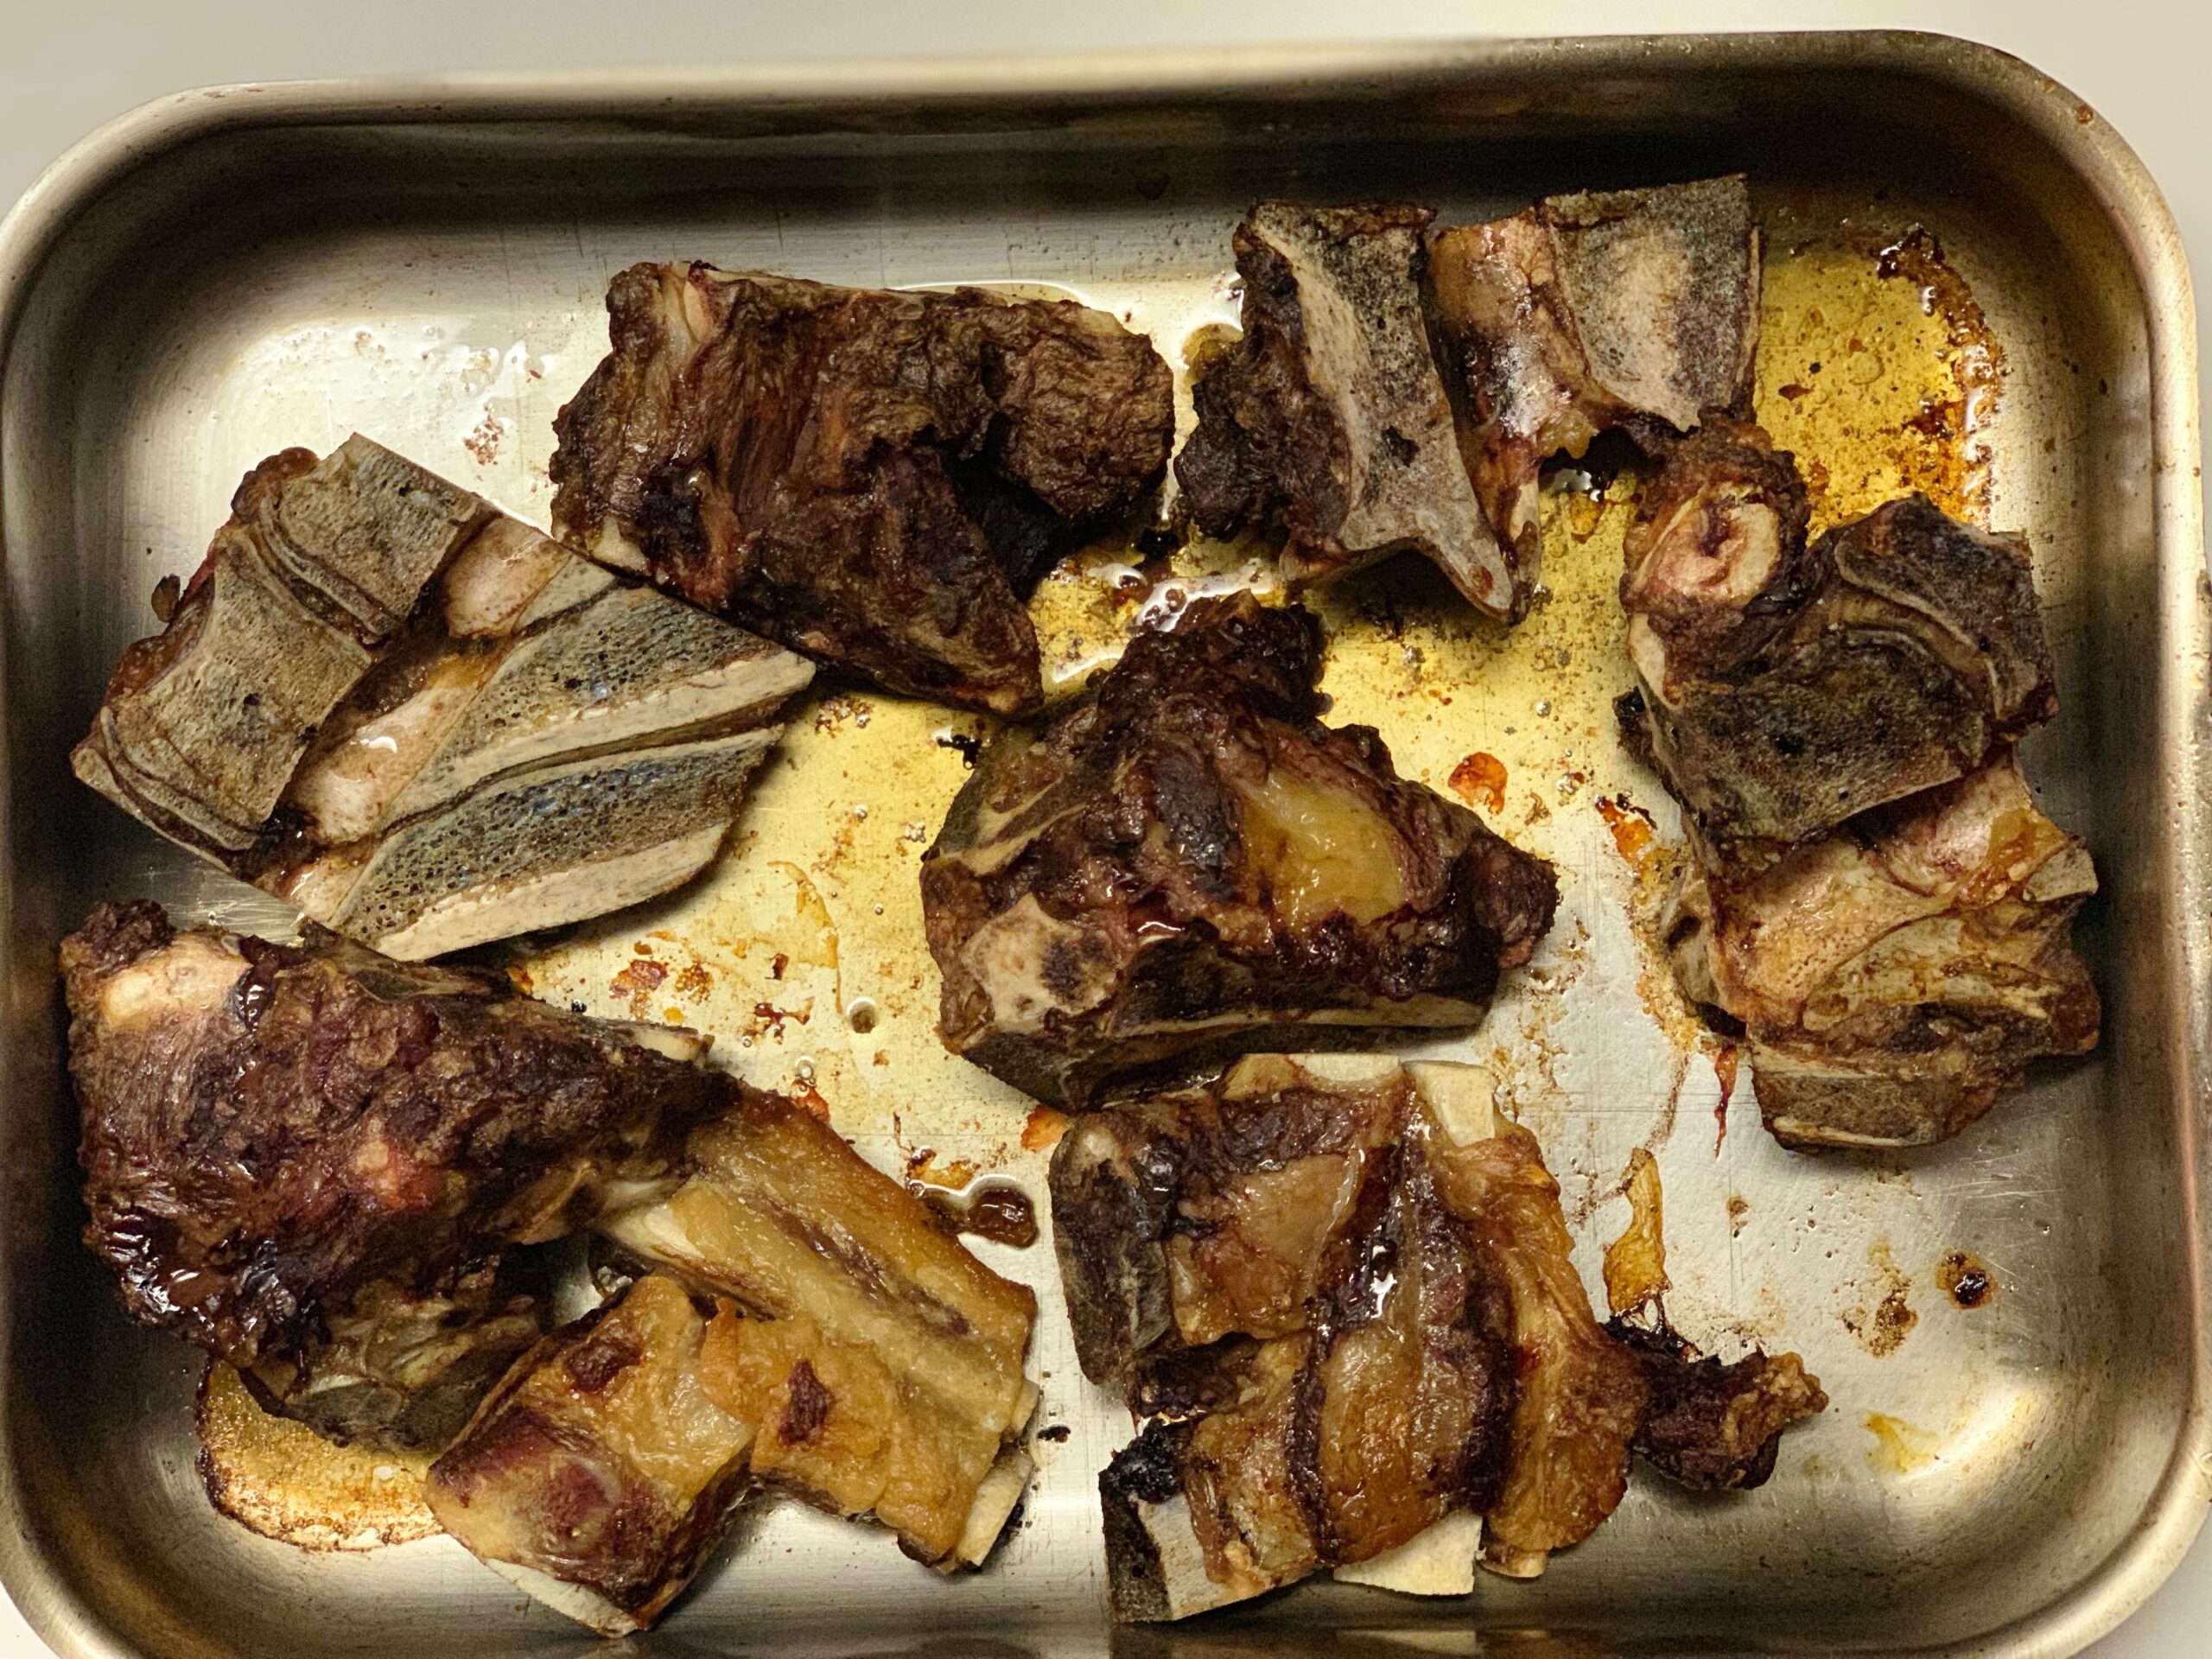
Tip # 1: Roast Your Bones for Deep Flavor
Roasting adds a rich, dark color and complex flavor to the bones. Whether you are using a leftover carcass from a homemade roast chicken or buying fresh beef bones, this step is essential.
I’ll just spread the bones in a large roasting pan and roast them at 450˚F (235˚C) for about 30-40 mins (turning them after about half the time). This works great in any large roaster or even a cookie tray.
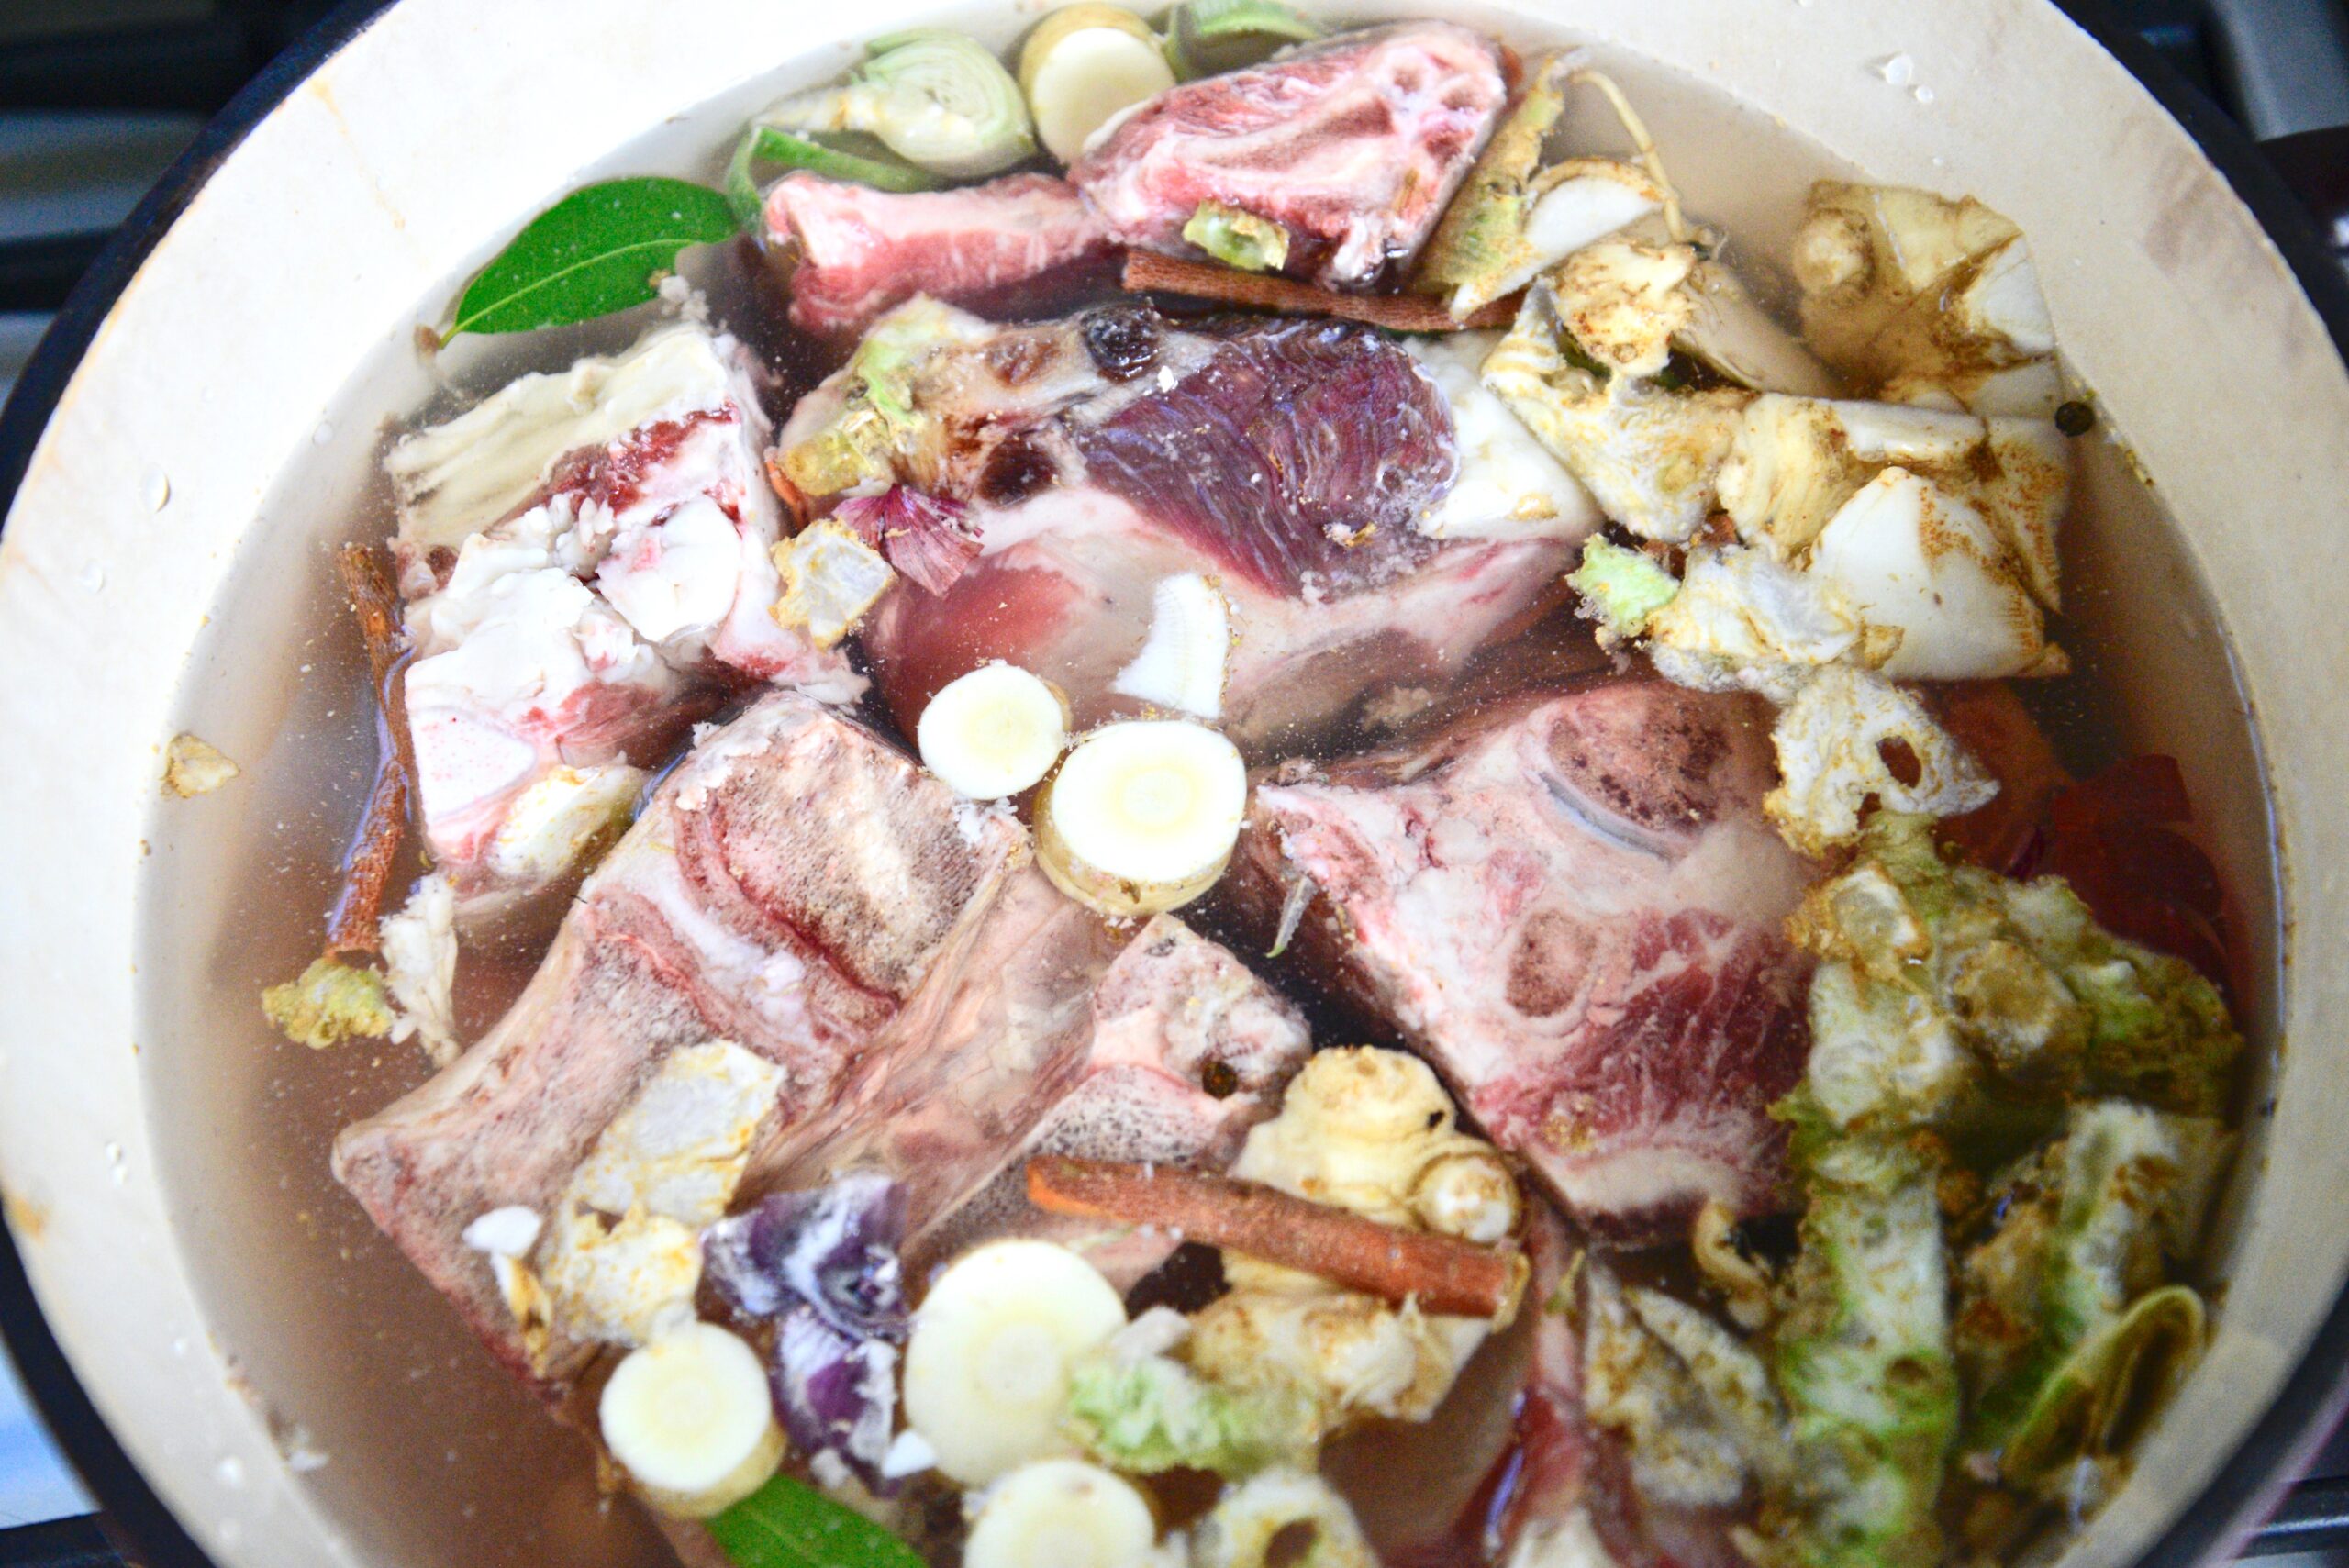
Put them into a stock pot or cast iron dutch oven and just about cover them with filtered water.
Tip # 2: The Power of Apple Cider Vinegar
Once I have added cold filtered water to the bones, I add 2-4 TBSP of apple cider vinegar and let it sit for 30 to 60 minutes. This easy step helps draw the trace minerals and nutrients out of the bones.
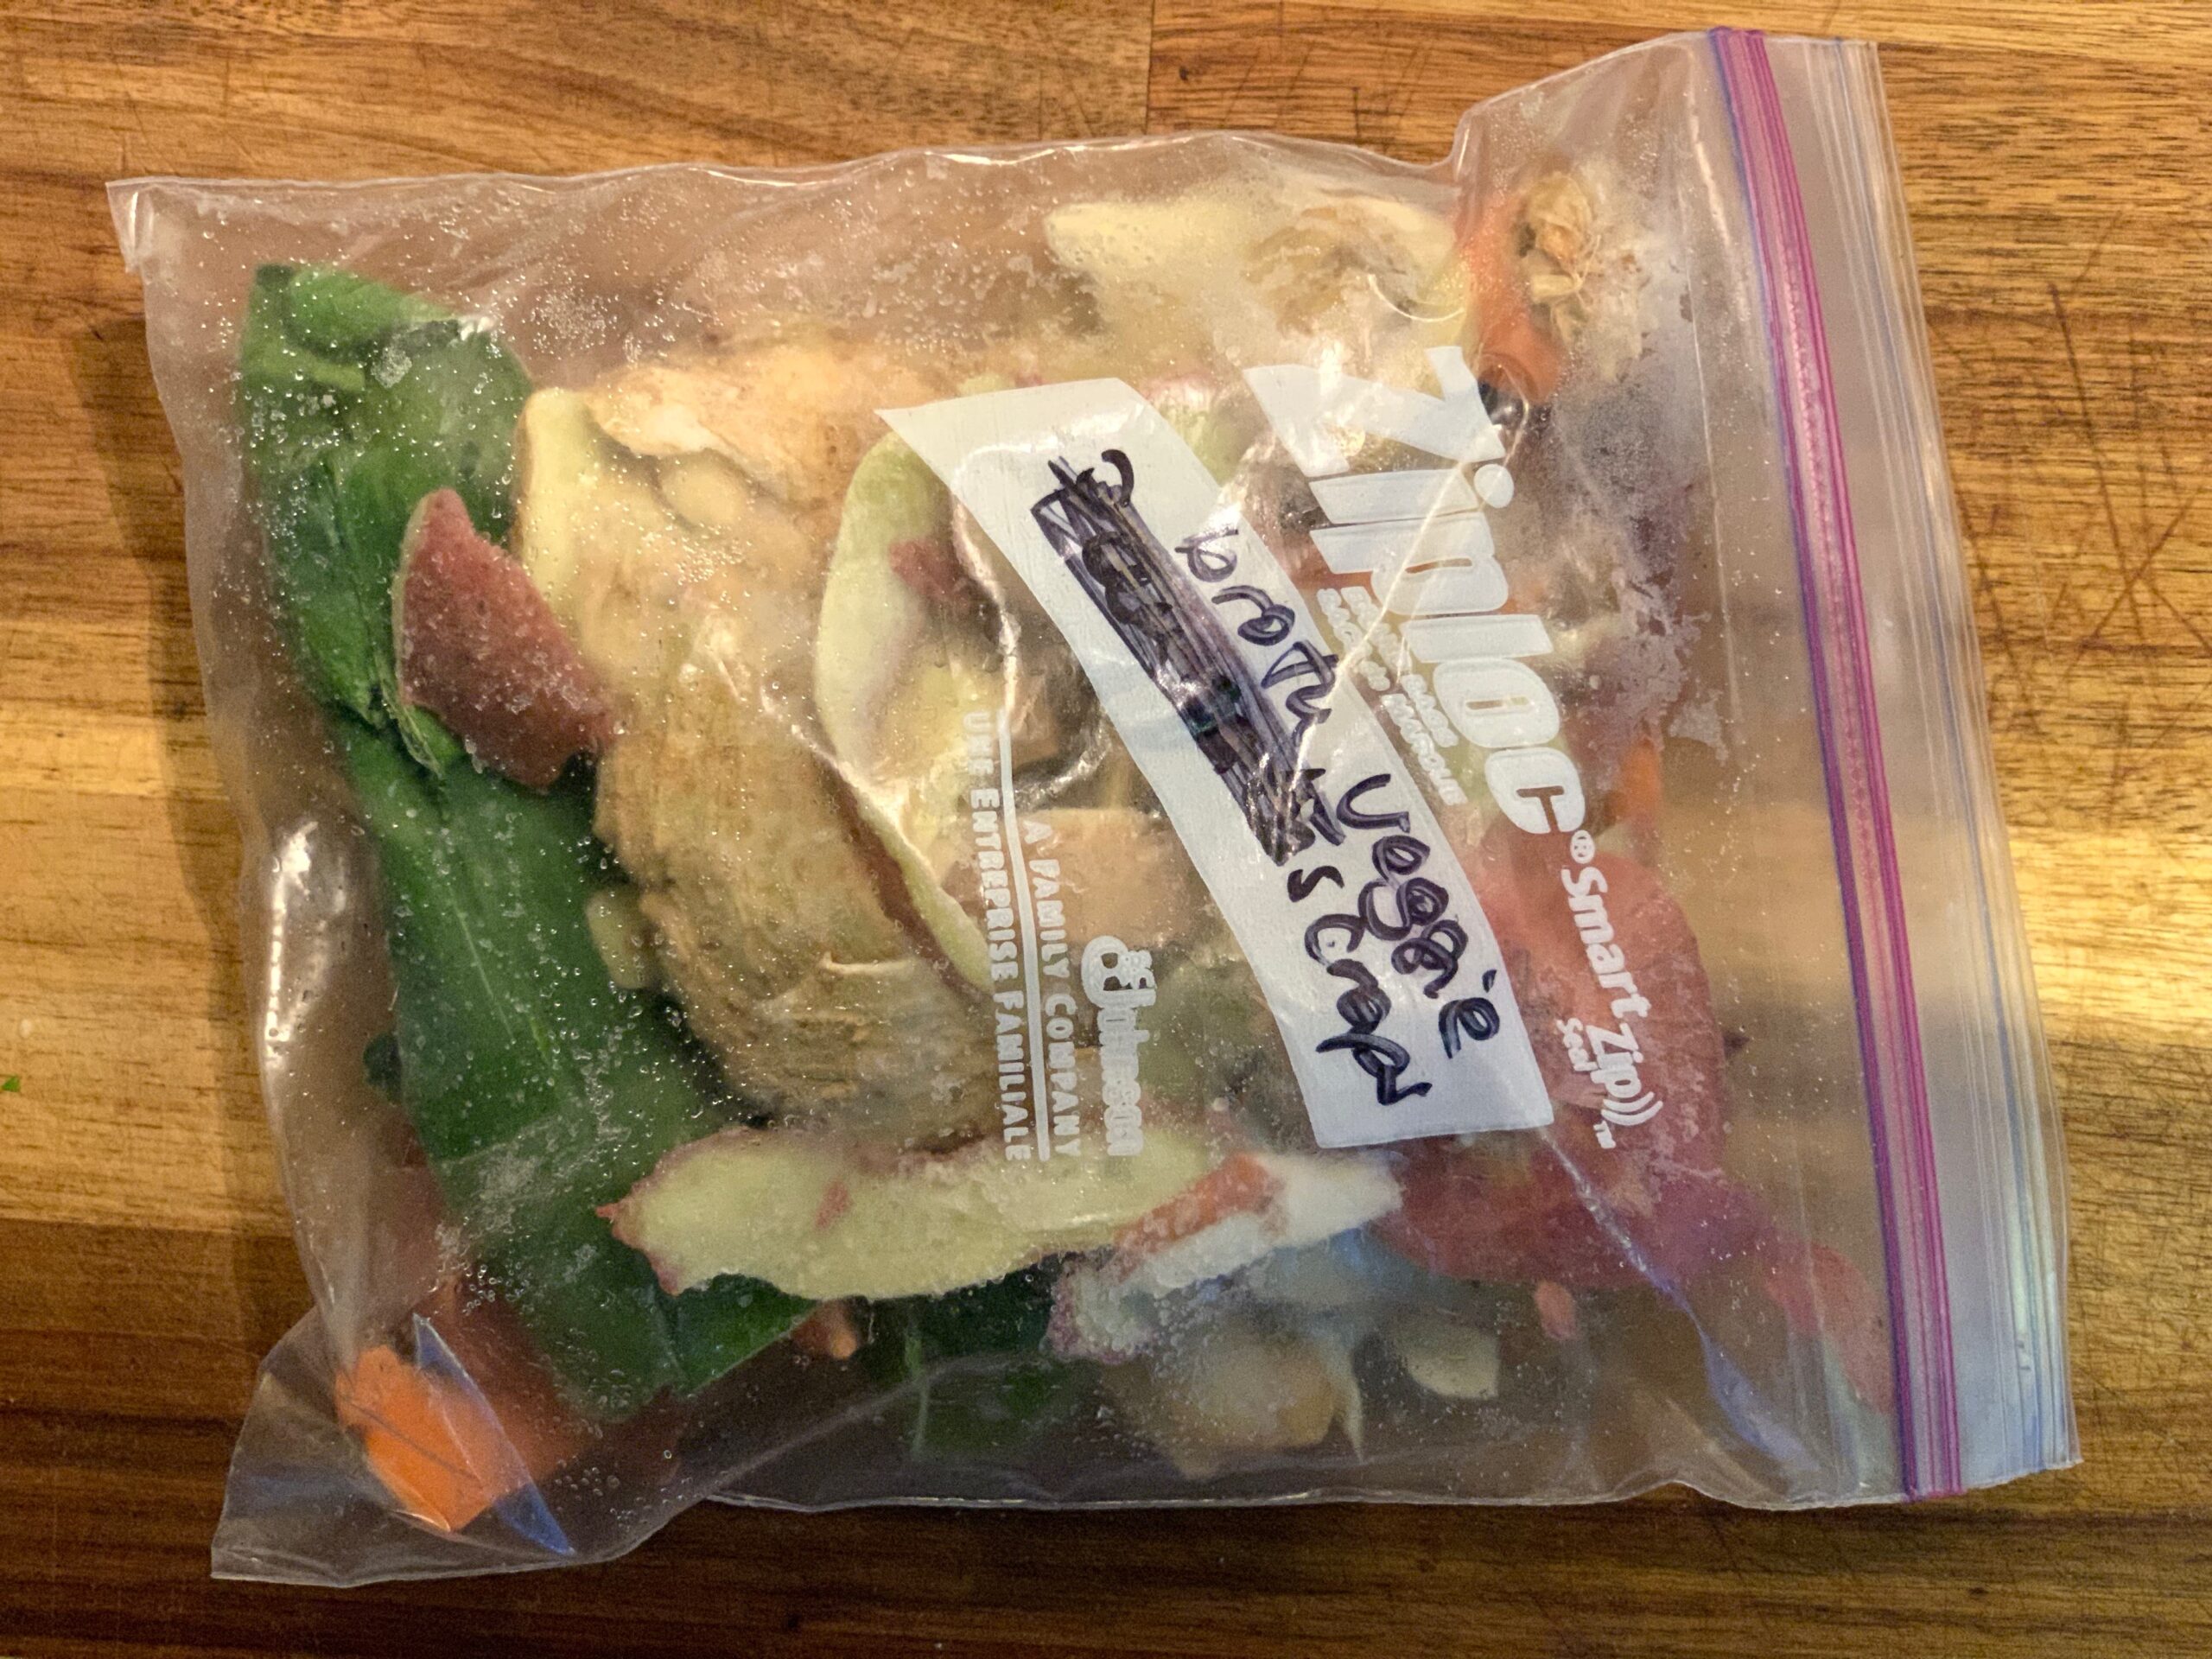
To increase the flavor of your beef bone broth, don’t forget the veggies! I love a low-waste kitchen, so I use frozen veggie scraps like onion skins, carrot peels, and parsley stems that I keep in a ziplock bag in my freezer at all times. You can also add a bay leaf or two and some peppercorns.
Tip # 3: Only Simmer – Never Boil
This may be the most crucial tip for making bone broth that gels. If you boil the bones at high heat, the collagen might be destroyed. You want a very gentle, traditional simmer where little bubbles come up here and there.
- Beef: Simmer for up to 48 hours.
- Chicken: Simmer for about 6 hours.
Tip # 4: Choose Collagen-Rich Knuckle Bones
Collagen is most abundant in the joints. If you have a choice at the butcher, go for knuckles, ribs, or oxtails. Using a variety of bones ensures your homemade broth is thick and gelatinous once cooled.
Tip # 5: Prioritize High-Quality Ingredients
The health of the animal affects the quality of the broth. I feel strongly that the healthier the animal, the healthier our food will be. Whenever possible, choose pasture-raised or organic bones to avoid antibiotics and ensure a nutrient-dense result.
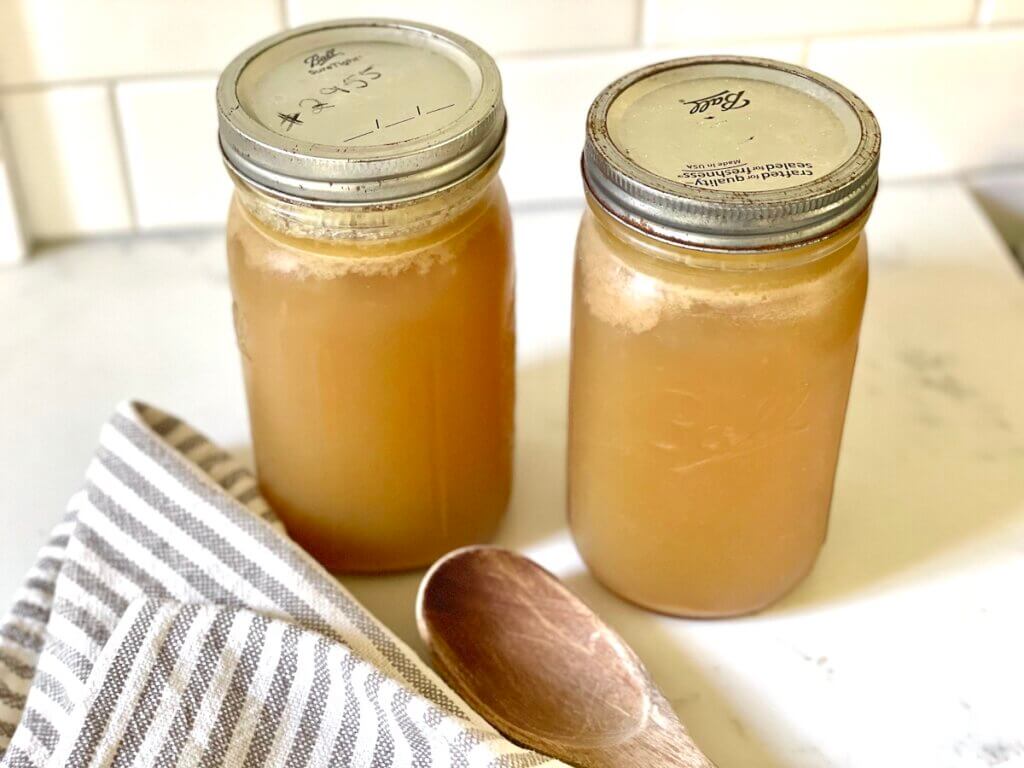
Storing and Using Your Broth
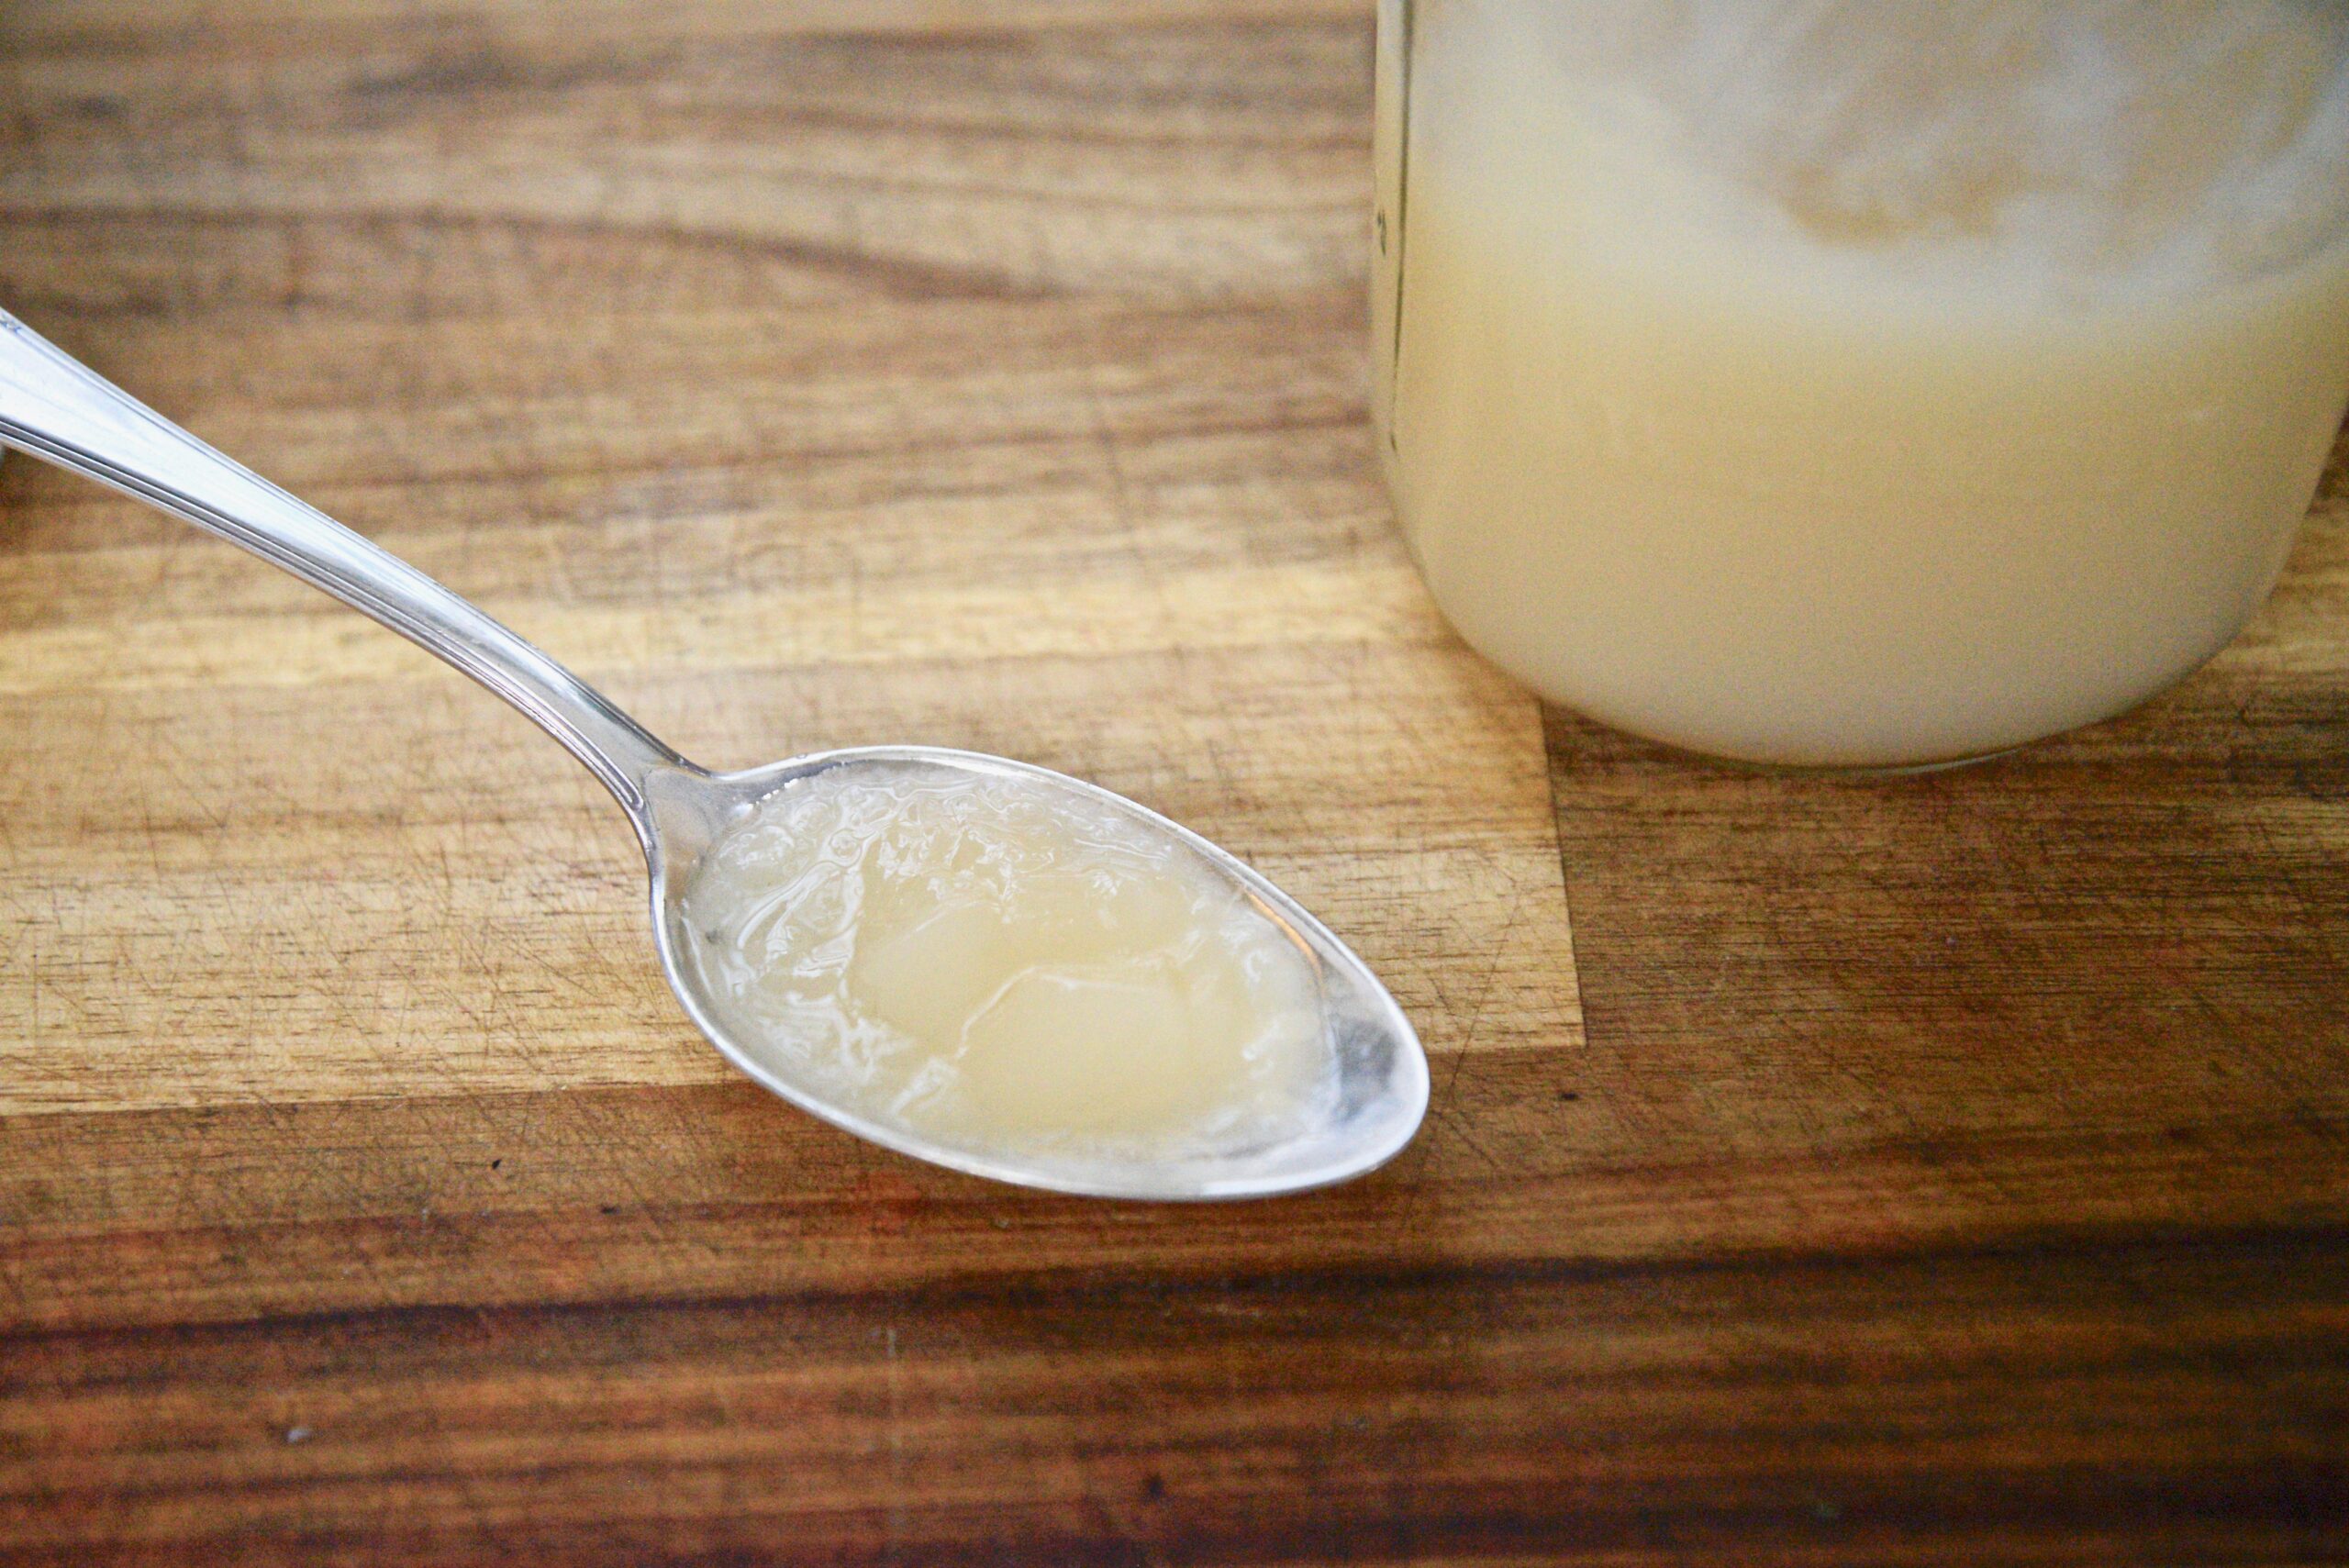
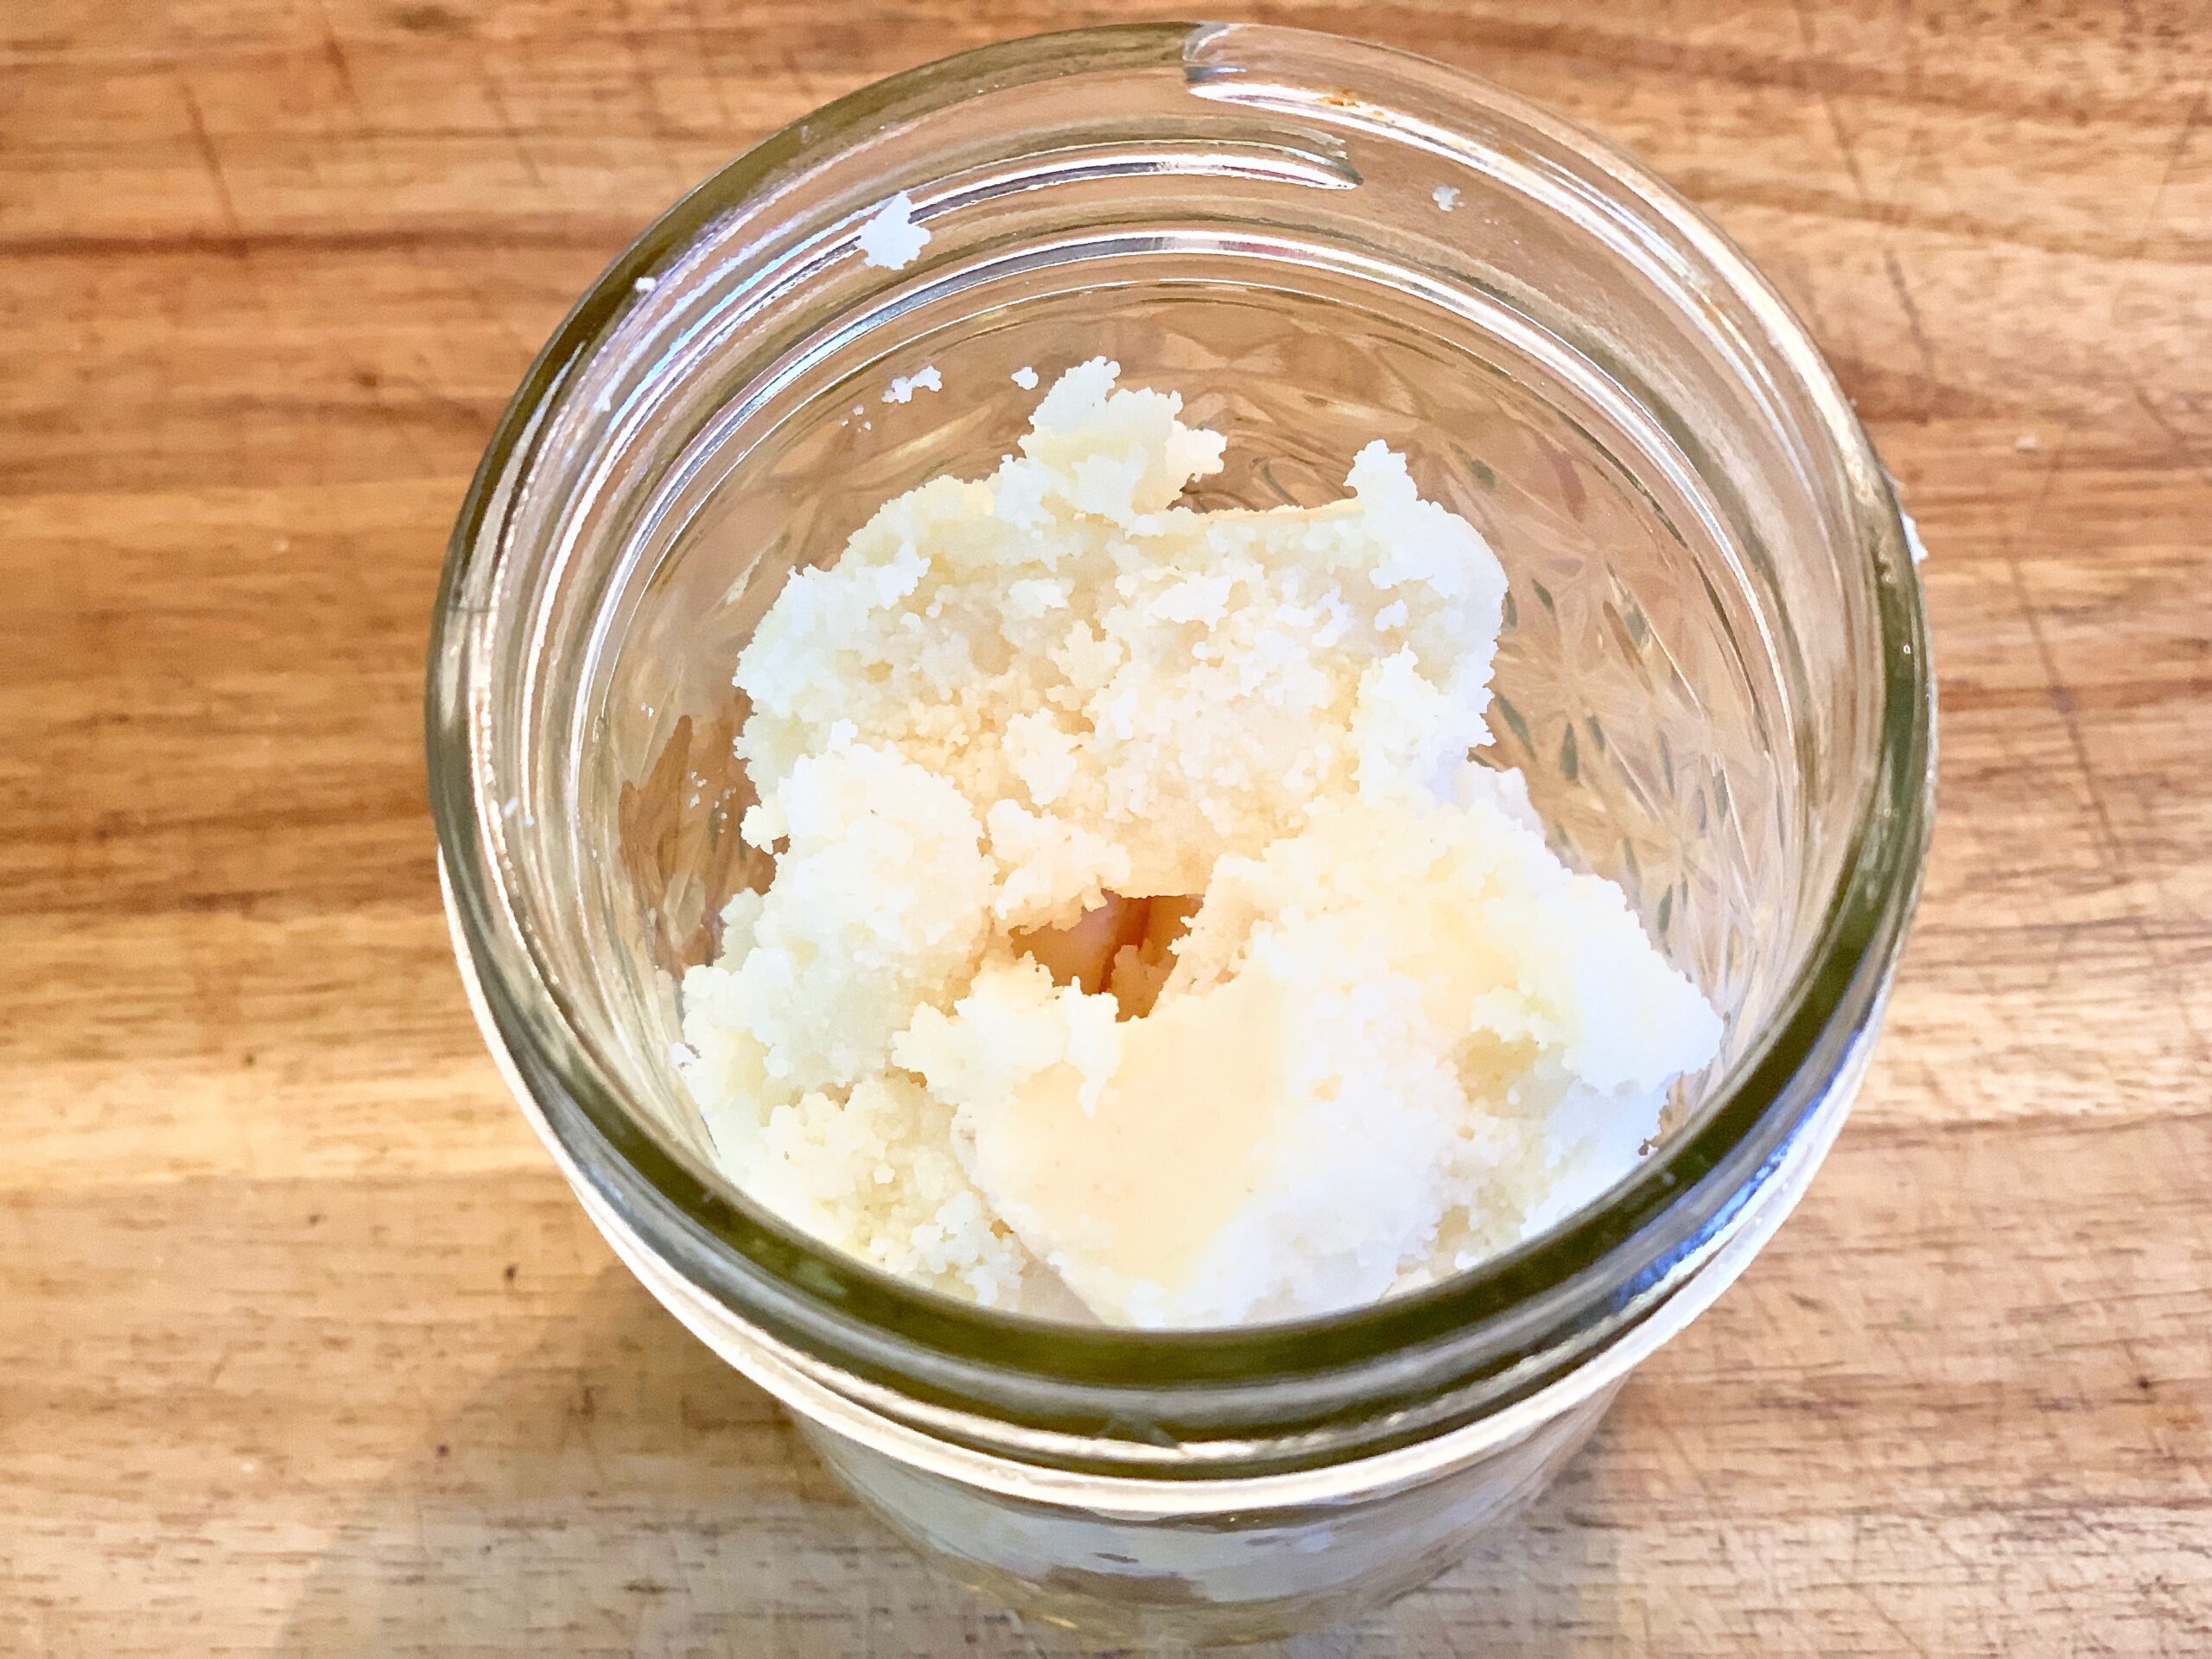
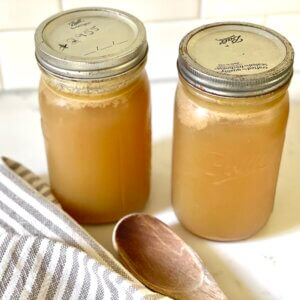
When you’re done simmering, let the broth cool and strain it into glass jars. You’ll notice a layer of fat on top – this is beef tallow, and it is excellent for frying potatoes!
Homemade bone broth lasts 3-7 days in the refrigerator and up to 3 months in the freezer. Use it as a base for my German meatballs in white sauce or simply sip it straight from a mug.
👉 TIP: If you’d like to use Mason jars or Weck jars for freezing, only fill them about 80% full and lay them in the freezer at an angle. That increases the surface and prevents the glass from breaking.
How to use bone broth
Here are our favorite ways and recipes to use homemade bone broth:
- You can sip it straight from a cup
- Add it to your favorite recipes, such as creamy celery soup, chicken and sourdough dumplings, or German meatballs in white sauce
Frequently Asked Questions
The “gel” comes from collagen. If your broth stayed liquid, you may have used too much water or boiled it too vigorously instead of simmering. Using more “jointy” bones like knuckles or feet will also help ensure a perfect gel next time.
While you can make broth with raw bones, roasting them is a traditional step that significantly improves the flavor and color. It removes the “raw” taste and gives you that deep, rich brown broth that looks as good as it tastes.
Yes! A slow cooker is an easy way to maintain a low simmer for 24-48 hours without needing to watch the stove. Just ensure you still follow the tip to add apple cider vinegar and start with cold water.
After a long simmer, the bones should look “spent.” For chicken bones, they may even become soft enough to crumble between your fingers. This is a sign that all the minerals and collagen have been successfully pulled into your homemade broth.
Homemade Bone Broth
Ingredients
- 1 pound bones beef or chicken
- 1 handful veggie scrapps onion peels, carrot peels, parsley stems etc
- 3 TBSP apple cider vinegar
- 2 whole bay leaves
- 10 whole peppercorns
Instructions
- Pre-heat your oven to 450°F. Place the bones in a roasting pan and roast for 30-40 minutes, turning halfway through, until they are deeply browned and fragrant.
- Transfer the roasted bones to a large stockpot or Dutch oven. Add your veggie scraps, herbs, and apple cider vinegar. Cover with cold filtered water until the bones are just barely submerged.
- Let the mixture sit for 30-60 minutes before turning on the heat. This helps the vinegar begin to pull minerals from the bones.
- Bring the pot to a very slow simmer over low heat. Avoid a rolling boil! Look for "lazy bubbles" breaking the surface.For Chicken: Simmer for at least 6-12 hours.For Beef: Simmer for 24-48 hours.
- Once finished, remove the large bones with tongs and strain the liquid through a fine-mesh sieve into glass jars.
- Allow the broth to cool to room temperature before refrigerating. Once chilled, a layer of fat (tallow) will wrap the top, sealing the broth and keeping it fresh longer.
Notes
- Storage: Keeps in the fridge for up to 7 days or in the freezer for 3 months.
- Don’t Toss the Fat: Carefully scrape off the solidified fat cap to use for roasting potatoes or sautéing vegetables – it’s “liquid gold” in the kitchen!
- Don’t let the long cook time discourage you! Almost all of this is ‘hands-off’ time while the pot whispers on the stove (or in the slow cooker). If you don’t want to leave your stove on overnight, simply turn it off before bed and resume the simmer the next morning.
Nutrition
Pin for Later:

Since finding this site it has become my “go-to” for learning about making all things from scratch! My grandmother was born in Austria, and somehow (she never talked about “those” dark years) wound up in Germany. She was an excellent cook and baker (bake-tress? 😉) Eventually making it to the states.
She would never allow us in the kitchen when she was cooking, always lamenting that out “long hairs” would somehow get in the food! LOL So it wasn’t until I was off living on my own that I wanted to recreate some of her nostalgic dishes, goulash, chicken and dumplings, braised red cabbage, and HERE they all are!!! And very, very similar to my grandmother, Josephine’s recipes – kept in her head and never written down.
But I digress! BEFORE finding this post on making beef bone broth someone had given me a Ninja combo machine. I decided to try pressure cooking my bones (and a large short rib.) After roasting them. I put the machine on hi and set the timer for 4 hours. It took 2 more hours for the pot to cool down. After opening I didn’t feel satisfied that all the marrow had been removed so I did the whole process over again overnight. When I opened the pot the next morning everything smelt burnt. It was unusable. Such a waste of quality ingredients. 😢 I wish I’d found your video first Anja! NOW I know, low and slow… like the turtle and the hare. Faster doesn’t always mean better.
I am so happy to hear my you enjoy my recipes and my content and that you’re connecting back to your heritage that way ~ Anja
Great post! I make mine from our own farm-raised meat chickens, but I haven’t been able to stomach putting the feet or heads in. 😬 Maybe one of these days. But I do love to add veggies when I make the broth. I sometimes keep a bag in the freezer of cut off celery tops, or carrot peelings, etc so I can toss those in the next time I make broth. Onion and a bay leaf is also fantastic.
Yes, exactly! Freezing veggie scraps is the way to go and I bet your own chickens have a fantastic flavor!
Wow!!! This looks so simple and amazing!!!
Thank you and – yes, it is 🙂
Wow, great information! Changing subject, lol, love all the natural light in your kitchen.
I make this for my fur-babies, they ❤️ it, me not so much. 😂
I make mine in an instant pot.
Thanks for the 💜. I enjoy being in our kitchen, can you tell??? Love that you’re treating your fur-babies so well!!
Nice tips! Any tips for the odor? I have been having to brew mine in the garage in a slow cooker as the scent of the bones simmering isn’t so pleasant to me. Thanks for sharing!
Thank you! I do find that there’s more smell from gras-fed animals but knowing where that comes from, I personally like it. Sounds like you got it figured out with having the slow cooker in the the garage 🤣