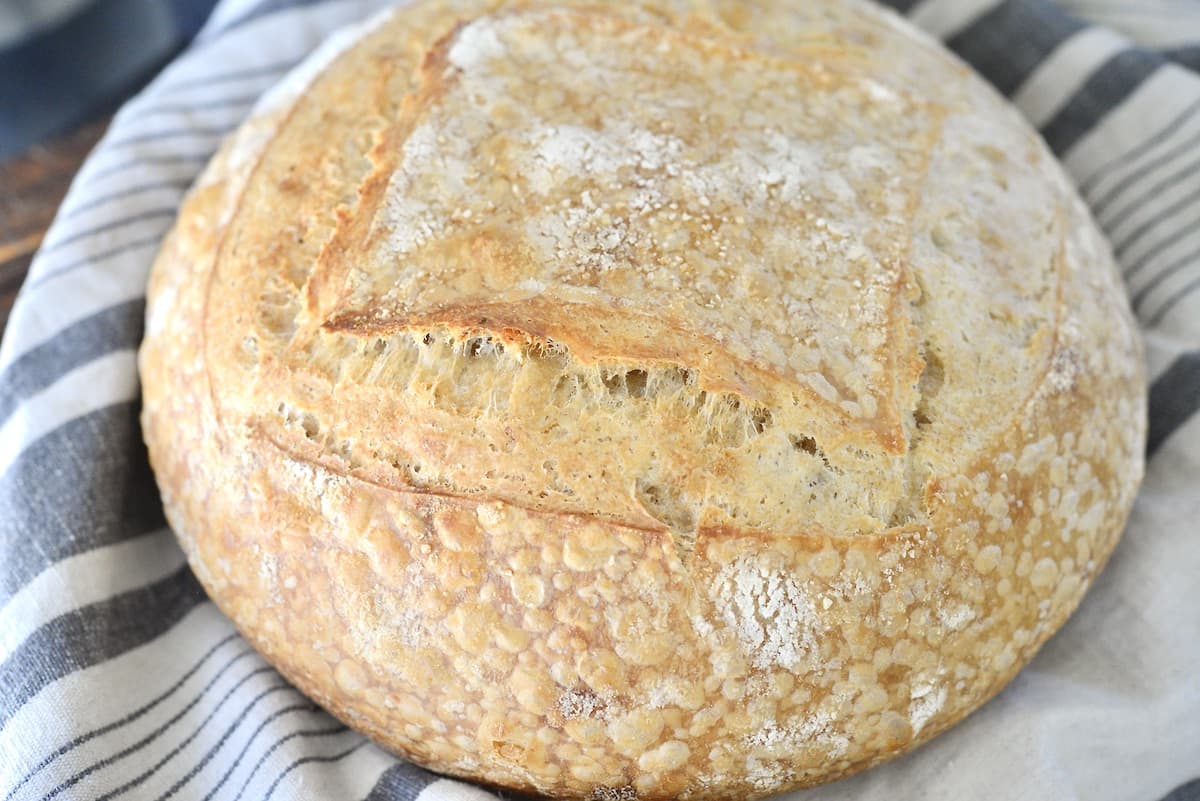
Olive Oil Bread Recipe
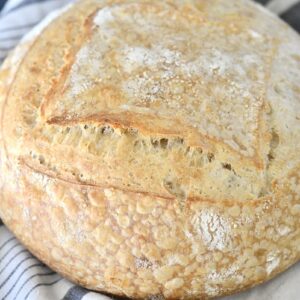
Get ready to fall in love with olive oil sourdough bread, with its soft crust, tender crumb, and rich flavor. Using my step-by-step instructions and helpful tips, even beginners can make this olive oil bread recipe!
This post contains affiliate links, which means I make a small commission at no extra cost to you. You can read my full disclosure.
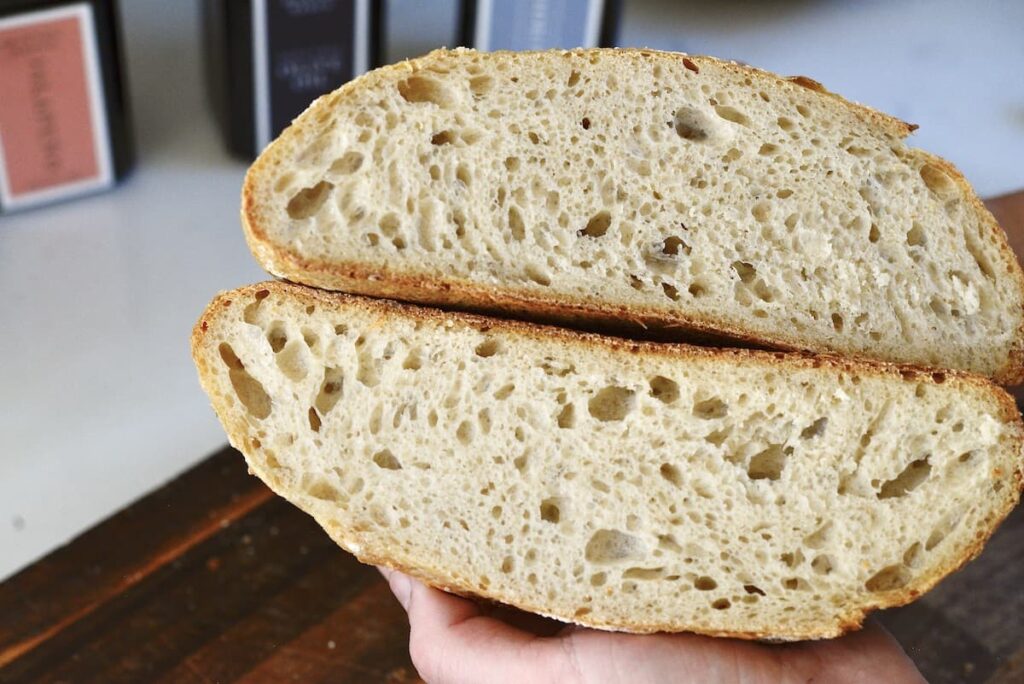
The olive oil complements the typical sourdough flavor to produce a mellower flavor with a beautifully even and moist crumb.
A Little Note from My Kitchen: While I love a traditional crusty boule, this Olive Oil Sourdough has a been a family favorite and it’s the loaf I bake most often now. Adding just a touch of good quality olive oil completely transforms the texture. It doesn’t just bring a nice, mellow depth of flavor; it actually softens the crumb, making it moist, even, and tender. If you’ve ever struggled with sourdough that feels a bit too tough to chew or goes stale too quickly, this is the loaf that will change your mind. It’s pure comfort food, and I can’t wait for you to experience it.
The Best Sourdough Bread Recipe
What makes my olive oil bread recipe special
New To Sourdough? Check out My Super Simple Sourdough Course!
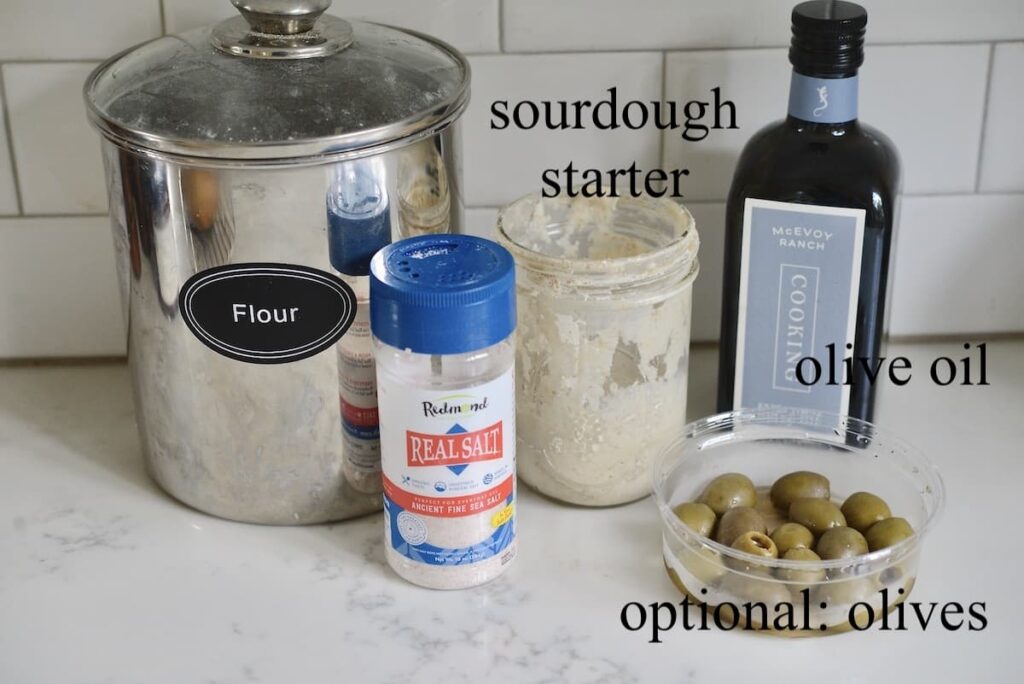
Olive Sourdough Bread Recipe Ingredients
For the ingredient amounts, refer to the recipe card at the bottom of this post.
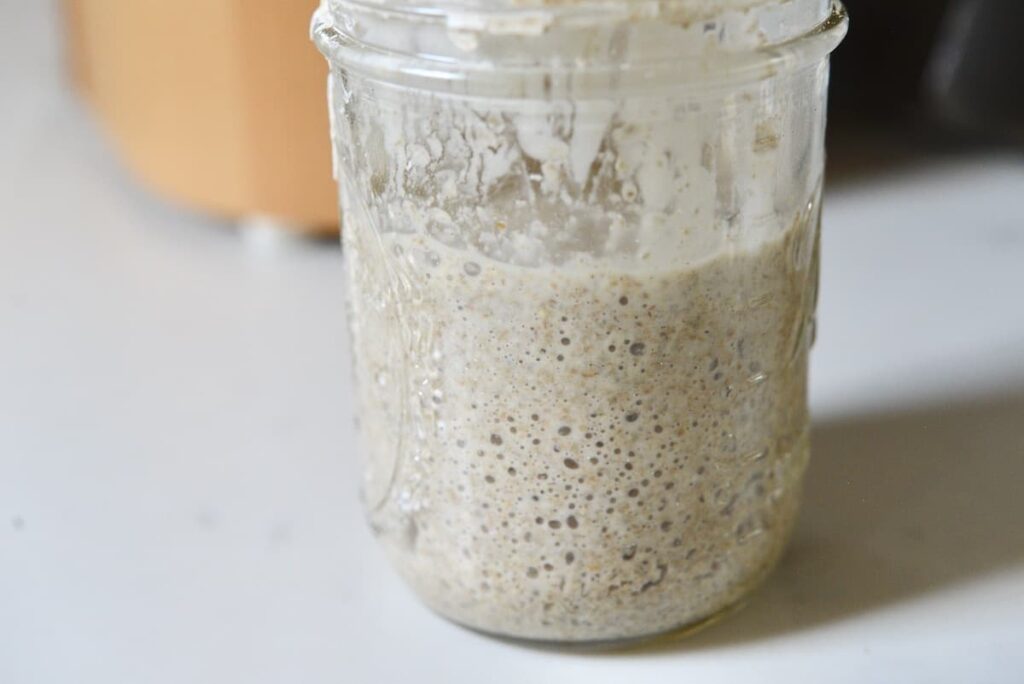
- Active Sourdough Starter: If you don’t have a starter yet, I encourage you to check out my super simple method to make your own starter from scratch.
- Olive Oil: I recommend using high-quality extra virgin cooking olive oil.
- Flour: I use organic unbleached all-purpose flour, but use whatever flour you have on hand
- Salt: Be sure to use a coarse grain sea salt or kosher salt – avoid using iodized table salt.
Optional ingredient– olives: If you would like to make a loaf of olive bread, you will need some black or green pitted olives.
Useful tools and equipment
- Stand mixer: People have been making and mixing bread doughs for millennia but a stand mixer makes that so much easier.
- Digital Kitchen Scale: Weight measurements are so much more accurate than volume measurements and digital scales are very affordable if you don’t already own one.
- Banneton: These proofing baskets are very useful with or without a cloth liner. However, you can use any bowl and line it with a kitchen towel or other cloth if you don’t own a banneton.
- Dutch Oven: I like to bake sourdough bread in one of my cast-iron Dutch ovens. With the lid on, they perfectly trap the steam to ensure a nice rise.
- Bread Lame: While you can also use a sharp knife to score your bread, a bread lame uses a razor blade and is extremely sharp.
You can learn more about my favorite sourdough baking tools in this post.
How to Make Olive Oil Bread
1. Make the Dough
- Measure and add your ripe sourdough starter with the wet ingredients to the bowl of your stand mixer or a large mixing bowl. Mix well.
- Add the dry ingredients and mix in your stand mixer for about 8 minutes. If you don’t have a stand mixer, you can use a Danish dough hook to mix this dough by hand.
- It should be a somewhat shaggy dough.
TIP: Be sure to use a mature sourdough starter for this recipe. If your starter is still young, you can add 1 g of commercial yeast to help the dough rise.
2. Bulk Fermentation, Stretch and Fold
- Cover the bowl with a clean kitchen towel and let the dough rest at room temperature for 30 minutes.
- With wet hands, perform the first set of stretch and folds.
- Let the dough rest in a warm place for 30 minutes.
- Do 2 more sets of stretch and fold.
- After the third time, let the dough ferment for one hour before you do the final stretch and fold.
3. Shape the Dough
- Add some flour to your work surface.
- With a dough scraper or silicone spatula, put the dough onto the floured surface.
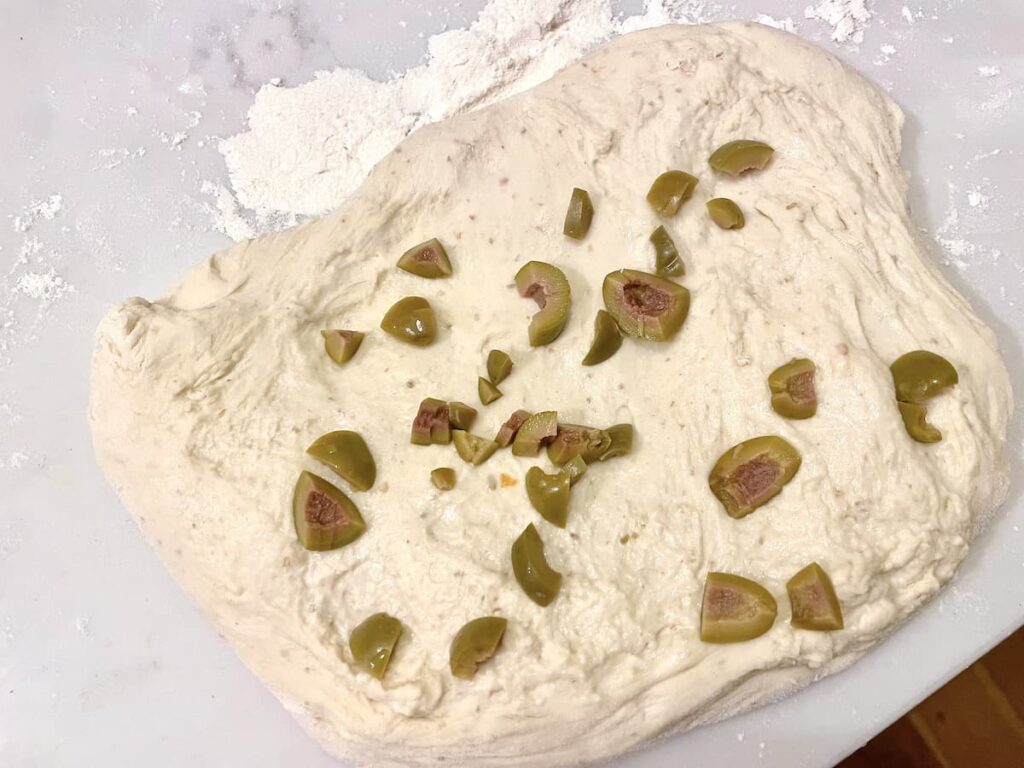
- Gently stretch the dough and fold it back over itself.
- Turn over the dough ball and gently pull it toward yourself while giving it a slight turn to get some tension on the surface of the dough.
TIP: If you want to include any additional ingredients, such as olives, this is when you will add them.
4. Proof the Dough
- Heavily dust your proofing basket with flour (I like to use 50% AP flour and 50% rice flour).
- Put your shaped dough into the floured banneton with the seam side up. Cover it with a beeswax wrap or plastic wrap.
- Let it ferment in the refrigerator for at least 10 hours. You can even leave it in there for up to 48 hours.
Sample schedule for making olive oil bread
First Day
3:00 pm: Mix dough
3:15 pm: Bulk fermentation with 4 stretch and folds
5:45 pm: Shape the dough
6 pm: Second rise
Second Day
8 am: Preheat the oven
8:30 am: Bake
9:20 am: Cool
11:20 am: Enjoy your fresh sourdough bread!
5. Preheat the Oven and Dutch Oven
- The next morning, or when you are ready to bake, place a lid on a Dutch oven, then set it on an oven rack. Preheat the oven to 450°F. for about 30 minutes.
- After 25 minutes, remove the olive oil sourdough loaf from the refrigerator.
6. Score the dough
- Remove the hot Dutch oven from your oven and remove its lid.
- Place the olive oil bread dough right into the hot Dutch oven. To make it easier, place the unbaked dough onto a piece of parchment paper first, then hold the edges of the paper to lower the loaf into the hot Dutch oven.
- With a bread lame or very sharp knife, score the top of the dough in your favorite pattern.
7. Bake the bread
- Put the lid back on the Dutch oven and place it on the hot oven. Bake your sourdough loaf for about 25 minutes.
- Remove the lid and bake the bread for another 25 minutes or until the crust is golden brown.
- The final dough temperature should be about 200˚F.
TIP: For best results, place a baking tray on the lowest oven rack. That prevents the bottom of the loaf from turning too dark.
8. Cool the olive oil sourdough bread
- When the bread is finished baking, carefully transfer it to a wire cooling rack.
- Let it cool down for at least 2 hours before slicing it.
Olive Sourdough Bread Variations
This olive oil bread recipe is pretty adaptable, making it the perfect launching pad for additional ingredients.
- Olives: You might like to add some chopped green olives or Kalamata olives for a nice savory bread.
- Roasted garlic: Adding chopped roasted garlic pieces works really well in this recipe.
- Method: You can even bake the sourdough bread in an air fryer!
Storing Olive Sourdough Bread
There are two ways you can prepare this bread ahead of time:
- You can make the dough and let it ferment in the refrigerator for a day or two or whenever you are ready to bake.
- Alternatively, you can bake the bread and either freeze it whole or cut it in half. I recommend placing it in plastic wrap while it is still slightly warm and freezing it right away. You can then crisp it up in a warm oven for 15-20 minutes.

Olive Oil Bread
Ingredients
- 125 grams active sourdough starter
- 40 grams olive oil preferably extra virgin olive oil
- 300 grams warm water
- 450 grams all-purpose flour
- 10 grams salt
Instructions
- Measure and add the wet ingredients to a large mixing bowl. Whisk to combine.
- Add the dry ingredients to the bowl. Combine on medium speed in a stand mixer fitted with a dough hook for 8 minutes (or by hand with a Danish dough hook).
- Cover the bowl and let the dough rest for 30 minutes.
- With wet hands, perform a few stretch and folds. Cover the bowl and let the dough rest for another 30 mins. Repeat the stretch/fold and rest period 2 more times.
- Cover the bowl and let the dough rest for 60 minutes in a warm place.
- On a floured surface, shape the dough into a round. While gently pulling the dough ball towards you and turning it slighlty, tuck the dough until you create surface tension.
- Place the dough ball into a floured proofing basket, seam side up. Cover the basket with a beeswax wrap or plastic wrap. Let the dough ferment in the refrigerator for 10 hours or more.
After Fermentation
- Place a Dutch oven, covered with a lid, in an oven. Set the oven to preheat at 450˚F for 30 mins.
- After preheating, remove the lid and place the dough ball in the Dutch oven floured side up. Score the top of the dough with a sharp knife or bread lame.
- Bake covered for 25 minutes, then remove the lid and continue baking for another 25 minutes, or until the loaf is golden brown.
- Let the bread cool on a wire rack for at least 2 hours before slicing.
Notes
- if your sourdough starter is young, you can add 1 g of quick-rise yeast to help with the rise.
- To make olive sourdough bread, you can stir in some chopped green or black olives to the dough before fermentation.
Nutrition
Other sourdough recipes and tutorials
Pin It For Later
So tasty! I had to improvise a little as I don’t have a mixer. It is hands down my new favorite sourdough recipe ! I added a touch of olive oil to the base of my heated Dutch oven. I baked 25 mins covered and 18 mins uncovered as the crust was already crisping. It came out perfect. I will be making this loaf regularly now! Thank you for the recipe.
I am so glad to hear that ~ Anja
Perfectly crispy on the outside and soft and fluffy on the inside! This is my new sourdough recipe! ❤️
Yay! Love that you love it ~ Anja
This is the strangest recipe! Using the mixer made the dough extra sticky. There is no real time allotted for rise. I left mine overnight. I didn’t get a great ear. But it baked well. The bread didn’t appear over or under proved. Taste was fine. Just lot of extra work and mess for adequate bread? I think if your better off just grating in frozen butter before baking.
I am sorry you weren’t loving it. I still make this all the time and it’s my family’s favorite ~ Anja
I have been sharing my sourdough breads with friend and your Olive Oil recipe is the number one request. I always add 2 tablespoon of fresh Rosemary. Thank you for all your recipes.
That sounds wonderful! Thank you so much for sharing ~ Anja
I followed directions however my bread seems “under baked”. I understand sourdough recipes need to be tweaked based on oven, house temp etc. Should I start by increasing the covered baked time?
thaNKS
I would start by increasing the baking time. You can also insert a thermometer into the middle of the bread where it should read ~ 200 degrees F.
I’m new to sourdough and have tried 3 other different recipes, this was THE BEST one so far, every bite out of it my partner kept repeating that was the best bread I did.
Now I would like to try adding to it, so my question is, for the olives and roasted garlic do you add it in the dough or is sprinkle just on top? Thank you!
I love this recipe. My family is also enjoying it as well , I’ve been trying differently spices and we are loving it. Thank you love your ideas
That souns great! Thank you so much for sharing ~ Anja
Also wondering I want to start with a cold Dutch oven so do u increase the baking time to 40 min covered per your instructions using a cold Dutch oven for a different recipe?
Yes, you can increase the baking time but you can also check the internal temperature of the bread (should be around 200˚F) ~ Anja
What size Dutch oven for this recipe? I’m torn between 5 and 6 quart and this is my first time with this recipe!
This is what I use: https://amzn.to/3UdtJYu ~ Anja
Second attempt. Keeps coming out great. Added sweet basil leaf to this batch.
Nice! I am sure it tastes great with basil ~ Anja
New to making sourdough and this is the first recipe I’ve used. Turns out great every time!
That makes me so happy to hear ~ Anja
What size Dutch oven are you using?
Mine is this Lodge combo cooker: https://amzn.to/3UdtJYu ~ Anja
I am new to sourdough and struggled to find the right texture. The dough was very wet and sticky. It broke when I tried to stretch and fold, any thoughts?
I’m having the same problem. Did you just add more flour?
Usually, I don’t recommend adding more flour but instead do more stretch-and-folds. However, you can try using a bit more flour and see how you like the bread ~ Anja
What is the four mill you have? It looks much easier and convenient than mine! I am loving following you!!
It’s a Mockmill and I love it: https://ourgabledhome.com/product/grain-mills/ Thank you so much for your sweet comment ~ Anja