How to Repair a Cane Chair Seat
You might be surprised how easy it is to repair the cane chair seat of your bentwood with just some ordinary household tools.
If you think that it is too complicated to repair a cane chair set, keep reading!
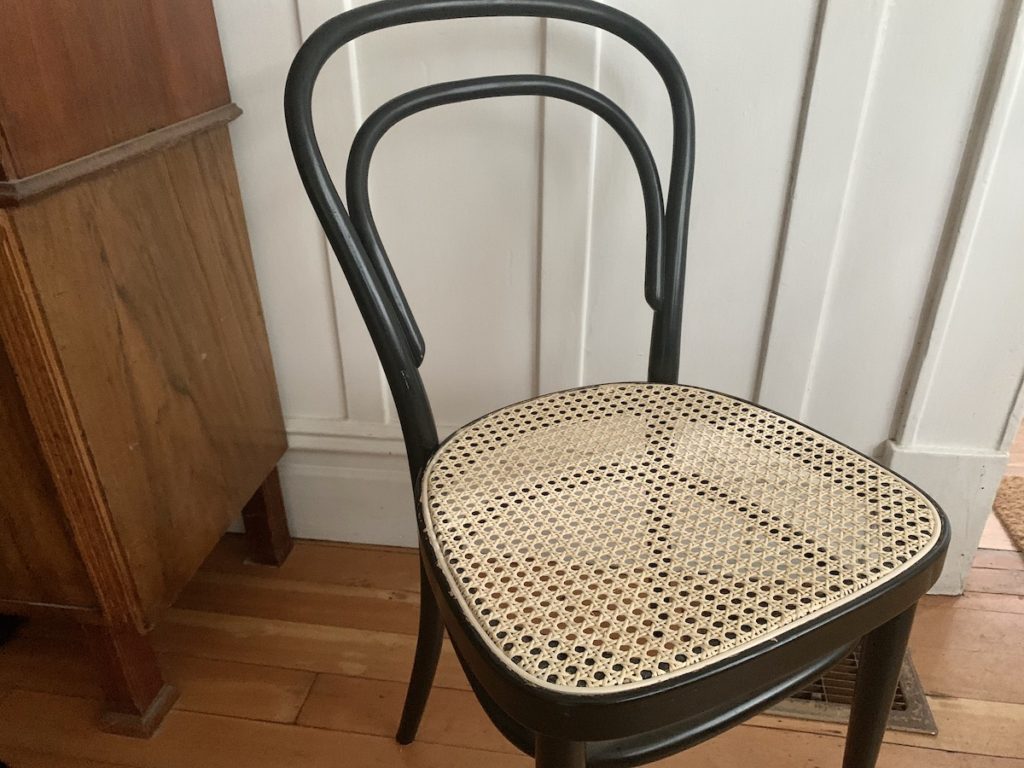
We have a whole set of Thonet bentwood chairs that my parents bought in 1978 and 1981 (how do I know? The year is stamped on the chair underneath the seat).
These classic cane chairs are perfect in our kitchen. With all this use, we’ve had to periodically repair a seat here and there, even though we have been putting chair cushions on them.
Years ago, I would take those Thonet chairs to repair shops. But now that I have repaired a few cane chairs myself, I just want to share with you how easy it actually is.
You will not need any special tools or skills for this repair. Hopefully, this tutorial inspires you and gives you the confidence to try to tackle more DIY repair projects in your own home!
This post contains affiliate links, which means I make a small commission at no extra cost to you.
What you need to repair your cane chair seat
Obviously, you need the cane chair replacement. It is very easy to find online. When you do order it, make sure it actually matches the hole sizes of your existing cane chairs.

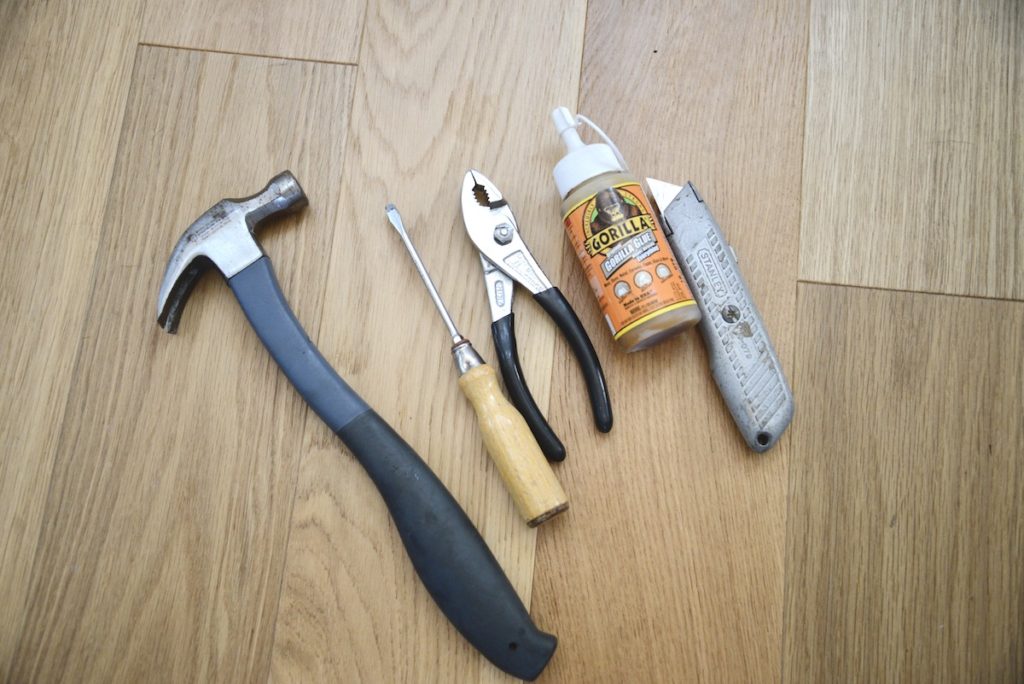
Then you need ordinary household repair tools:
hammer
flathead screwdriver or small chisel
boxcutter
scissors
wood glue
and pliers (just in case)
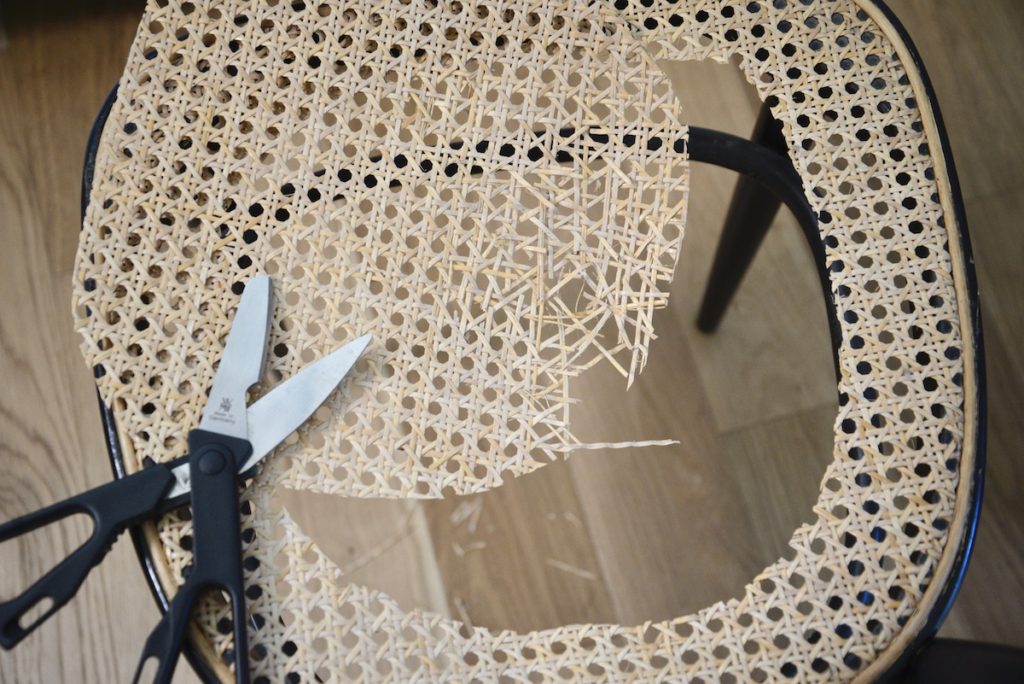
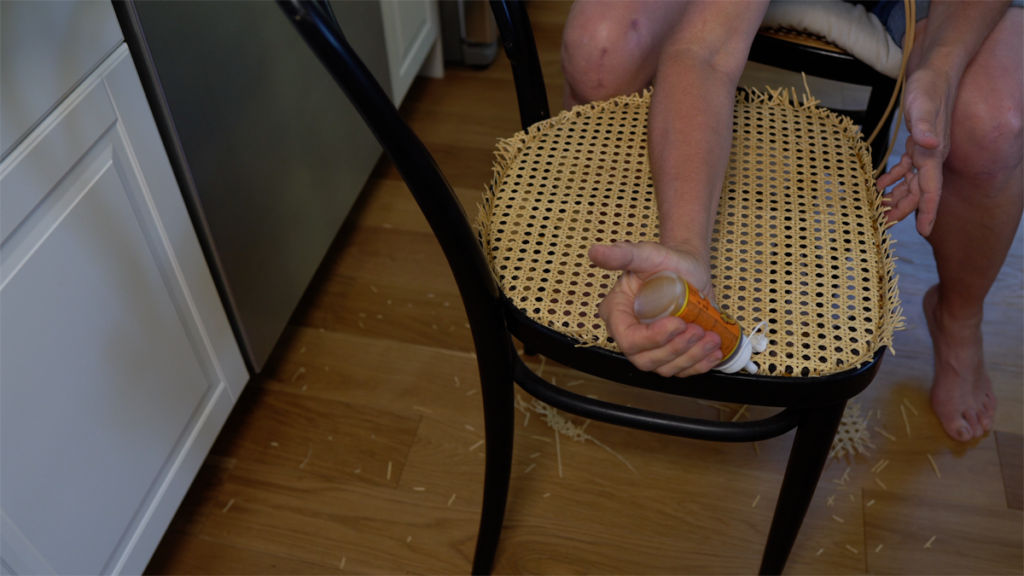
Cutting out the old seat
I like to cut out the old cane seat to give myself a bit more room to maneuver around. You can cut closer to the edge as I did!
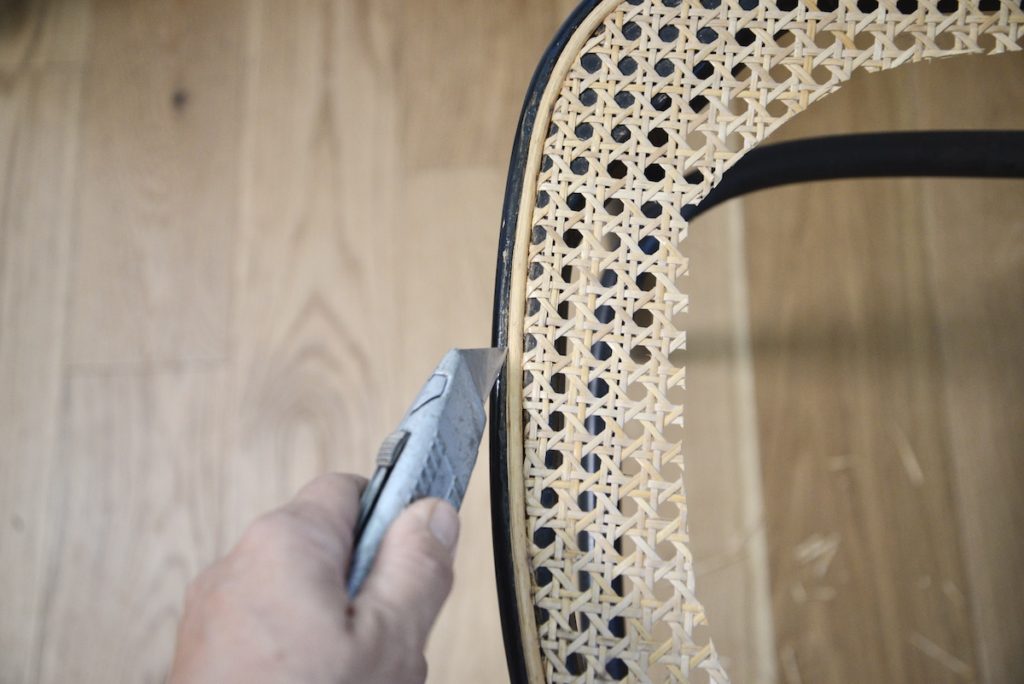
Cutting along the spline to loosen the glue
With the box cutter, carefully cut both sides of the spline to loosen the glue. Be very careful with sharp knives!!! Also, try to not cut into the actual chair the best you can!
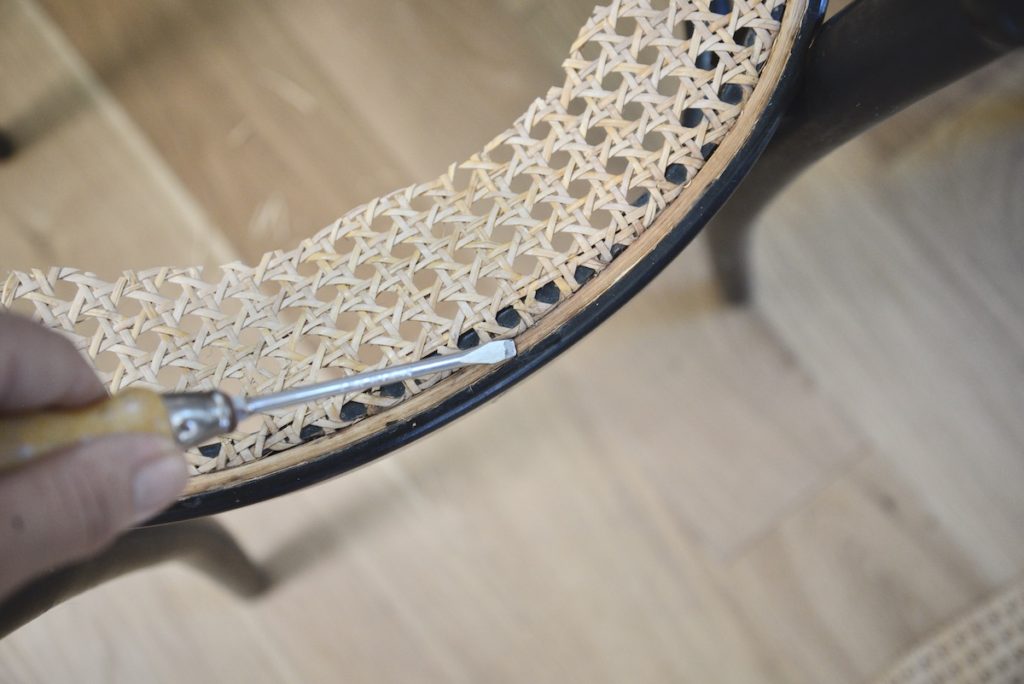
Chisel out the old spline
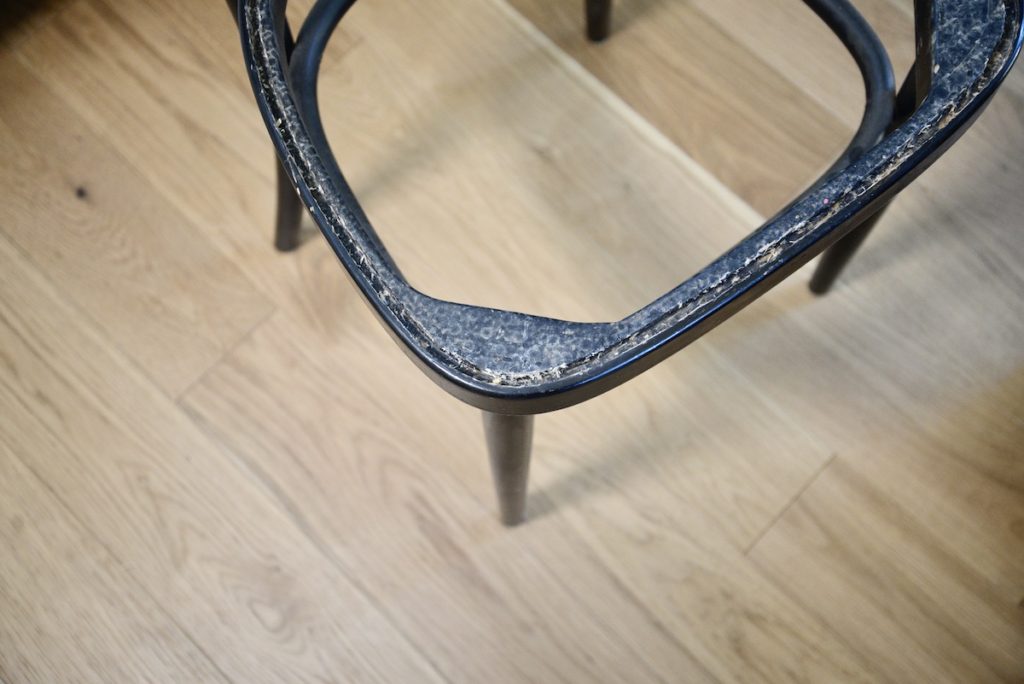
With your flat-head screwdriver or small chisel, take out the old spline. This is the most tedious and effortful part of this whole project. Depending on how much glue was used before, it could take a bit.
Try to work mostly from the center of the chair. If you work from the outer edge, you might damage the chair a bit (I’ll show you down below what that looks like). Those little nicks wouldn’t be the end of the world even though you want to avoid them as much as you can.
Soak the cane seat replacement
Now would be a good time to soak the replacement seat in lukewarm water for about 20 – 30 minutes. I always like to set myself a timer so I don’t forget!

Clean out the groove
With your chisel or screwdriver also clean out the groove as best you can. It might not be perfect but in my humble opinion, it doesn’t have to be!
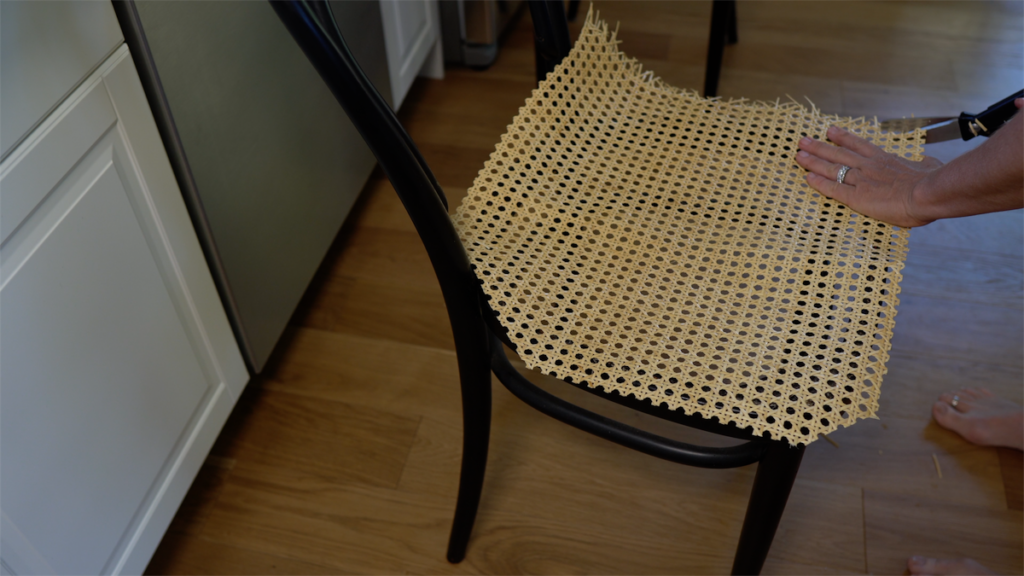
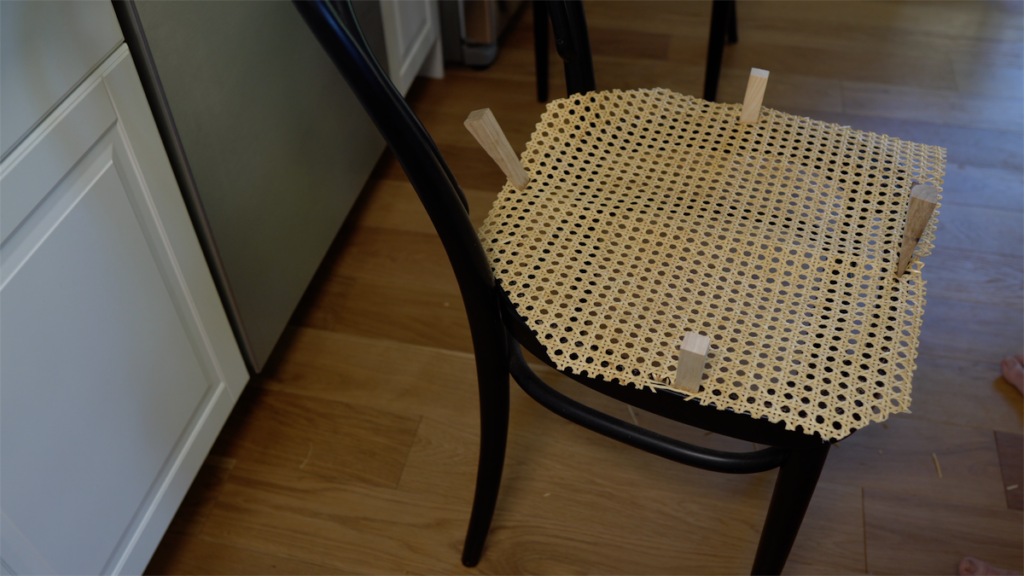
Align the new cane seat
Take your soaked replacement seat out of the water and shake it off to get rid of excess water.
Place it on top of your chair. It should be bigger than the seat. Now, cut it to size with about ½ to 1 inch of overhang on all four sides (or all-around in case of a round seat).
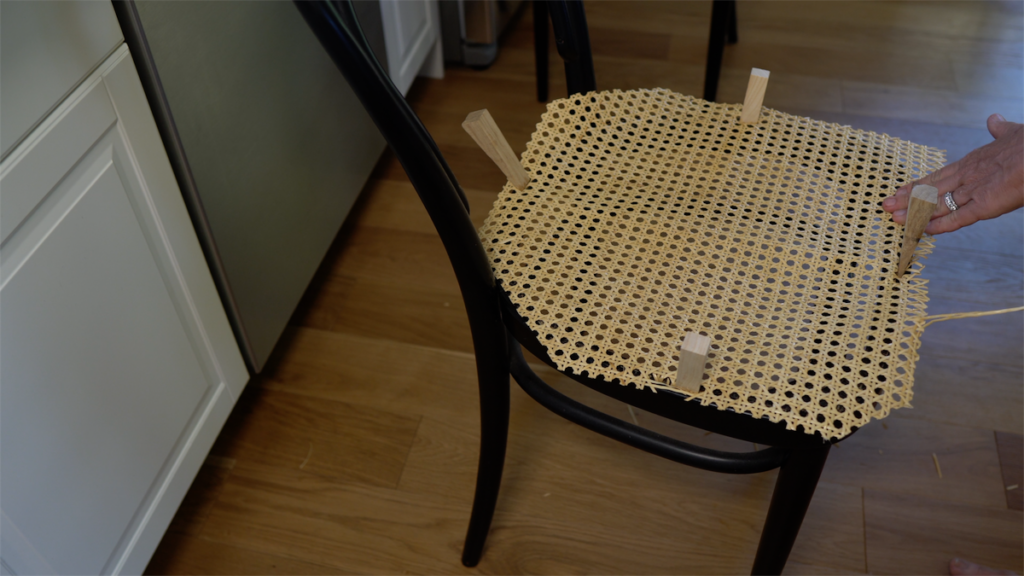
Find the wooden wedges that should have come with your replacement seat. Align the cane and press it into the groove with one of the wedges. Take your time now to align the seat front to back and left to right. It is much easier to do this now than later!

Find the next wooden wedge and press the cane into the front groove with it. Check it for straight alignment one more time. Then use two more wedges to press the seat into the sides of the chair.
Remove strands
With the four wedges holding the cane in place, carefully remove any unneeded strands on the outside. This helps with putting in the spline.
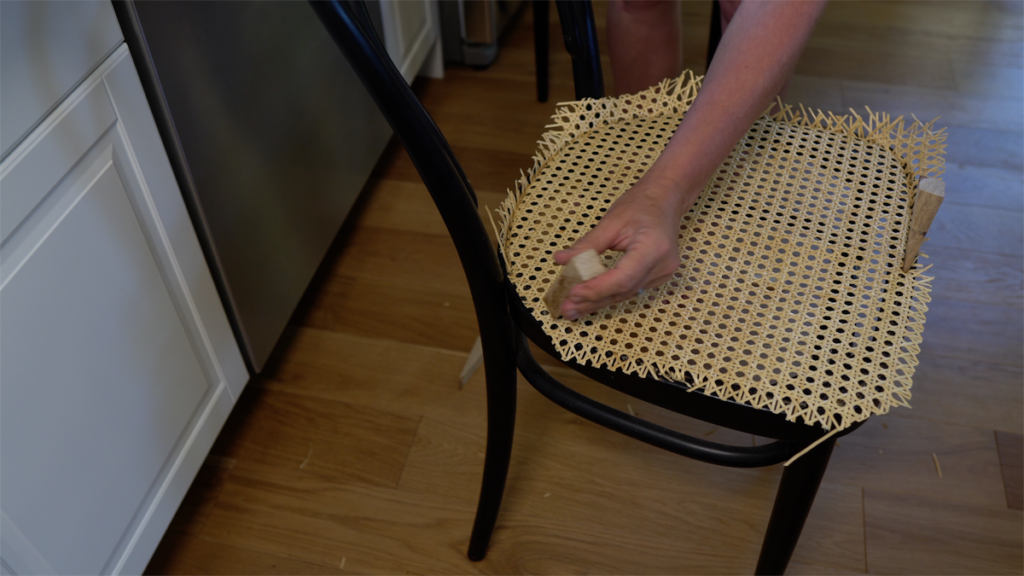
Press the cane into the groove
Your set should come with 5 wedges. Using the 5th wedge, press the cane into the groove with the hammer. Doing this, I often lose the other wedges. If that happens, simply press them back in.
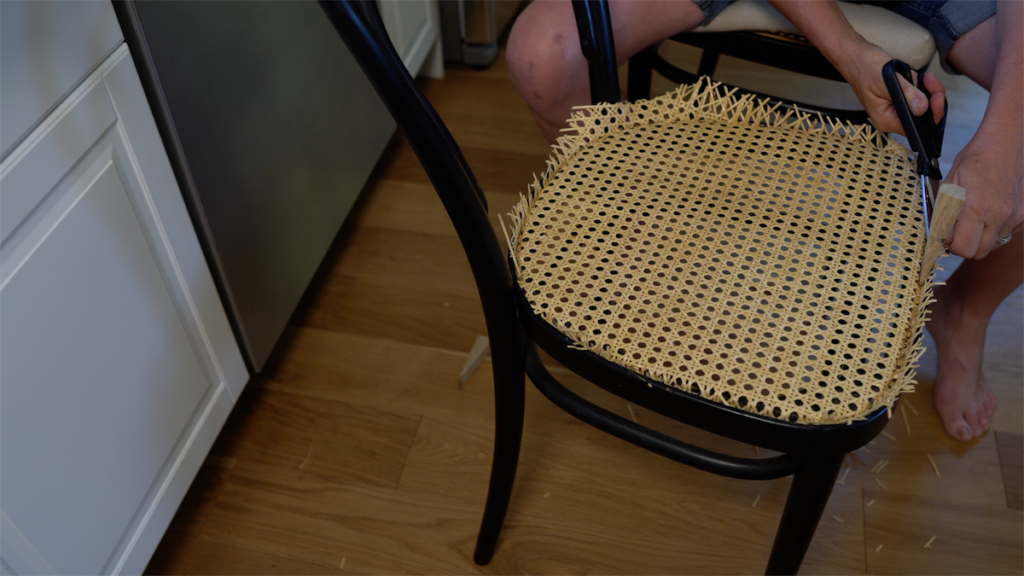
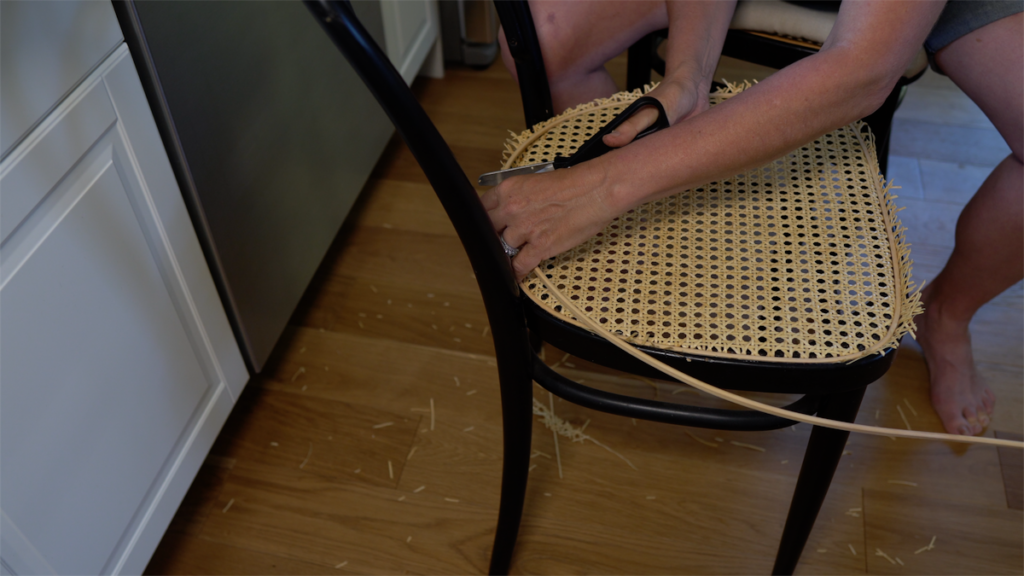
Cut off excess cane
With your scissors cut the excess cane. This step is a bit optional but helpful in my mind.
Add the wood glue
Now, put the wood glue into the groove. Note: I have decided that it’s easier to only apply wood glue to the straight sides of my chair and not in the rounded corners. While it will still be stable enough, it will make cutting out the spline easier in the event that I’ll have to repair this chair sometime in the future.
Also, try to get the glue right into the groove and not onto the cane.
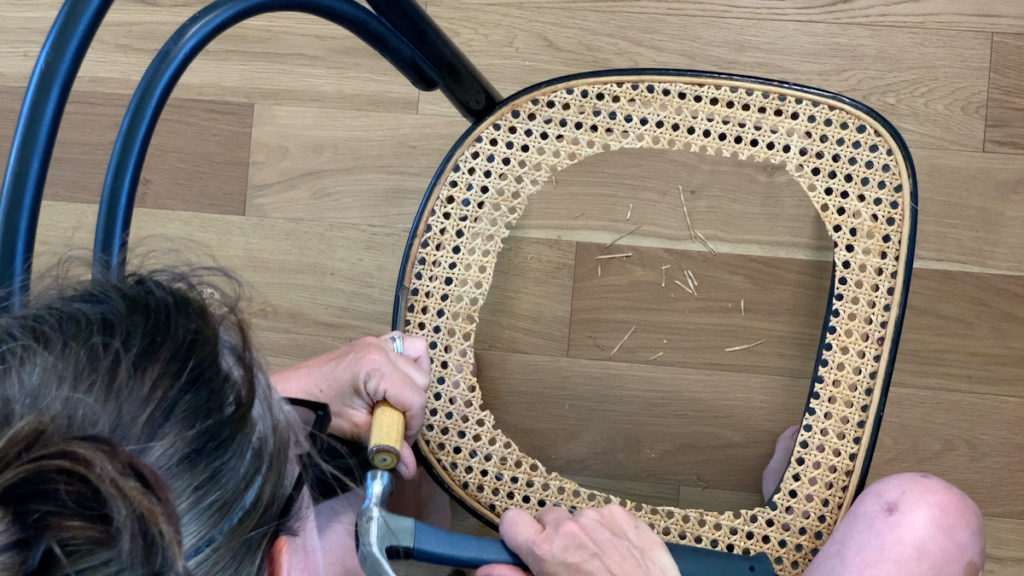
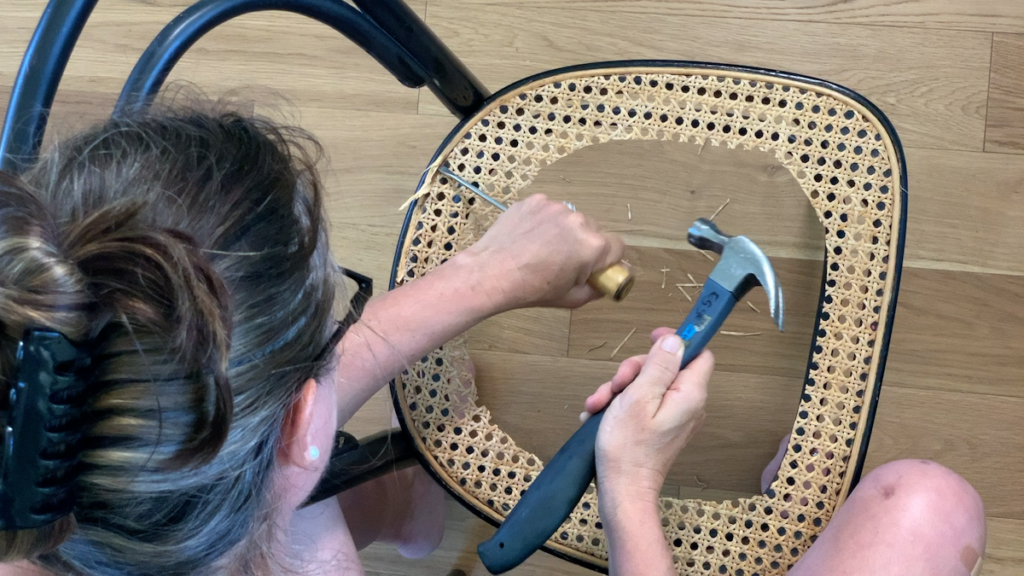
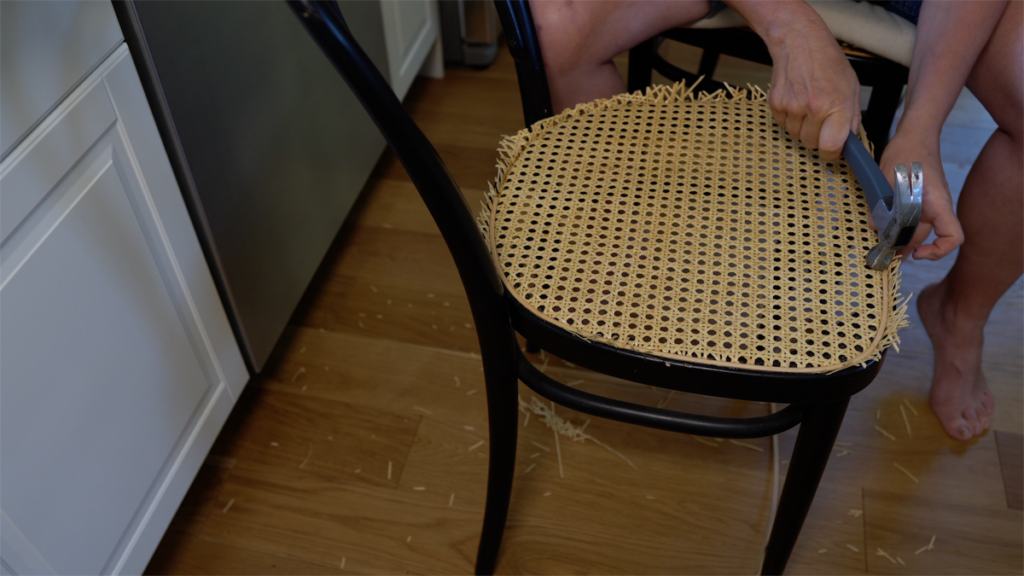
Attach the new spline
Starting at the center in the back, press the new spline into the groove (with the narrower side down). Then press it in following the groove. You can use your hammer to press it in.
When you come all the way around, cut the spline. I recommend cutting it a tad long and if necessary cut it shorter than cutting it too short the first time around.
Clean up excess cane
With the box cutter or the chisel, carefully cut away any excess cane that is sticking out.
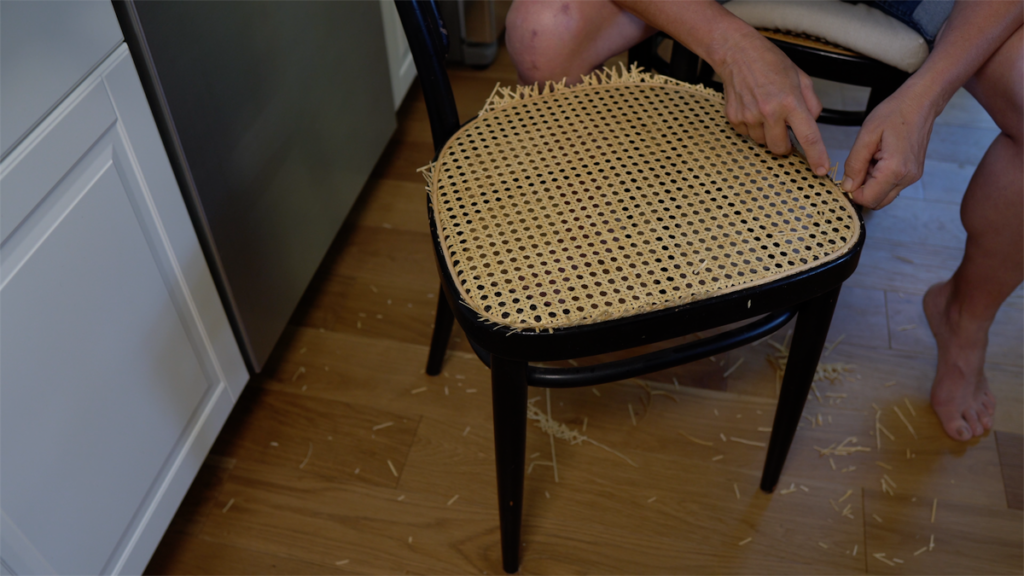
Let the repaired cane chair dry
Now, let the repaired cane chair dry for 24 hours, and do not sit on it yet! You may have noticed that the cane might have been wavy before but how it should be taut and straight.
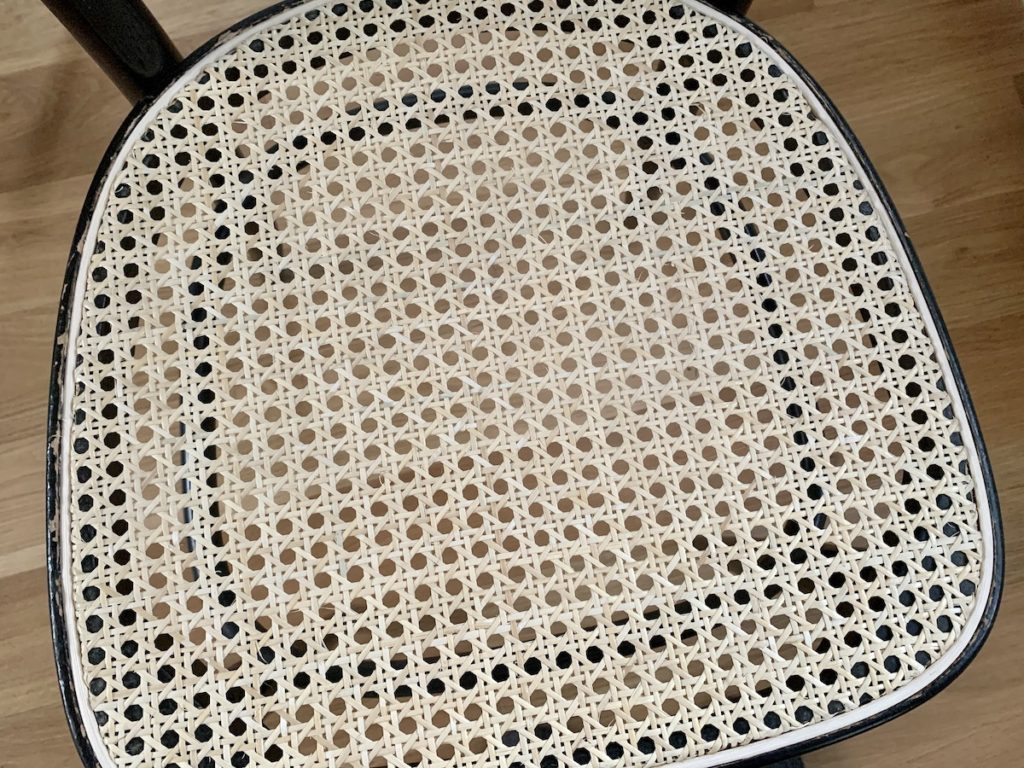
In the above picture, you can see that my repaired cane chair has a few nicks. Some of them came, believe it or not, from the previous professional repair job. And some were my own. I will just take some black lacquer and touch up those spots.
And that, my friends, is it! I don’t find the process complicated at all. I hope that you will be proud of your work and that you will enjoy your chair for years to come!
Let me know if you have comments or questions!
Pin For Later:
Hi there! The current seat of my caned Bentwood rocker, while quite torn in the center, is pretty firmly glued into the groove still. Do you have any tips for removing it? Also, were you trimming excess cane strand by strand with the box cutter at the end? Thank you! Very helpful!
I do use a box cutter to get the spine out but if it’s wet you should be able to cut it with garden shears ~ Anja
hallo
I came upon your site as it mentioned re-seating a bentwood chair, which is what I think I rescued. However, the seat was not the pre-woven/spline type and the frame is bolted with four bolts, 2 front, 2 back, and the bolts obviously partially block the 3/16″ holes. I am a pretty experienced hand caner, but I cannot even get a second strand in. As I can’t back the bolts out a bit to re-insert as that would tear the newly woven strands, I am stuck! The holes occupy a shallow groove around the top, and there is a groove under the frame. Is there a resolution, or do I need to re-seat with pre-woven, which I really dislike doing?! Thanks for thoughts!
I am not quite sure I can picture your chair but I only have experience with the pre-woven seats ~ Anja
You should never use Gorilla Glue so that it can be easily removed the next time!
Thank you for sharing that ~ Anja
Hi Anja, thanks to your helpful information my curved wood chair is restored again. Thank you very much. I have one question. I bought a repair seat through amazon. Even though I soaked it in water for more than an hour, there are a few places where the seat was cut in the process of fitting. Also, the splines were not narrowed on one side like you said, and the triangular piece for temporary fixing was not included. I went to the link in your blog, but the link seemed to be disconnected. I would appreciate it if you could tell me where I can purchase the materials you used, as I would like to make the repair as beautiful as possible when I repair other chairs in the future.
If you buy this replacement set https://amzn.to/3SHA6Ab there should be written instructions. You can also watch this video: https://www.youtube.com/watch?v=ZPda9dg6iHg Hope this helps, Anja
Wow, this is fantastic. We have 3 Restoration hardware chairs that all need repair. Now I’ll be trying this myself.
Great! Have fun ~ Anja
Readers should be aware that there are canned chairs out there with NO rim and they need to be canned by hand!
Yes, thank you! The difference is pretty obvious but it’s good to be aware of that ~ Anja
Brilliant tutorial and so doable! I’d love for you to share over at our Wednesday weekly Creative Linky Party https://creativelybeth.com/creative-crafts-linky-party-4-join-in-the-fun/
Have a great weekend!
Creatively, Beth
Thank you for your nice comment, Beth! And thank you for the invite to you link party 💛!
Brilliant idea! I’ve always had an interest in cane back and seated chairs, but have always been reluctant about them when I see how they can get holes in them. This was a great tutorial showing us that they can be repaired, which I didn’t know!
We featured you this week on our Embracing Home and Family link-up!
Please join us again this Friday!
-Cherelle
Awesome tutorial! I sent the link to my friend who loves vintage furniture.
Thank you so much for sharing, Liz!
I have always wondered how this was done! It looks beautiful!
Oh this is interesting! You did a great repair job!
So helpful for many I am sure! Please link up tomorrow at Embracing Home and Family! I bet others will love this too!
Thank you SO much for posting this information! I have several chairs with broken canes and I have been unable to find anyone in my area who fixes caned chairs anymore!! Wow! This is a game changer for me and my upcycling furniture business….Thanks again!
Oh, this makes my day! I am so glad you find this helpful! Thank you, Christina!