Authentic German Bauernbrot: A Simple Sourdough Mischbrot Recipe
If you have ever lived in or traveled through Germany, you know there is one bread that Germans particularly love. It has many names – Bauernbrot, Mischbrot, or even Graubrot – but essentially, they all point to the same popular loaf.
This German Mixed Rye Bread sits in the “sweet spot” of baking: it isn’t quite the heavy, dark loaf of a 100% Roggenbrot, but rather a lighter bread with a distinct, fine crumb and an unmistakable sourdough tang. It is the quintessential “farmer’s bread” found in village bakeries across the country. With my recipe, you can achieve that authentic German result right in your own kitchen using my “no-stress” heritage method.
This post contains affiliate links, which means I make a small commission at no extra cost to you. You can read my full disclosure.
What is German Bauernbrot, Mischbrot or Graubrot?
Bauernbrot, or “Farmer’s Bread,” is a popular type of Mischbrot (mixed grain bread) or Graubrot (“grey bread”) you can find all over Germany. Traditionally, people baked it in large wood-fired ovens in rural villages. It has high rye content (usually 60-70%) and a thick, aromatic crust that keeps the bread fresh for days.
What makes this recipe special
The Secret is in the “Ash”: Understanding Flour Grades
Part of what makes this bread so distinctly German is its texture. Unlike the large, airy holes you often see in American sourdough, a true Bauernbrot has a fine, tight crumb. I like to call it “butter-friendly” bread – it’s the perfect sturdy base for spreads, cheese, or cold cuts!
To achieve this, we need to look at flour grades in Germany. German flours are designated by “Type” numbers (like Type 405 for pastry or Type 1150 for rye), which represent the mineral or “ash” content left in the flour. Since American flours are categorized differently, I use a simple technique to mimic those authentic German grades:
- Mill your grains on the finest setting.
- Sift out the coarse bran using a fine-mesh sieve.
- Re-mill that bran to get the particles even smaller before adding a portion back in.
This extra step is what gives the bread that signature “half-white” look and perfect consistency.
👉 Free Resource: If you aren’t milling your own flour, don’t worry! Download my German Flour Substitution PDF here to see how to achieve these results with store-bought options.
Ingredients for German Bauernbrot
- Active Sourdough Starter: Be sure to have an active sourdough starter (or learn how to make your own with my simple method)
- Rye Flour: I recommend getting rye berries and milling them, but you can also use medium rye flour (see tips below)
- Wheat Flour: the same goes for wheat flour
- Spelt Flour: I really like to include spelt, but you can also use rye and wheat flour only
- Sea Salt: adds depth of flavor
- Filtered Water: I always recommend using filtered water
Where To Source Whole Grains
I am often asked where I get my grains. For my Bauernbrot, I personally love the berries from Grand Teton Ancient Grains.
They are a family-run company that has been in the business for generations who have been practicing regenerative farming.
Heritage Tip: Using high-quality, sustainably grown grains isn’t just better for the planet; the flavor profile is much more complex and “alive” than what you’ll find in a standard grocery store bag. You can [find the grains I use here].
How to make Authentic German Mischbrot
This is a summary of the recipe steps. For the complete instructions, please scroll down to the recipe card at the bottom of the post.
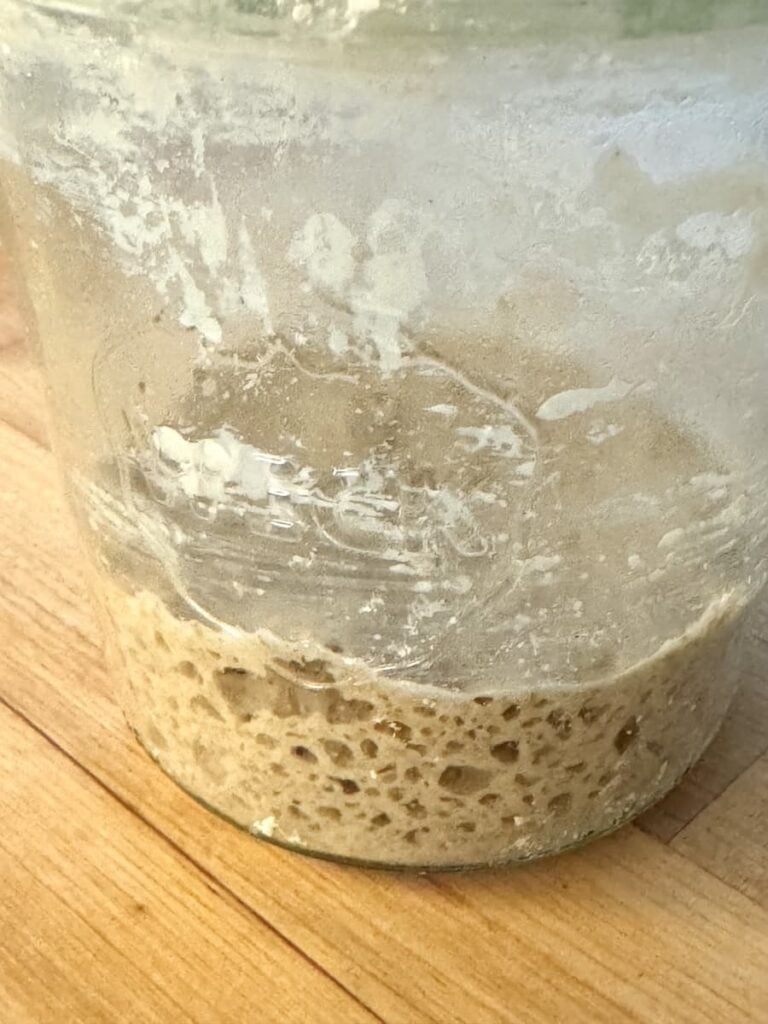
1. Prepare the Preferment
This recipe begins in the morning before the day you bake. Mix a bit of sourdough starter with warm water and rye flour to create that slow-fermenting base. Keep it in a warm spot.
2. The Milling and Sifting Process
To achieve that “Type” consistency of German flour, mill your grains on the finest setting. The secret step is sifting out the coarse bran to create a lighter, more refined flour. I like to mill the grains a second time! Be sure to keep the bran, it is full of fiber and works great in your morning granola.

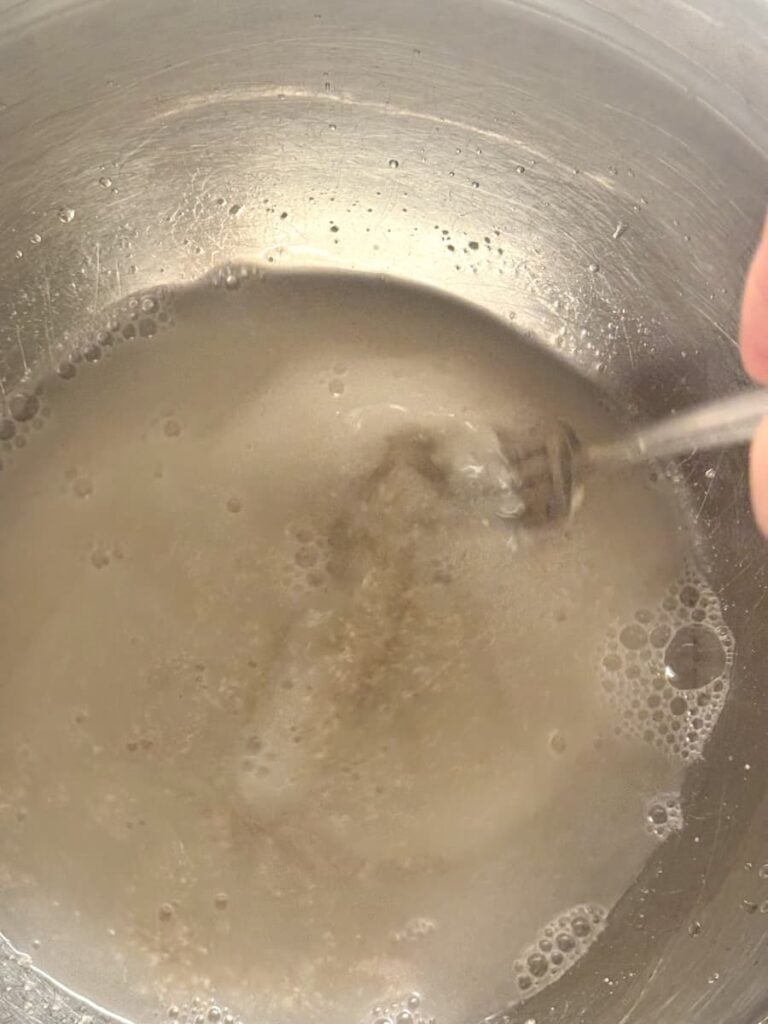
3. Mixing the Dough
Once the preferment has about doubled, mix it with the filtered water, salt, and your custom flour blend. You can use a Danish dough hook for this – no heavy stand mixer required.

4. The Overnight Rise
Rye needs time to hydrate. Let the dough rest overnight in a warm spot. This long fermentation not only develops that unmistakable sourdough tang but also allows the bran to soften, resulting in a much better texture the next day.
5. Shaping and the Final Proof
The next morning, gently shape your dough on a floured surface. Because this is a sticky dough, don’t be afraid to use a little extra flour or saved bran for your banneton. Let it rise one last time until it’s visibly risen and ready for the oven.


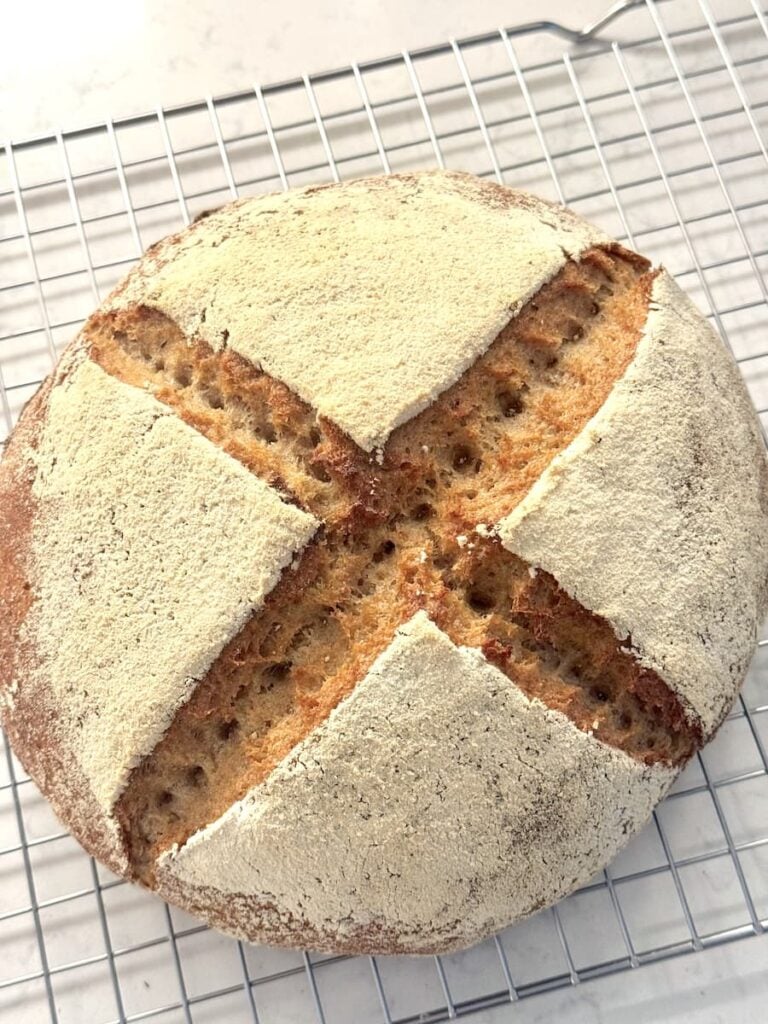
6. The Dutch Oven Bake
Preheat your cast-iron Dutch oven to a high heat (480°F). Score the loaf (optional) and bake covered to trap the steam. After 30–40 minutes, remove the lid and lower the temperature to 400°F to finish the crust.

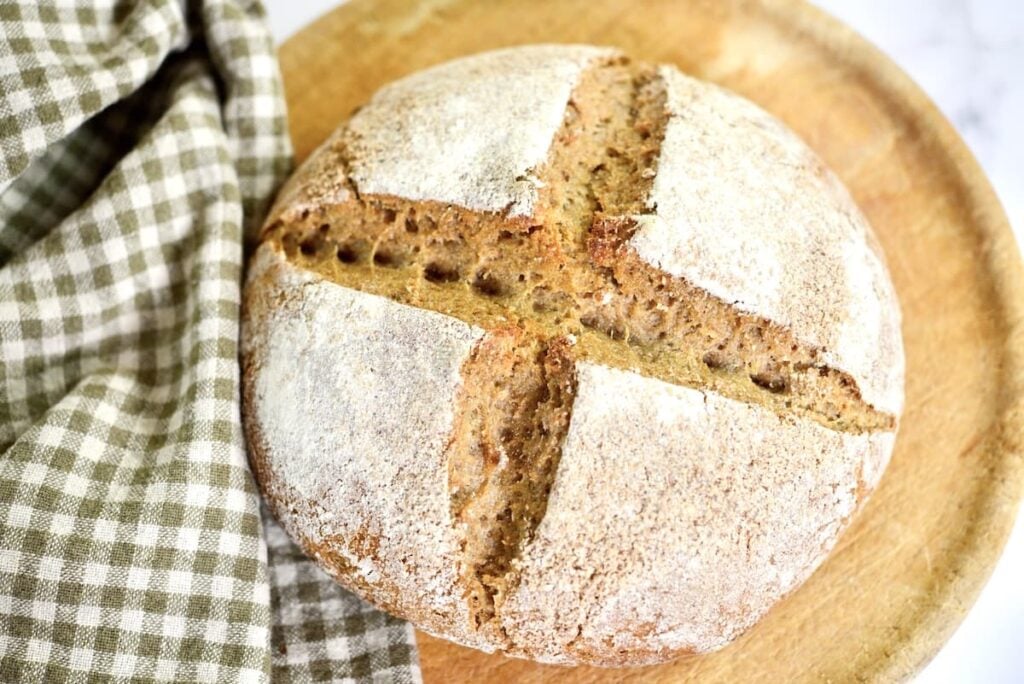
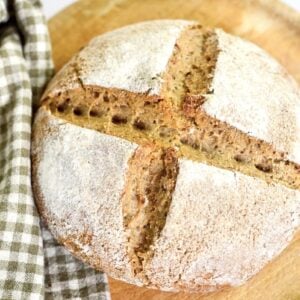
The Result: A Taste of Home
The final loaf has that signature slightly grayish hue from the rye and a crumb that smells exactly like a bakery in Bavaria. It’s surprisingly easy once you master the flour ratios.
Do you have a favorite German spread for your Bauernbrot? Let me know in the comments below!

Authentic German Bauernbrot Recipe (Farmers’ Bread)
Ingredients
For the preferment:
- 15 g active sourdough starter
- 25 g water
- 25 g whole-grain rye flour
For the main dough:
- 65 g sourdough starter your preferment
- 330 g water
- 200 g medium rye flour
- 200 g medium wheat flour
- 100 g medium spelt flour optional, you can also use all wheat flour
- 12 g salt
Instructions
For the prefement:
- In the morning, in a small jar, mix all the ingredients well. Cover the jar loosely and keep it in a warm spot for 8-12 hours. The ferment should double.
For the main dough:
- In the evening, in a large bowl, mix water and sourdough preferment well. Add the flours and mix well. The dough will be sticky. You can use your hands to shape it into a rough ball.
- Cover the bowl and let it ferment in a warm spot overnight (12-14 hours).
Shaping the dough:
- The next day, flour a banneton well. Flour your work surface generously. Dump the dough onto the work surface and shape it into a ball. While continuously turning, gently fold the sides over the middle to create some surface tension. Pinch the open sides together.
- Transfer the dough ball to the banneton with the pinched side facing up. Cover with a tea towel and keep in a warm spot for another 2-3 hours.
Baking the bread:
- Preheat your cast-iron Dutch oven at 480˚F (250˚C) for 30 mins.
- Carefully, transfer the dough ball to the preheated Dutch oven with the smooth side up. Optional: score the top of the bread. Put the lid back on and bake in the hot oven for 30-40 minutes.
- Reduce the oven temperature to 390˚F (200˚C), remove the lid, and bake for another 5-10 minutes.
- Remove the bread from the oven and let it completely cool on a wire rack.
Notes
- In order to achieve the distinct crumb, I recommend milling the grains on the finest setting and sifting out about 15-20% of the bran by weight
- You can download my handy free flour guide here:
- Feel free to experiment with the ratios of rye flour to wheat flour to spelt flour to achieve your preferred taste
Nutrition

This is my 4th time making this. Always turns out great.
That’s great! Thank you so much for letting us know ~ Anja
I was amazed at how well this bread turned out! I remember getting warm misch brot across the street at our neighborhood bakery when we lived in Germany. Back state side I owned an “American” bakery in Missouri for 9 years and made at least 100 loaves of yeast bread daily; in addition to cinnamon rolls etc. That was easy!
Anja I love the no discard, no feeding method. Sourdough is time consuming but SOO worth it! Thank you!
Nice! That makes me so happy to hear, especially from a bakery owner ~ Anja
Great recipe.
I have this ready to shape in 2 more hours. Wish we could post pics so you can see your recipe made by another baker.
That makes me so happy to hear. You can always send your photos to anja@ourgabledhome.com