The Best Ancient Grain Gluten-Free Sourdough Bread Recipe (No-Discard)
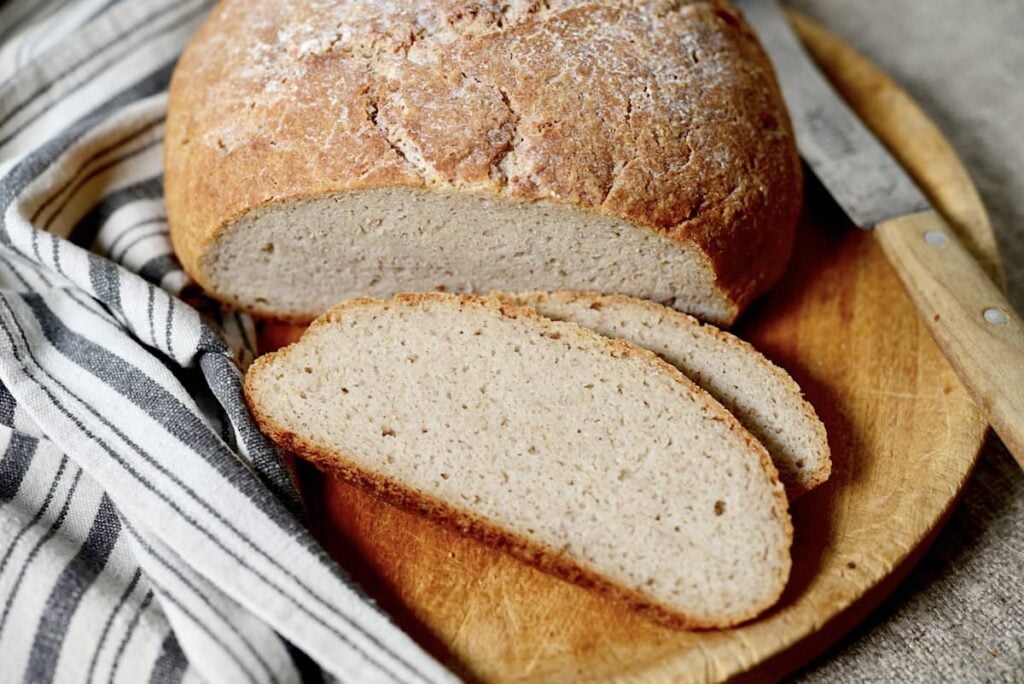
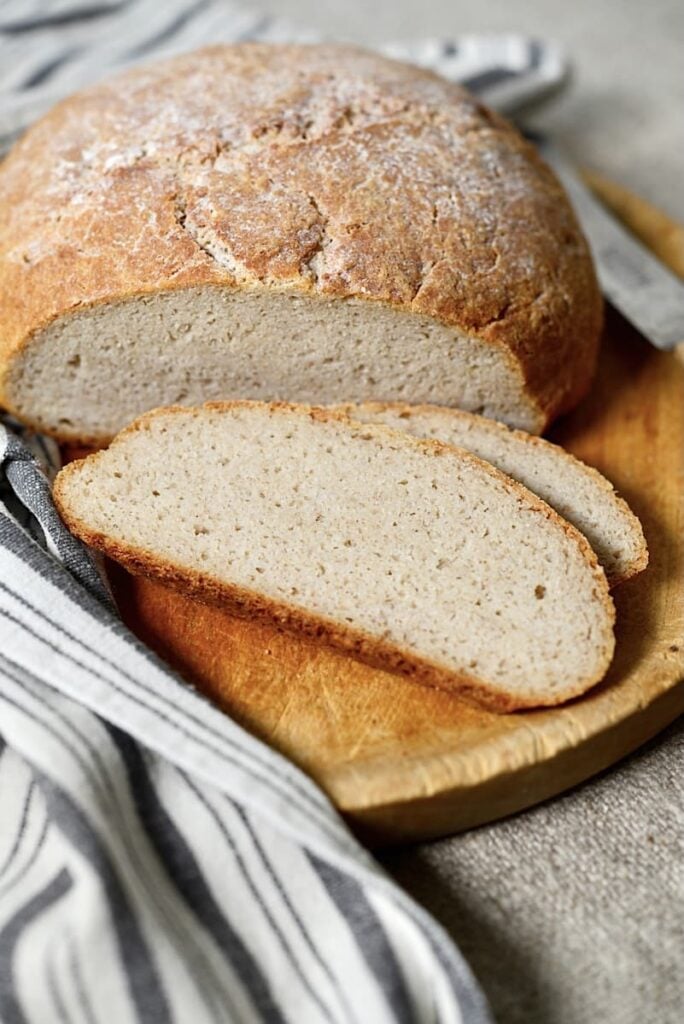
If you’ve been searching for a gluten-free sourdough bread recipe that actually has the texture, “chew,” and mouthfeel of a traditional loaf, this is the one. Unlike many recipes that rely on processed starches or “cardboard-like” fillers, this ancient grain version is fluffy, delicious, and surprisingly easy to make.
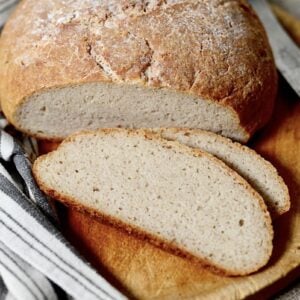
After testing this recipe numerous times in my own kitchen, I am so proud of the result. This isn’t just a “gluten-free alternative”. It is a robust, flavorful boule with the same mouthfeel, airy crumb, and chewy crust as regular sourdough. Best of all, it is based on the same unique heritage sourdough method my family has used for generations, adapted for those of us avoiding gluten.
This post contains affiliate links, which means I make a small commission at no extra cost to you. You can read my full disclosure.
Why This Recipe is Different
After testing dozens of versions, I’ve finally “dialed in” a gluten-free loaf that actually feels like bread. Unlike many recipes that rely on processed starches or gums, this ancient grain method focuses on texture and heritage tradition.
The secret to this “no-cardboard” loaf is:
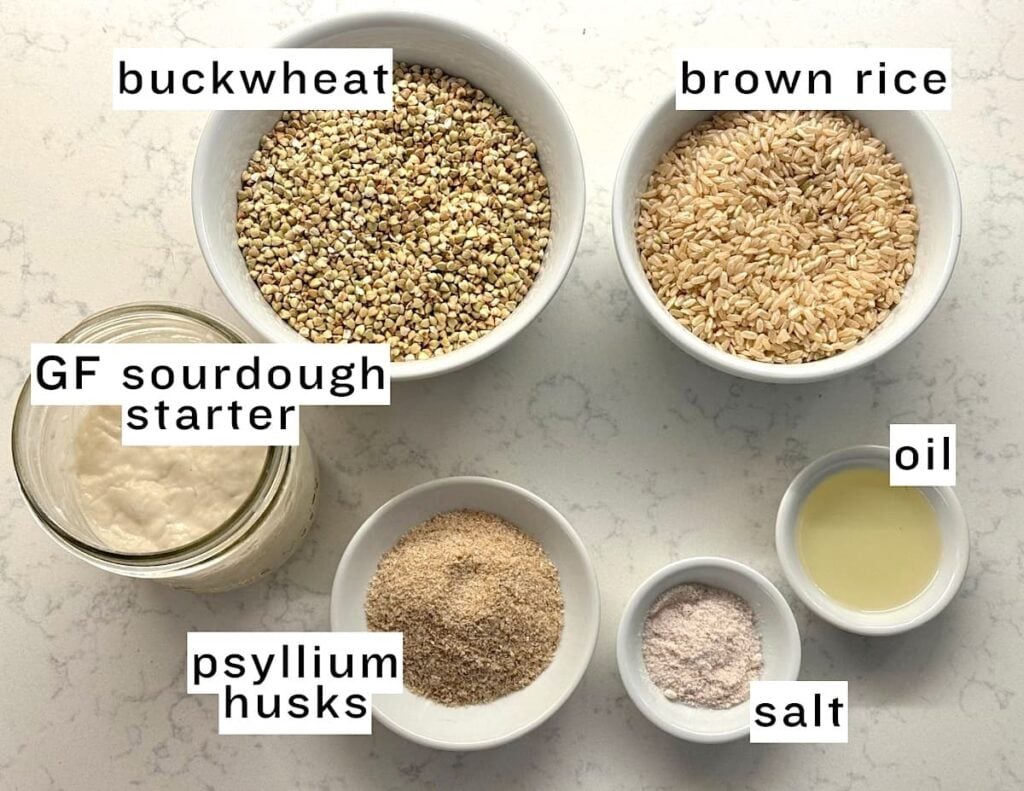
Ingredients
- Heritage GF Sourdough Starter: Developed using my family’s generational method.
- Buckwheat & Brown Rice Flour: I personally love to grind my own grains with my Mockmill. If you’re milling at home, I’ve found that a fine grind is essential for preventing that “gritty” mouthfeel. However, you can buy buckwheat flour and brown rice flour.
- Psyllium Husks: They create the light, airy texture.
- Filtered Water, Salt, and a touch of Oil.
How to make this gluten-free bread
This is just a summary of the steps. For the complete instructions, scroll down to the recipe card at the bottom of this post.
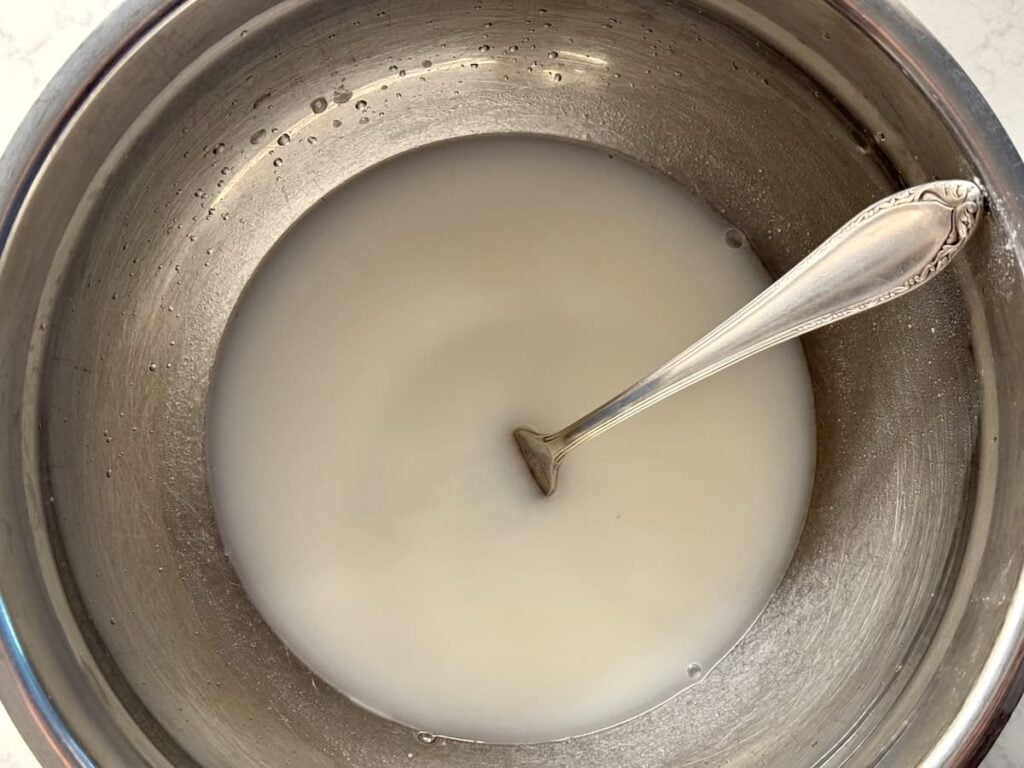
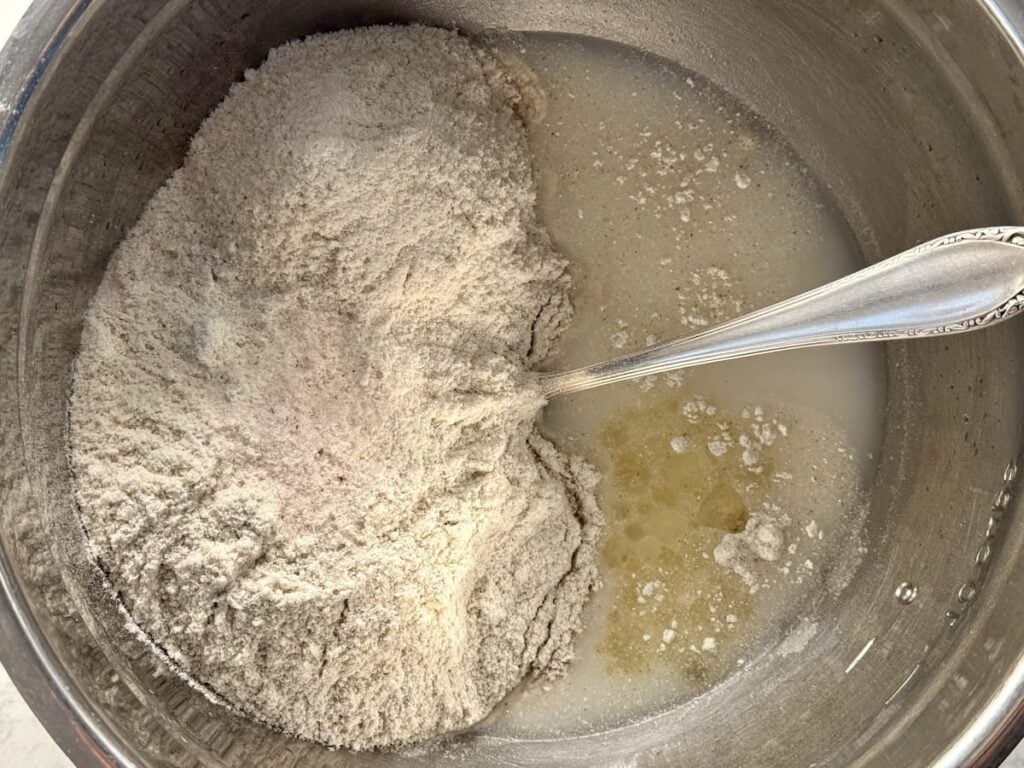
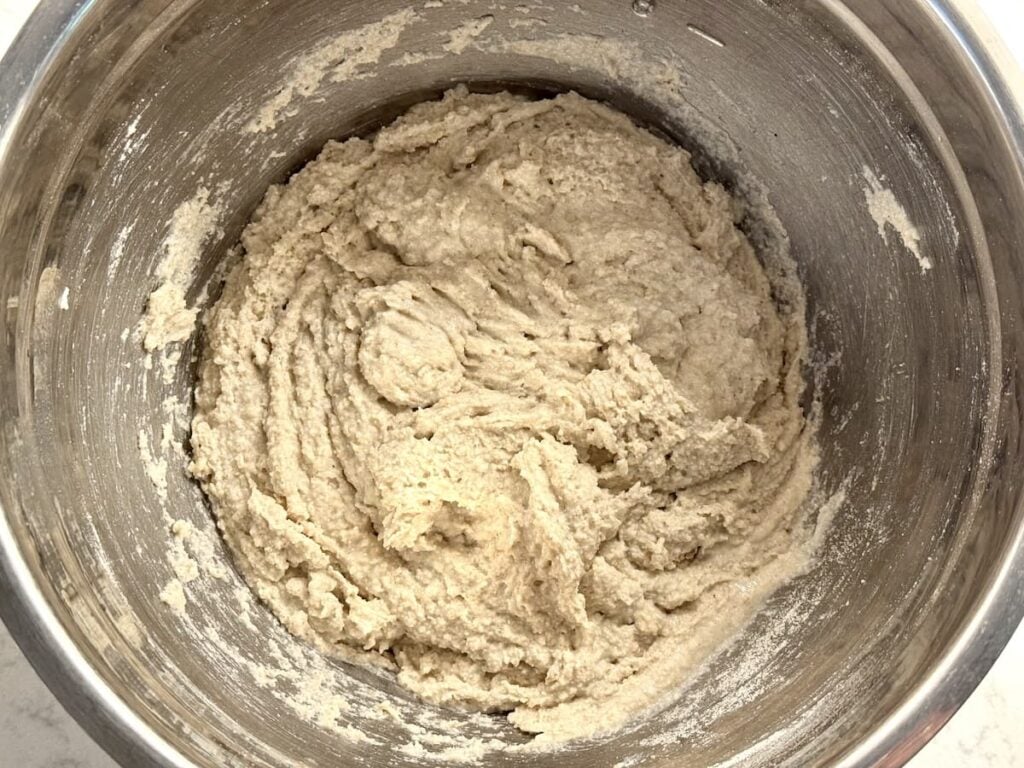
1. Simple Mix:
Combine your heritage GF starter, water, oil, and salt. Add your grains and let the dough sit for 3 hours at room temperature.
2. The Cold Proof:
Transfer to the fridge for 8+ hours. This slow ferment is the secret to the flavor, don’t skip it!
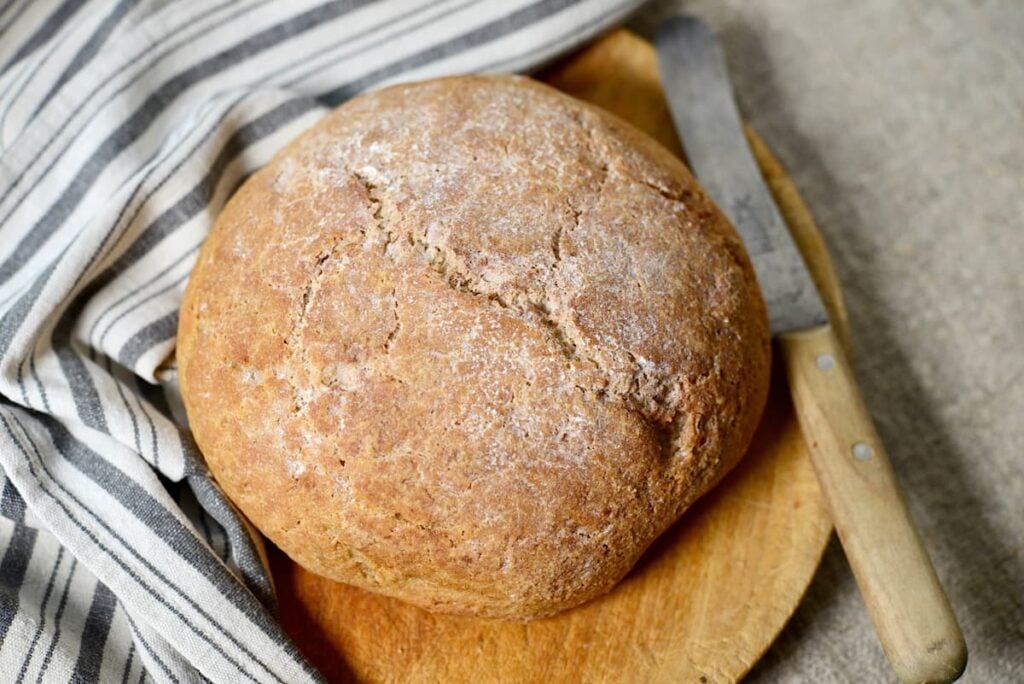
3. High-Heat Bake:
Shape your dough into a tall ball (boule) to ensure it keeps its shape. Bake in a preheated cast-iron Dutch oven at 450°F (covered) for 30 minutes, then 390°F (uncovered) for 25 minutes.
👉 Anja’s Troubleshooting Tips
- Milling: I highly recommend grinding your own grains with a Mockmill. Fresh-milled buckwheat has a sweetness that store-bought flour lacks.
- Natural Cracking: I prefer not to score my dough. I love the rustic, natural cracks that form as it expands. It’s the hallmark of a true heritage loaf.
- The Tap Test: You’ll know it’s done when the bottom sounds hollow. Let it cool completely on a wire rack to ensure the interior sets perfectly.
Recommended Resources & Links
🍞 The Easiest Gluten Free Sourdough Starter My No-Feed, No-Discard GF Starter Recipe: The foundation of this bread.
🍞 Sourdough Simplified: My book for those wanting to master the art of heritage baking.
🍞 The Heritage Kitchen Table: Join our membership community for live baking calls and deeper dives into traditional cooking.
Ancient Grain Gluten-Free Sourdough Bread
Ingredients
- 300 ml water
- 100 g GF sourdough starter
- 1 TBSP neutral oil
- 200 g buckwheat flour
- 150 g brown rice flour
- 2 TBSP psyllium seeds
- 6 g salt
Instructions
- In a medium bowl, mix all the wet ingredients.
- Add the dry ingredients and mix well.
- Cover the bowl and let the dough sit at room temperature for 3 hours.
- Transfer the dough to the refrigerator overnight or at least 8 hours.
- Preheat a cast-iron Dutch oven in the oven at 450˚F for at least 30 minutes.
- Transfer the dough to parchment paper and shape it into a tall boule.
- Transfer the dough ball on the parchment paper to the preheated Dutch oven, cover it, and bake it for 30 minutes.
- Lower the temperature to 390˚F, remove the lid and bake it another 25 minutes.
- Let the bread cool completely on a wire rack.
Notes
- Always shape your dough into a tall, tight ball on the parchment paper. Ancient grain dough spreads more than wheat; starting high ensures a beautiful, rounded boule.
- Do not skip the temperature drop from 450°F to 390°F. This ensures the crust is golden and crisp without drying out the interior.
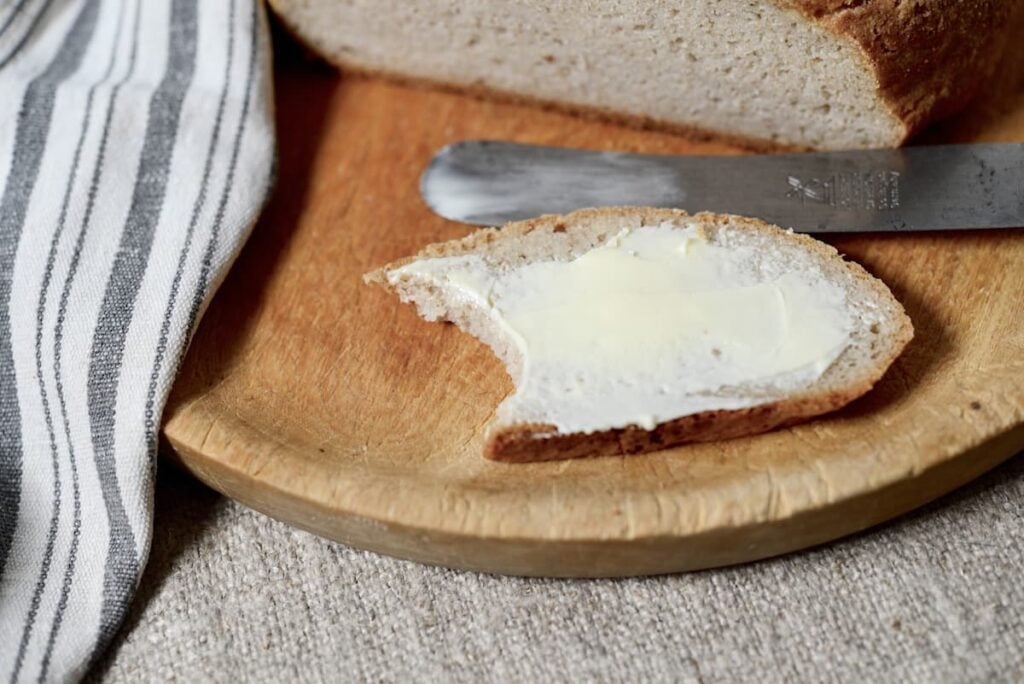
- Because there is no gluten, the steam trapped inside the bread is still “working” while it cools. Slicing too early results in a gummy texture. Wait until it is completely cool!
Nutrition
💡 I have spent so much time refining this recipe to make sure it’s the best gluten-free loaf you’ll ever taste. If you make it, please leave a comment and let me know how it turned out!
Hello Anja ~ thank you for your recipe. I am always eager to try new recipes and help perfect the enjoyment of gluten free bread. My bread turned out rather crumbly and not as pleasing as I’d hoped. Perhaps due to my buckwheat flour? I noticed that your bread had a lighter colour. I think I would add more salt and possibly a touch of honey. Appreciate any feedback and insights. Many thanks for all your time, effort and enthusiasm for living well and offering joy. Rita. 🌸
It’s always challenging to give a remote diagnosis but you can try adding a tad more psyllium seeds and/or a different brand of buckwheat flour. I hope you feel inspired to try until you get the bread you like!