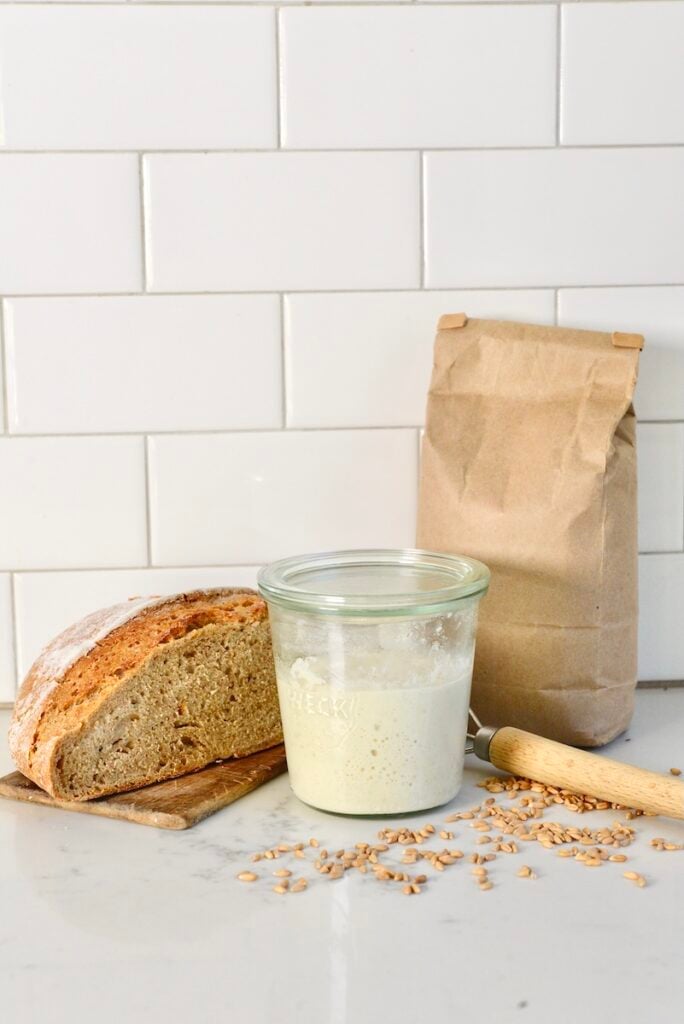
How To Bake With Freshly Milled Flour
If you enjoy baking at home, you might be wondering why you should use freshly milled flour. There are many reasons but also some pitfalls.
In this article, I will teach you exactly what you need to know and my top tips to make the most out of your flour but also set you up for success. After all, nobody wants to eat dense, hard bread.
Not everyone is lucky enough to grow up with homemade bread so there often is some learning curve.
My best advice, though, is to just get baking, not get discouraged if you’re first loaves of bread don’t turn out the way you had hoped, and just keep experimenting.
This post contains affiliate links, which means I make a small commission at no extra cost to you. You can read my full disclosure.
1. Why Use Freshly Milled Flour
There are lots of reasons why you might want to mill your own grains:
- It’s Cheaper: Buying grains in bulk and milling at home usually saves you quite a bit of money.
- More Variety: While whole wheat flour is common, finding other whole grain flours can be a challenge.
- The Whole Grain: Commercial mills often sift out the germ (which goes rancid quickly). When you mill at home, you get the whole grain – endosperm, germ, and bran.
- More Nutritious: Fresh milled flour keeps more vitamins and minerals. Vitamin E and other antioxidants start to degrade as flour sits on a shelf.
- Perfect for Sourdough: The natural enzymes in fresh flour boost fermentation. Fresh-milled flour is perfect for sourdough baking.
- Faster fermentation: The protein content is similar to that of bread flour, depending on the specific grain used. The faster fermentation occurs because the milling process effectively breaks down starches, making sugars immediately accessible to the yeast and bacteria, thereby expediting their feeding activity
- Better Flavor: Freshly milled flour tends to have a sweeter, nuttier, and richer taste.
- No Additives: You get pure flour without any extra ingredients or preservatives.
- Choose Your Milling Grade: Adjust the texture to be as very fine flour or more coarse, depending on your preference.
A Quick Note on Grain Mills:
Obviously, you will need a grain mill if you would like to mill your own flour. If you’d just like to see if that is for you, you could use a high-speed blender, however, that process tends to heat the flour to very high temperatures.
If you are serious about baking with freshly milled flour, I highly recommend investing in a high-quality grain mill. You can head over to this article to learn more about my favorite grain mills.
2. How Is Flour Milled at Home Different from Store-Bought?
When you mill your own flour, you know exactly how fresh it is and exactly what’s in it. Most store-bought flour comes from steel mills (unless it’s labeled “stone ground”), and sometimes the different parts of the whole grain are separated and then recombined.
At home, you control the process, including the fineness of the flour.

3. Choose the Right Grains
There really are no wrong choices here – it’s all about experimenting! I personally love using ancient grains like spelt, emmer, rye, and einkorn.
You can also explore heritage grains like hard white wheat, Sonora, or Turkey Red for different flavors and textures.
I love trying different types of grain and experimenting with their distinct flavor and color. It would be very challenging to find such bread in a grocery store.

4. Add Some White Flour
This is probably my number one tip for people who use homemade flour for the first time. Using only wholemeal flour or whole wheat flour will definitely give you denser bread.
If you are not used to that or would still like a lighter loaf of bread, I recommend adding some ratio of white flour.
I bake an everyday sandwich bread that uses about 50% of white flour for best results. You can even add some bread flour which has a higher protein content that will give you a stronger dough.

5. Adjust the Hydration Level
If you are baking with freshly milled flour for the first time, you may have to make some adjustments. One is the hydration level.
I recommend you start with the amount of liquid given in your bread recipe and adjust from there. Your grain berries might have different moisture levels.
Moreover, though, the coarser the grind, the slower and more water your home-milled flour will absorb. That means that you often have to add a bit more later in the bread-baking process. A little trial and error will help you find that perfect balance.
6. Autolyze Before Adding Sourdough and Salt
If you are using freshly milled flour, you might like to play with “autolyzing”. This is a fancy word for only mixing flour and water for about one hour before you add your sourdough starter or yeast and salt.
It is supposed to help with gluten development and strengthen the dough.
Some people say, it doesn’t make any difference in their bread recipes and other people swear by it.
Tip
- If you don’t already have one, be sure to check out my super simple method to make your own sourdough starter.
7. Knead Well
Don’t rush the kneading process! Whether you’re working by hand or using a stand mixer, a longer kneading time (about 10 minutes by hand or 15–20 minutes in a stand mixer) helps strengthen the gluten network.
This is especially important with freshly milled flour, where the bran can sometimes poke through those delicate gluten strands.
8. Long Rise
A long, slow rise can do wonders for your bread dough. With freshly milled flour, the extra enzymes get plenty of time to work their magic, breaking down the bran and making the dough more elastic.
For sourdough, consider letting your dough rise for at least 8–12 hours. This not only improves texture but also deepens the flavor.

9. Possibly Add Some Yeast
If you’re new to baking with home-milled flour, adding a bit of active dry yeast might help ensure a good rise.
Even though I think freshly milled flour is perfect for sourdough baking, a little yeast can give your bread a lighter texture and a more open crumb – kind of bridging the gap between artisan and store-bought bread.
10. Manage Expectations
It’s important to keep in mind that baking at home is all about embracing the beauty of artisan bread.
Commercial bread products (think “Wonderbread”) use extra ingredients to achieve that ultra-soft texture, which isn’t really the point of whole grain, freshly milled flour. If you let go of the need for super fluffy bread, you’ll enjoy the rich flavor and health benefits of homemade loaves even more.
You can watch me bake two different types of bread in this YouTube video:
11. How To Transition
You can either use a recipe that was developed for freshly milled wheat (see next section) or take your favorite recipes and use those.
Again, I recommend you start with a small amount of your own flour, maybe just 10% of the total amount of flour. As I mentioned above, you will have to add a bit more liquid. Take notes on the exact amounts so that next time, you can improve your recipe if needed.
12. Best Bread Recipes for Freshly Milled Flour
Not all baked goods are created equal when it comes to using fresh flour. Here are some recipes you might love to start with:
- European-Style Whole Grain Bread: Bake it in a loaf pan to eliminate the loaf-shaping process.
- Everyday Sandwich Bread Recipe: Try mixing in some white or bread flour (about 50%) for a lighter, beginner-friendly loaf.
- No-Knead Sourdough Bread: This recipe is a beginner’s dream. A pinch of commercial yeast ensures a good rise.
- German Bauernbrot (Country Bread): To achieve that distinct crumb and flavor, I am sifting the whole-grain flour a bit.
- 100% Rye Bread: Perfect if you enjoy a robust, hearty taste.
- Pancakes: These are great for getting started with freshly milled flour. Just add a bit more liquid than what the recipe calls for.
👉 You can find even more sourdough recipes here.
New To Sourdough? Check out My Super Simple Sourdough Course!
13. Storage Tips for Freshly Milled Flour
Since your freshly milled flour doesn’t contain preservatives, you’ll want to use it up quickly for the best flavor and nutrition. Here are a few storage tips:
- Immediate Use: For best results, I recommend using your whole grain flour right away. You will also get the greatest nutritional benefits.
- Short-Term Storage: If you have leftovers, you can store them in an airtight container or a ziplock bag in the refrigerator for up to 7 days.
- Long-Term Storage: For longer storage, I recommend freezing your flour in an airtight bag for up to 6 months.
- Whole Grains: Whole wheat berries and other grain berries will last forever if you store them in a cool, dry place (such as these food-grade buckets).

Where’s the recipe?
This is an educational guide on how to use fresh milk flour, but you can apply it to most if not all whole-grain recipes.