How to Sew Simple Fabric Star Ornaments | Tutorial
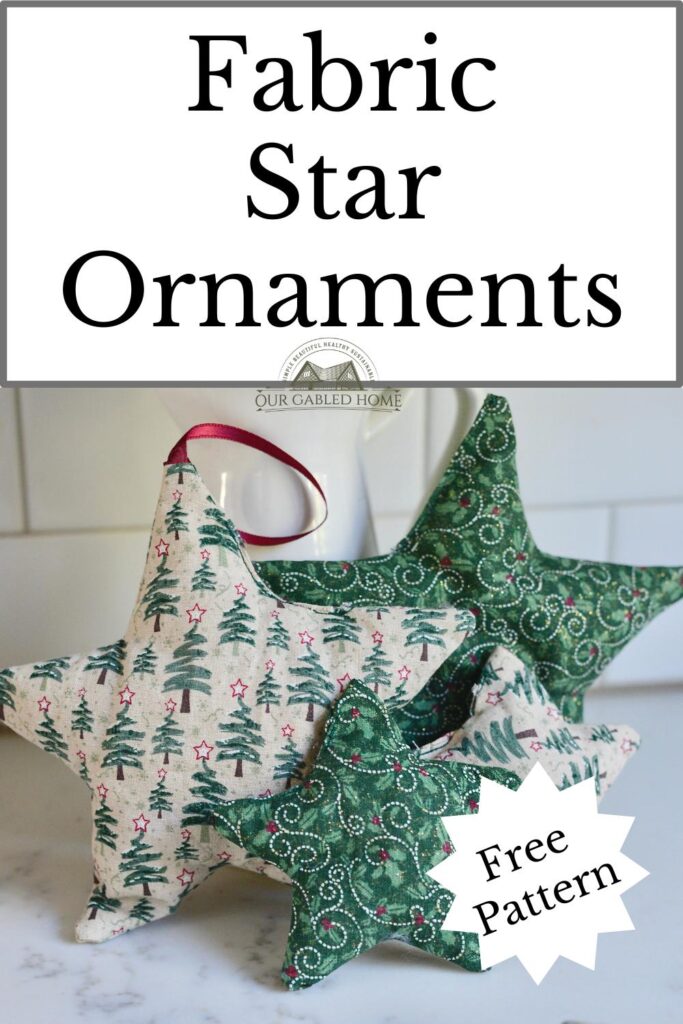
These cute fabric star ornaments are easy and fun to make. With your preferred fabric, they are the perfect holiday decor.

With the holidays around the corner and the evenings getting longer, I love making fabric star ornaments to ring in the holiday spirit.
They are the perfect addition whether your decor is Scandinavian-inspired, rustic, primitive, farmhouse, or an eclectic mix.
This post contains affiliate links, which means I make a small commission at no extra cost to you. You can read my full disclosure.
Why you’ll love making these fabric star ornaments
This little project is perfect because
- it is an easy sewing project, perfect for every skill level
- each fabric star ornament only takes about 30 minutes to make
- size and look are very customizable
- you can use whatever scraps of fabric you have
- they are so much fun to make
- they make the perfect gift, Christmas ornaments, or a little extra on wrapped gifts
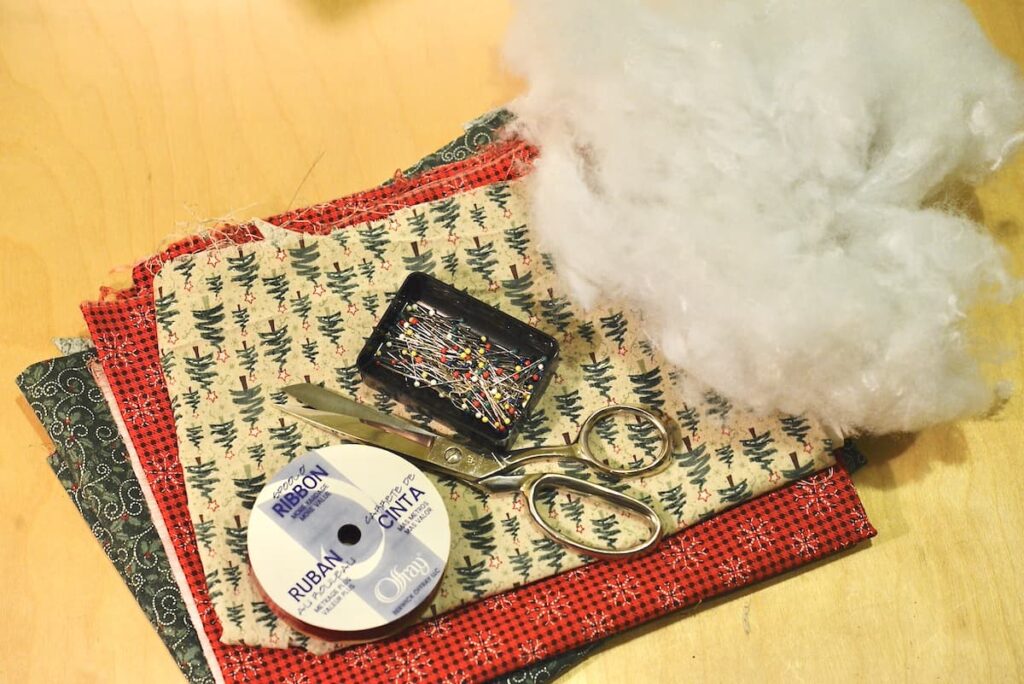
Supplies and Tools:
This is what you will need to make these Scandinavian Christmas star ornaments:
- Strips of fabric and coordinating thread
- Sewing pins
- Batting
- Scissors
- Optional: Ribbon to make a hanger
- Optional: Sewing machine
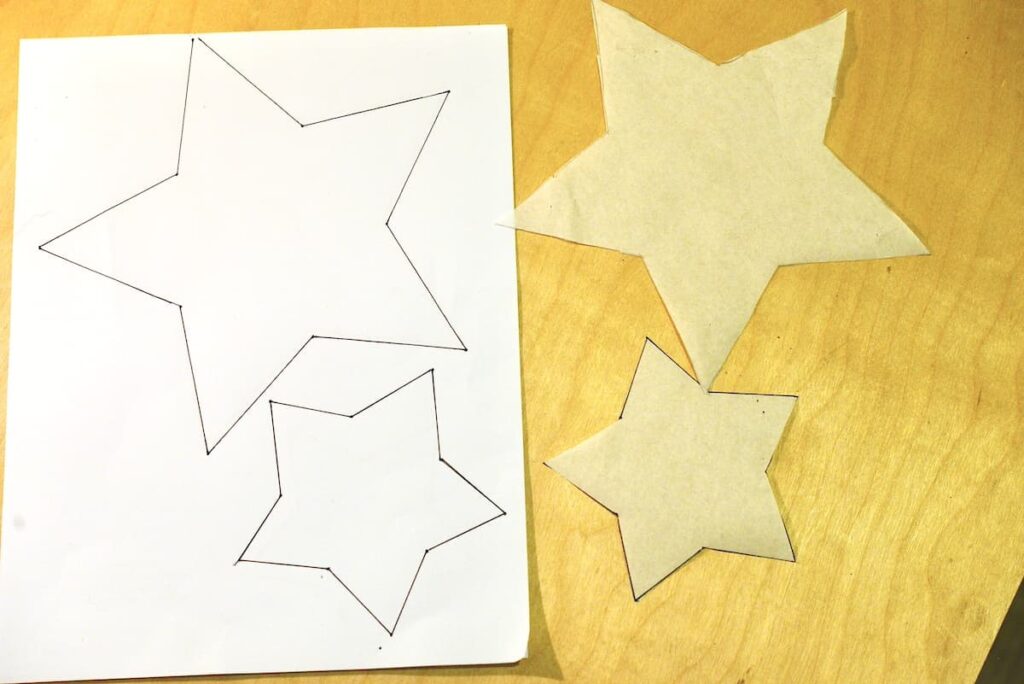
How Many Stars Do You Get From This Free Pattern?
If your strip of fabric is 42″ wide and 10″ long, you can easily make 2 larger stars and 2 smaller stars. The finished star size of the larger one is about 8 inches, and the smaller one is about 5 inches in diameter.
How To Make:
1. Get your FREE printable pattern (optional)
To make things easier for you, I have created a free star pattern for you to get and print. You can use that or perfectly come up with your own design.
2. Cut out the star shapes
The first step is to cut out star shapes, either with my free pattern or your own design. You can use 2 different sizes or more as you like.
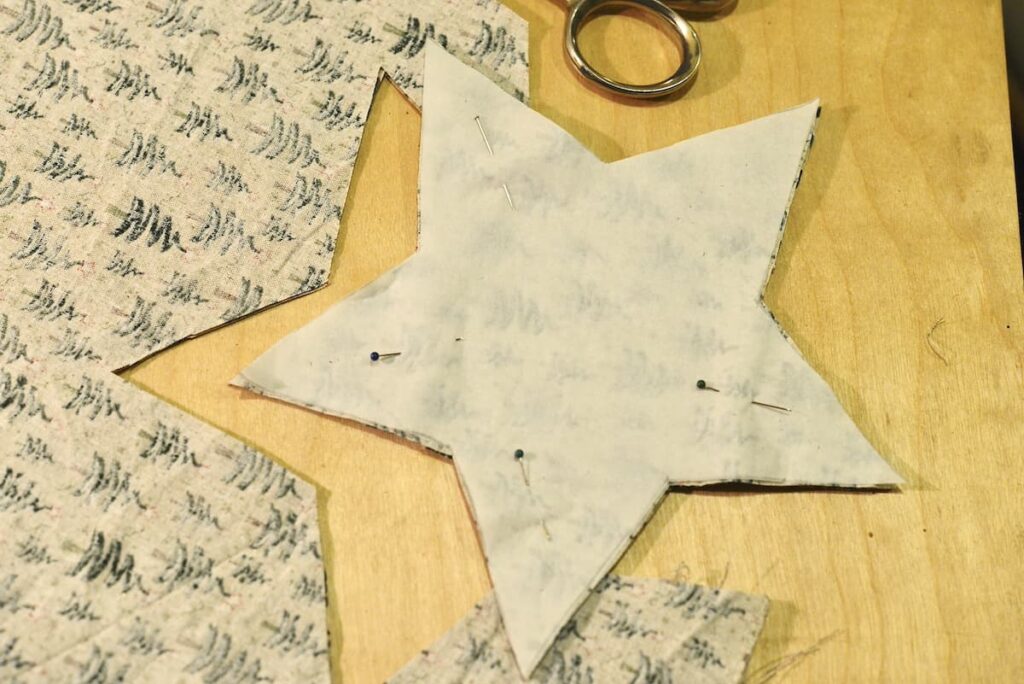
3. Cut the fabric stars
Fold your fabric with the right side facing. I always like to pin the pattern pieces to my fabric to prevent any shifting. I have included a ¼” seam allowance in my pattern. Cut as many smaller stars and larger ones as you like and as you have fabric for.
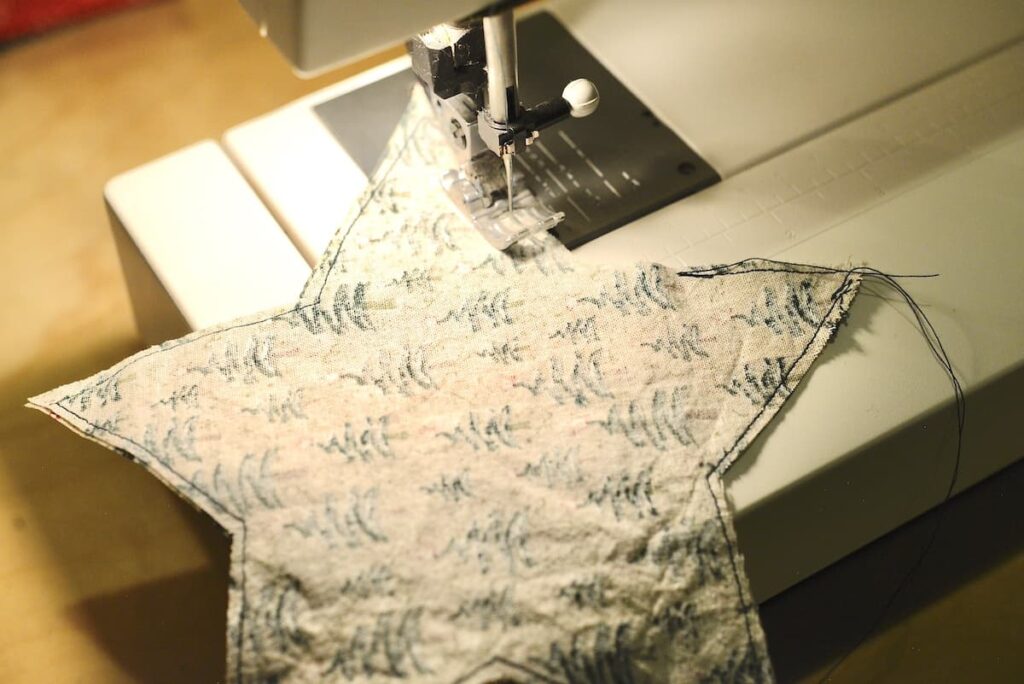
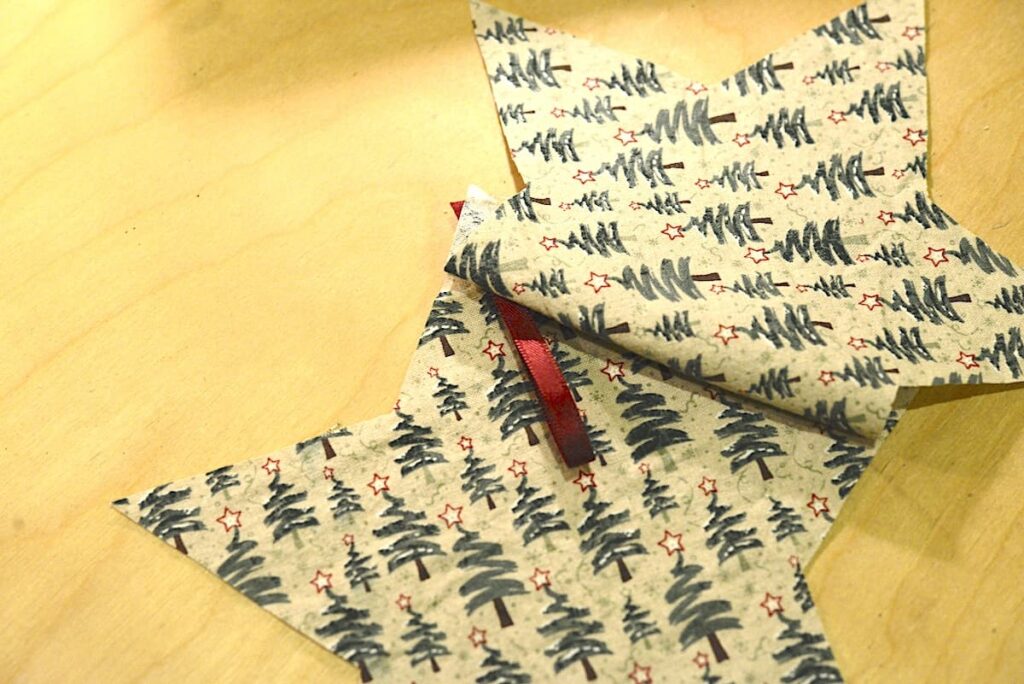
4. Sew the fabric stars
For the next step, with the wrong sides out, sew two pieces of fabric together. I like to use a fairly tight stitch on my sewing machine, and I like to sew very close to the raw edges. NOTE: Be sure to leave a 1½ ” to 2″ opening. To make the star shape come out better, I like to cut away the star tips and excess fabric around the “turns”.
Optional: Include a hanging loop
If you would like to add a hanger to your star ornament, cut about 4″-5″ of ribbon. Fold it in half. Place it in the middle of one of the star tips. If your fabric has a distinct pattern, make sure to place the ribbon so that the star is hanging upright pattern-wise.
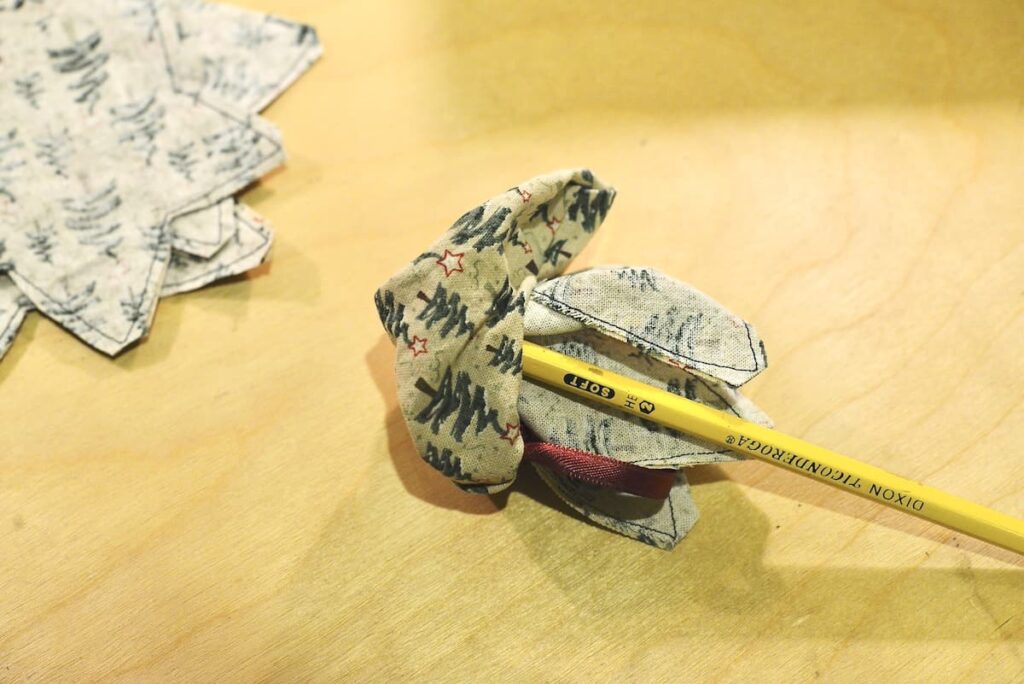
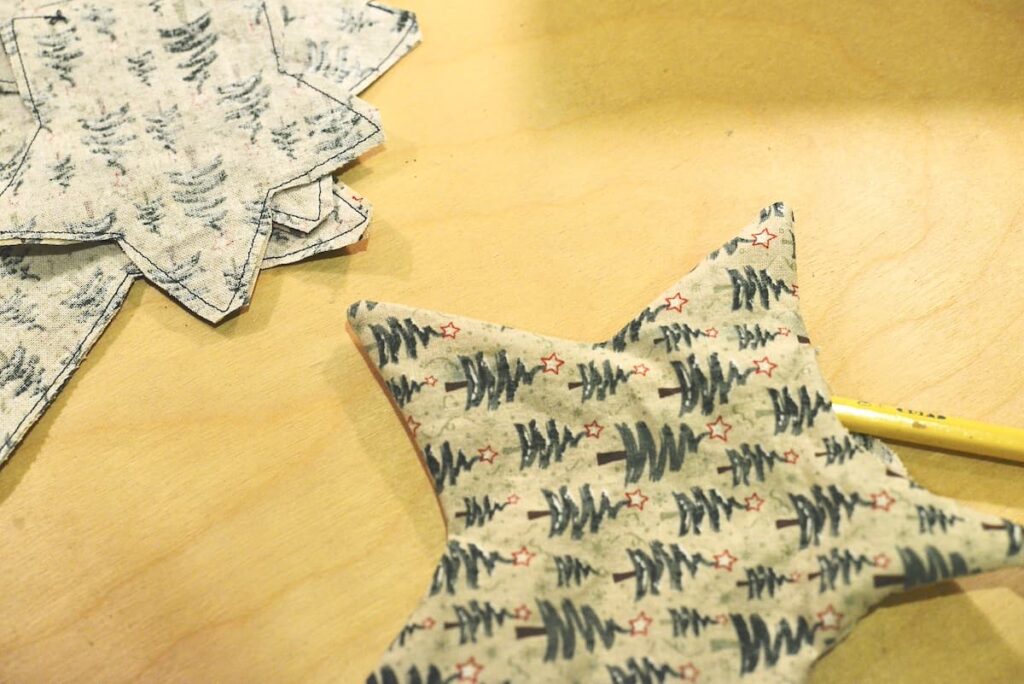
5. Turn the stars inside out
Carefully, turn the fabric stars from the wrong side to the right side. You can use a pencil to push out the star points.
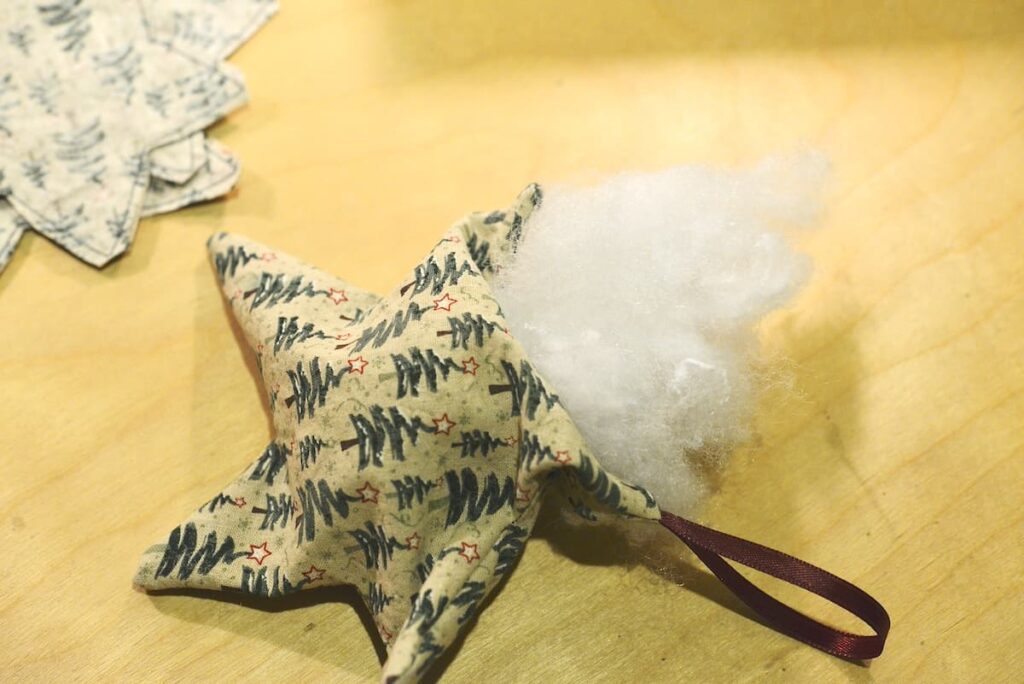
6. Fill the fabric stars
Through the opening, carefully push some batting into your Scandinavian fabric stars. Start with a small amount and use a pencil to push it into the points of the star. Look at your star and decide if you’d like to add more batting or remove some.
7. Close the star ornaments
The last step is to sew the opening shut. This might be a bit fiddly but do your best to fold the fabric in. Remember that we were only using a very small seam allowance. Finger press the seams and use pins to pin the opening shut. You can either use a straight stitch on your sewing machine to sew very close to the edge or sew the stars shut by hand.

Sewing Tips:
- I like to use a pretty tight stitch to make sure that nothing comes undone
- You can also use fabric glue to close the opening
- You might like to use a large safety pin and attach it to one of the tips to make it easier to turn the stars inside out
- Fat quarters are a great choice of fabric, too
- You can use different fabrics for the front and back sides of the stars
- If you’d like to make a larger star, you can use spray starch to make them hold their shape better
- I don’t recommend using a rotary cutter for cutting out the star shapes since scissors are a bit more precise
- I recommend you make one first piece to see how it turns out before you begin making more stars (you can then make any necessary adjustments)
How to use
Here are some ways you can use your fabric star ornaments:
- They make beautiful ornaments for your Christmas tree
- You can add it to a Christmas card (just use a little less batting)
- Use it as decor around the house during the holiday season
- Smaller stars are a great way to adorn and personalize Christmas gifts
- You can string them along to make Christmas garlands
More Easy Sewing Projects You Might Enjoy:
- Linen Bread Bag
- Round Fabric Basket
- Easy Potholders
- Half Apron
- Cross-Back Apron
- DIY Sleep Mask
- Reusable Bowl Covers
The star pattern link goes to something completely different from both here and Facebook
Thank you for letting me know. It should work now – let me know if it still doesn’t work ~ Anja