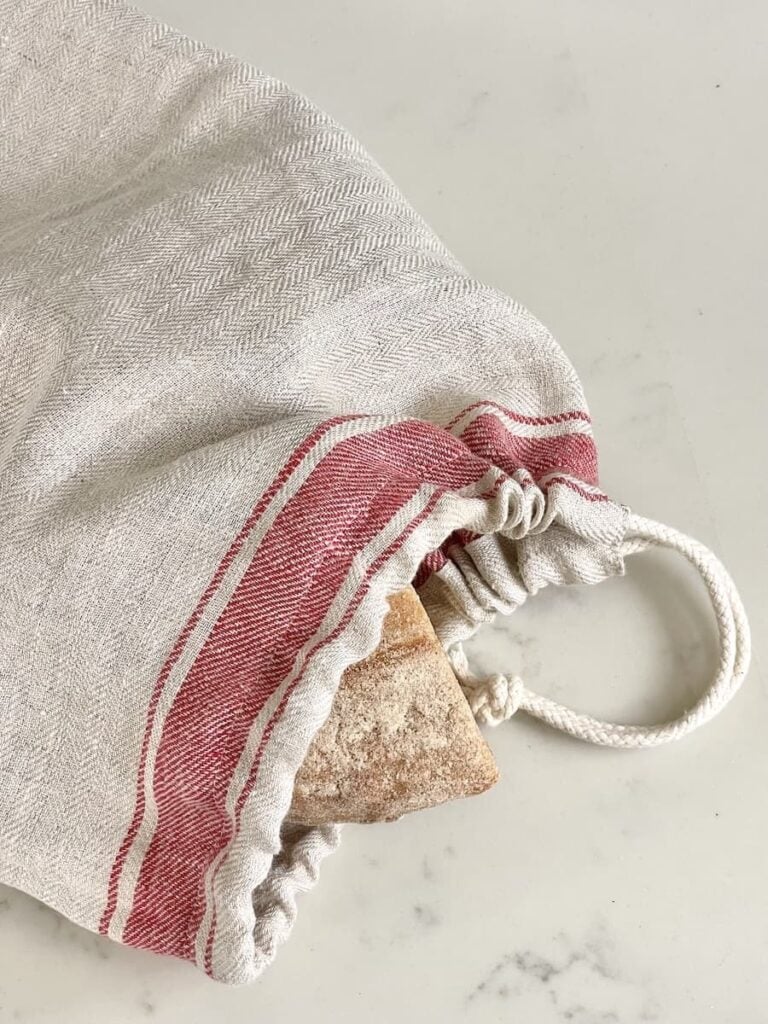
How to Make a Bread Bag: Easy DIY Linen Tutorial
If you’ve ever gone to the effort of milling your own grain and creating a sourdough starter from scratch, the last thing you want is to watch your beautiful, crusty bread go moldy in a plastic bag – or rock-hard on the counter.
After years of baking in my own kitchen, I have been using one thing that keeps my bread the freshest: breathable, 100% linen.
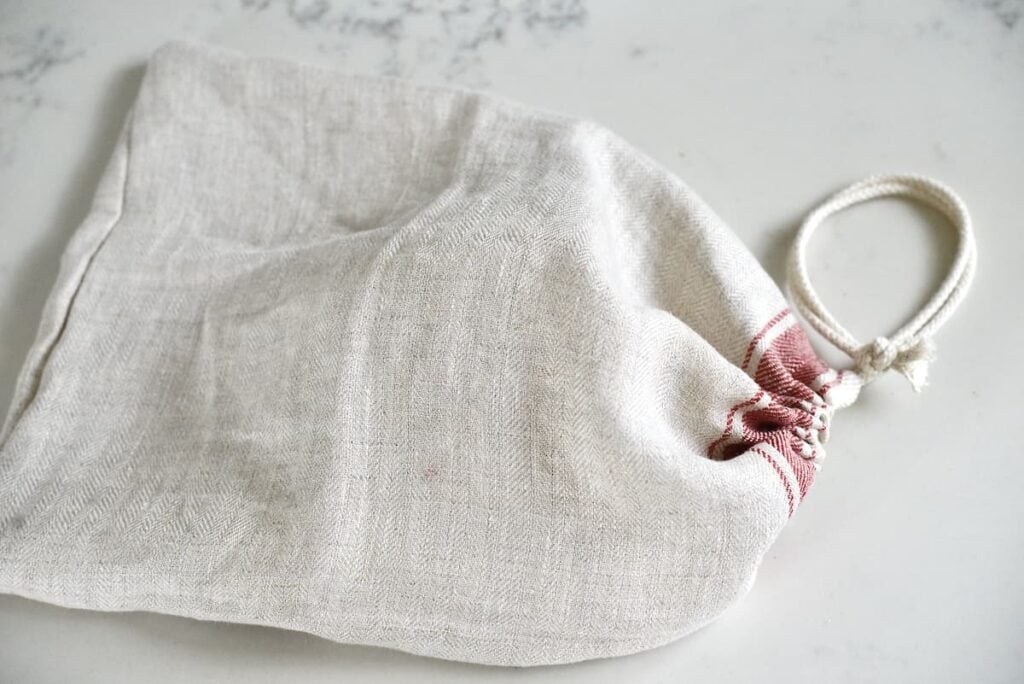
In this tutorial, I’m sharing my easy pattern for a very practical linen bread bag – the same one I use every day to keep my loaves fresh, breathable, and mold-free.

This post contains affiliate links, which means I make a small commission at no extra cost to you. You can read my full disclosure.
Why Linen is the Gold Standard for Sourdough?
If you’ve ever pulled a beautiful, crusty sourdough loaf out of a plastic bag only to find the crust has gone soft and ‘rubbery,’ you know exactly why I’ve switched entirely to linen. I believe the way we store our bread should be as natural as the ingredients we use.
- Durability for Daily Use: I mill my own flour and bake constantly, so my bags see a lot of action. Genuine linen is very sturdy; it actually gets softer and better with every machine wash, lasting for years rather than ending up in a landfill like single-use bags.
- Breathability vs. Mold: Unlike plastic, which traps moisture and creates a breeding ground for mold, 100% flax linen is naturally breathable. It wicks excess moisture away from the crust while still retaining enough internal humidity to keep the crumb soft.
- The Sourdough Secret: Because sourdough has a lower pH, it already resists mold better than commercial bread. Storing it in a linen bag enhances this natural preservation.
- Space-Saving Heritage: While a traditional wooden bread box is wonderful, these bags are far more versatile. In my own kitchen, I often store my bagged sourdough right inside the (turned-off!) oven—it’s the perfect draft-free environment.
Where to Source the Best Linen Fabric for Bread Bags
Here are some ideas on where to source linen fabric for your reusable bread bag:
- The IKEA Hack: This is still my favorite budget-friendly tip! Look for 100% linen tea towels like the VARDAGEN series (though check labels as styles change). They are often the perfect width for a standard loaf, meaning two of the four sides are already hemmed for you!
- Upcycled Linens: Thrift stores are a great place to find vintage linen tablecloths and oversized napkins. Just perform a quick “burn test” if you aren’t sure of the fiber – natural linen will smell like burning grass and leave a fine grey ash, while synthetics will melt.
- Linen by the Yard: If you want a specific color or a heavier weight for large boules, buying by the yard is best. Look for OEKO-TEX Standard 100 certified linen; this ensures the fabric has been tested for harmful substances, which is my personal preference for anything touching my family’s food.
Buyer’s Checklist:
- 100% Flax Linen (Avoid “Linen-Look” or Polyester blends)
- Medium Weight (5–7 oz is ideal)
- Natural/Undyed or Oeko-Tex certified (for food safety)
What You’ll Need:
- Fabric, ideally 24″ x 32″ or bigger
- Thread
- Cord for the drawstring closure, 33″ long (see below how to make your own)
- Scissors
- Measuring tape
- Pins
- Safety pin
- Ruler (optional)
- Fabric marker or pencil
- Sewing machine (even though you can absolutely make this bread bag by hand)

How to sew the linen bread bag
These instructions are for a linen bread bag measuring 11″ x 15″. You can use this tutorial to make your own size depending on the sizes of breads you bake or your preferences.
This is a summary of the steps. For the complete instructions, please scroll down to the how-to card at the bottom of the post.
1. Cut & Prep:
Fold your fabric to create two layers and mark your 23″ x 31″ rectangle. To save time, try to use a pre-finished edge from a tea towel!
2. Stitch the Sides:
Sew the bottom and the long side, but remember to leave the top 2.5 inches open—this is crucial for your drawstring.
3. Secure the Opening:
Press those top flaps open and stitch them down so your drawstring can move freely without snagging.
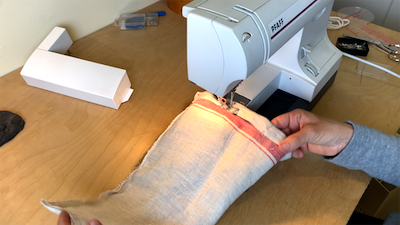
4. Create the Tunnel:
Fold the top edge over and sew a “tunnel” (casing) all the way around the mouth of the bag.

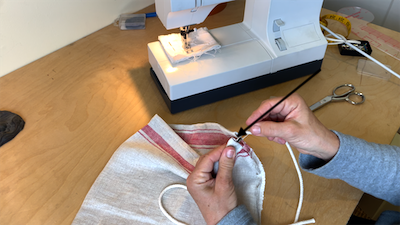
5. Finish with a Cord:
Thread your favorite twill tape, cotton cord, or a hand-crocheted string through the tunnel and tie a knot.
Watch the Video Tutorial:
How to Use and Care for Your Linen Bread Bag
Now that you’ve finished your project, it’s time to use it! Whether you are storing a loaf of my no-knead sourdough loaf or a high-quality boule from the local bakery, here is how to get the most out of your linen bag:
- Countertop Storage: For very fresh bread with a hard crust, simply slip it into the bag and keep it on your counter. The linen allows just enough air to circulate so the crust stays crisp while the inside stays soft.
- The “Heritage” Oven Trick: In my kitchen, I often place my bagged bread inside the (turned-off!) oven. It’s a great, draft-free environment that keeps the temperature consistent.
- Caution: Just make sure to leave a little note on the oven dial for your family so no one accidentally preheats the oven with your bread inside!
- Easy Maintenance: Every few days, turn the bag inside out and shake out the crumbs. When it’s time for a deeper clean, I recommend washing in lukewarm water with a mild, scent-free detergent. Air drying is best to prevent any shrinkage, although a low-heat tumble works too.
- Refreshing Your Loaf: If your bread does get a little too firm after a few days, don’t worry. Just sprinkle the crust with a tiny bit of water and pop it in a 350°F oven for 5–10 minutes to bring that “just-baked” crust back.
Want more tips? Check out my full guide on My Favorite Ways to Keep Bread Fresh for a deeper dive.
Other easy DIY projects you might like
How to Make a Pretty Basket From Linen
Frequently Asked Questions:
While you can use any fabric you like, I recommend at least using 100% cotton fabric. However, the best choice is a high-quality 100% flax (European flax is best).
The best size is the one that works best for you! I recommend starting with a bag that is 11″ x 15″. If you find that you need a bigger or smaller size, you can easily customize this tutorial.
Yes! This is a quick project that you can easily make in one afternoon. However, I recommend that you are comfortable using a sewing machine.
Theoretically, you can sew this bread bag by hand. It might just take longer. But I do recommend using a sewing machine.

DIY Linen Bread Bag
Ingredients
- 1 piece linen fabric 24" x 32" (or a linen tea towel)
- 1 spool thread
- 1 piece cord for the drawstring closure 33″ long (see below how to make your own)
- Scissors
- Measuring tape
- Pins
- Safety pin
- Ruler (optional)
- Fabric marker or pencil
- Sewing machine
Instructions
- Cut the fabric: If you’re using a tea towel, I recommend folding it in half (the short way, not the long way). If you are using fabric by the yard, I also recommend folding it so that you have two layers. Mark a rectangle of 23″ x 31″. If you’re using a kitchen towel you might like to use one of the finished sides so you don’t have to secure it with a zig-zag stitch or serger.
- Keep the cut sides from fraying: Using a serger or zig-zag stitch, finish all cut sides.
- Hem one short side (if using fabric by the yard): If you’re using fabric by the yard, fold over the fabric once or twice and sew the hem.
- Sew the 2 open sides together: You might like to pin your folded fabric in place to prevent shifting. Then, using a .5″ seam allowance, sew one short side and the long side together with a straight stitch. NOTE: only sew the long side to about 2.5″ from the top. Leave the rest open.
- Press the seam: Either use your fingers or a hot iron, press the seam on the long side open.
- Secure this seam: Sew a few times back and forth perpendicular to the seam to secure it.
- Sew the remaining 2.5″ inches: Use a straight stitch to sew the two open pieces in place.
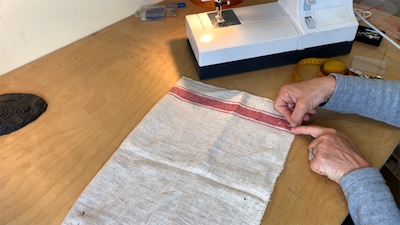
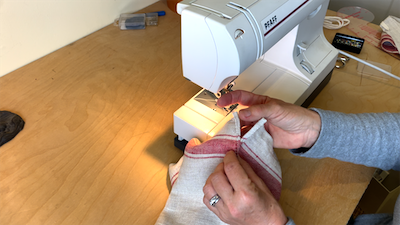
- Pin the tunnel for the drawstring: Make sure you still have the right sides facing in fold the top of the bread bag over about 1.25″ to create the tunnel. I recommend pinning it in place
- Sew the tunnel: I recommend using the free arm of your sewing machine for the next step: sew the tunnel in place with a straight stitch.
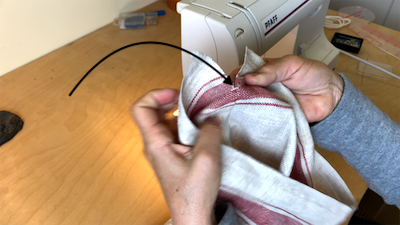
- Guide the drawstring through the tunnel: Put a safety pin through one end of your cord and move it all the way through the tunnel. Secure the ends with a knot.How to make your own drawstring: you can use some thick yarn and crochet a long string.
Notes
- 100% flax linen is the best fabric for this bread bag but you can also use 100% cotton
THANK YOU! You just made a daunting task, look quite easy.
Yay, that’s great to hear ~ Anja
Unfortunately this doesn’t work out the measurements don’t make sense or make what is posted. Please adjust this to make sense so no one else gets part way through this and has to restart with a different pattern.
I am sorry this tutorial doesn’t make sense to you. I will see what I can do but sometimes it is very challenging to describe in words how to do it ~ Anja
Do you think that linen clothing fabric could be used? It is yellow with printing and I’m trying to repurpose fabric. Is it just important to be 100 % linen
You can use cotton fabric, too, and linen from clothing is perfect ~ Anja
How is this $8? I am looking for fabric and it cost $29 for a yard.
I used a tea towel from Ikea for around $5 ~ Anja
This pattern makes no sense. How does 23×31 make an 11×15 linen bread bag? I was excited to learn to make these but this has proven difficult
You fold the piece of fabric in half and I have added the seam allowance ~ Anja
Hi! I am also confused about this – I understand that 23 inches with seam allowance will become 11 inch width, but what about the 31 inch length? It doesn’t look like that length is folded in half at any point, making the bag remain at 30 inches (after seam allowance).
Thanks in advance. 🙂
I may sometimes be a bit math-challenged. Ultimately, it’s more important that you find the size that works best for your needs and breads ~ Anja
Anja Super idea….thank you for sharing. ENJOY your videos.
Yay! I am so glad to hear that and thank you ~ Anja
I love this idea!! This would make an adorable addition to my sourdough. May be making these for Mother’s Day this year!
Oh, these would be a great Mother’s Day gift and I am glad you like the bread bag ~ Anja
This is exactly what I have been needing. I just recently joined the sourdough starter world but don’t love storing it in plastic bags…
Great! I am so glad you like this bread bag ~ Anja
This is so smart! ‘ll have to get busy making these as I usually bake 3 loafs a week. Thanks for sharing!
Oh, nice, then this bread bag would be perfect for you!
This is so cute! I have a flax linen bag from etsy but making my own would have been soooo much cheaper! Thank you for the tutorial!
I am so glad you like these DIY bread bags – and yes, they are cheaper than buying ~ Anja